
Round balloon
White PVA craft glue
Water
Small tray or mixing bowl
Measuring cup
Paintbrush or foam brush
Bowl to support the balloon
Scissors
Needle or pin
Orange poster paint or acrylic craft paint
Black poster paint or acrylic craft paint
Small detail brush
Pencil, optional
Clear water-based craft sealer, optional
Individually wrapped Halloween sweets
Protected work surface
Get more details about this project
What you need
Old newspapers, white glue, brush, tray, balloon.
Instructions
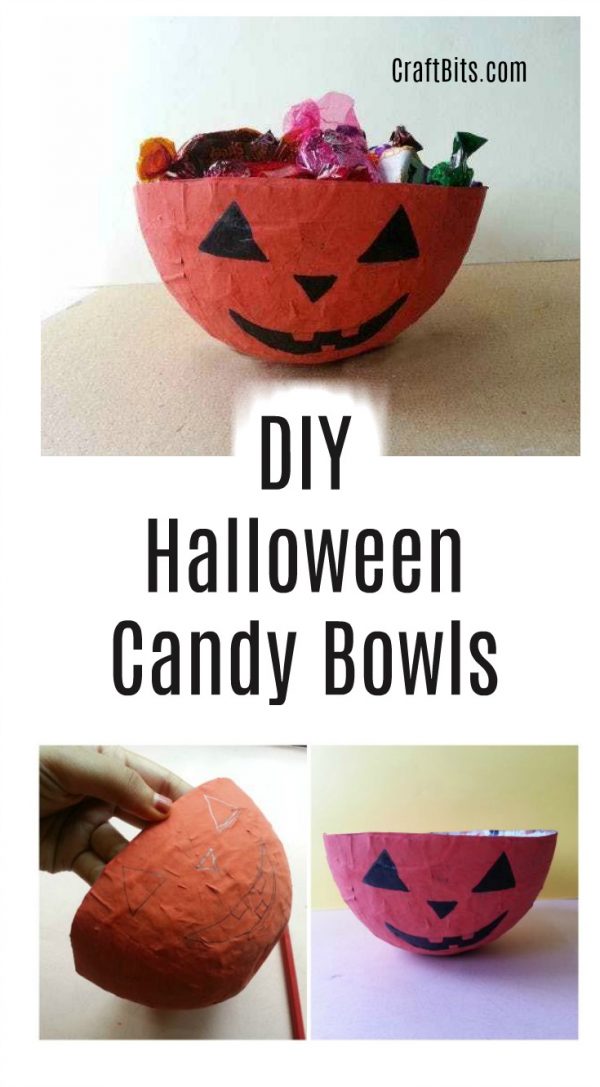
There is something especially satisfying about turning old newspaper into a useful Halloween decoration. With an inflated balloon acting as the mould, layers of paper and glue can be transformed into a lightweight pumpkin-shaped bowl.
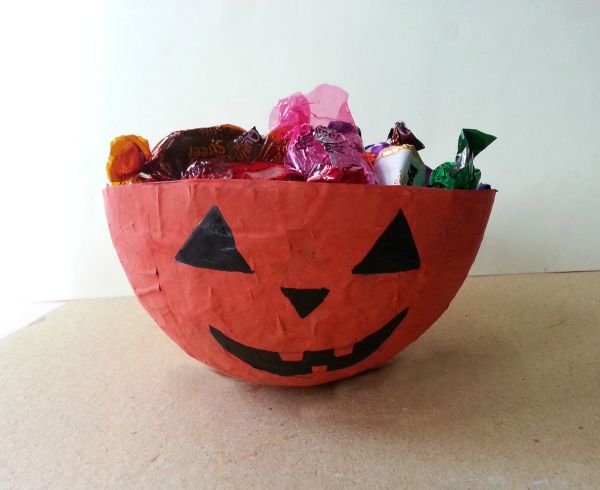
This is a wonderfully inexpensive craft for Halloween parties, classroom activities, and family crafting sessions. The original project uses a mixture of equal parts white glue and water rather than undiluted Mod Podge. Once painted orange and finished with a black jack-o’-lantern face, the humble newspaper shell becomes a cheerful Halloween treat bowl.
Because paper, glue, and craft paint are not food-safe, fill the finished bowl only with individually wrapped sweets or lightweight non-food treats.
Instructions
Step 1: Prepare the newspaper
Tear the old newspaper into pieces approximately 2–3 inches wide.
Torn edges overlap and blend more easily than neatly cut edges. Prepare plenty of pieces before mixing the glue so you can continue working without stopping.
Smaller pieces will be easier to smooth around the curved balloon.
Step 2: Mix the glue
Pour equal amounts of white PVA craft glue and water into a shallow tray or bowl.
For example, combine half a cup of glue with half a cup of water.
Stir thoroughly until the mixture has an even consistency. It should be thin enough to brush over the newspaper but still feel sticky.
Step 3: Inflate the balloon
Blow up a round balloon until it is approximately the size you want the finished candy bowl to be.
Tie the balloon securely. Avoid overinflating it, as an extremely tight balloon is more likely to burst while you are working.
Place the tied end of the balloon inside a bowl so the rounded lower half faces upward. The supporting bowl will prevent the balloon from rolling around.
Step 4: Apply the first newspaper layer
Brush the glue mixture over one piece of newspaper, or briefly dip the paper into the mixture and remove the excess with your fingers.
Smooth the paper onto the exposed half of the balloon.
Continue overlapping pieces until approximately half of the balloon is evenly covered. Smooth down raised edges and large air bubbles as you work.
The edge does not need to be perfectly straight because it can be trimmed after drying.
Step 5: Build up the bowl
Apply another layer of newspaper over the first, positioning the pieces in different directions to strengthen the shell.
Add a third layer for a sturdier candy bowl. Make sure the base and the area around the future rim receive even coverage.
Avoid making the paper excessively wet. Too much glue mixture can increase drying time and cause weak, soggy areas.
Step 6: Dry the paper mache
Leave the covered balloon in a dry, well-ventilated place for approximately 24 hours.
Drying can take longer in humid weather. The shell must feel completely hard and dry before the balloon is removed.
If any areas still feel cool, soft, or flexible, allow the bowl to dry for another day.
Step 7: Separate the balloon from the shell
Before popping the balloon, gently press around the exposed surface to release it from the dried paper-mâché shell.
Work slowly around the edge so the balloon separates without pulling the paper inward.
Ask an adult to carefully pierce the balloon near its tied end with a needle or pin. Let the air escape gradually rather than allowing the balloon to burst suddenly.
Remove the deflated balloon from the paper shell.
Step 8: Trim the rim
Use scissors to trim away uneven or fragile sections around the top of the bowl.
You can leave the rim slightly irregular for a rustic handmade finish or mark a guideline with a pencil before trimming it evenly.
If the rim feels thin, add another strip of glue-covered newspaper around it and allow it to dry completely.
Step 9: Flatten the base slightly
The balloon creates a naturally rounded bowl, so the base may wobble.
While the dried shell is still slightly flexible, place it upright on a protected flat surface and press down very gently. This can create a small flattened area without changing the balloon-mould method.
Do not press hard enough to crack or collapse the shell. If the bowl remains unstable, display it on a small concealed cardboard ring or shallow stand.
Step 10: Paint the pumpkin
Apply orange poster paint or acrylic craft paint over the outside of the bowl.
Allow the first coat to dry, then add another coat if newspaper print is still visible. Paint the inside as well if you would like a more finished appearance.
Let all painted surfaces dry completely before adding the face.
Step 11: Add the jack-o’-lantern face
Lightly sketch two triangular eyes, a small triangular nose, and a curved pumpkin smile onto the front of the bowl.
Use black paint and a small detail brush to fill in the shapes. Add a few square teeth along the smile to recreate the original friendly jack-o’-lantern design.
Allow the black paint to dry completely.
Step 12: Seal the bowl if desired
Apply a water-based clear craft sealer if you would like to give the painted bowl additional protection.
Follow the product directions and allow the sealer to dry and air thoroughly before using the bowl.
Sealing the surface does not make the bowl food-safe or waterproof.
Step 13: Fill and display the candy bowl
Fill the completed pumpkin bowl with individually wrapped Halloween sweets, packaged snacks, small toys, or party favours.
Do not place unwrapped food directly inside the bowl. Keep it away from moisture, open flames, candles, and heavy objects.
After Halloween, empty the bowl and store it in a dry location so the paper-mâché shell can be used again next year.

Step-1: You can use scrap paper but it’s better to use old newspaper. Tear the newspaper into small pieces, around 2-3 inch pieces. On a small tray or bowl mix 50:50 amount of white glue and water. Mix the glue-water really well.
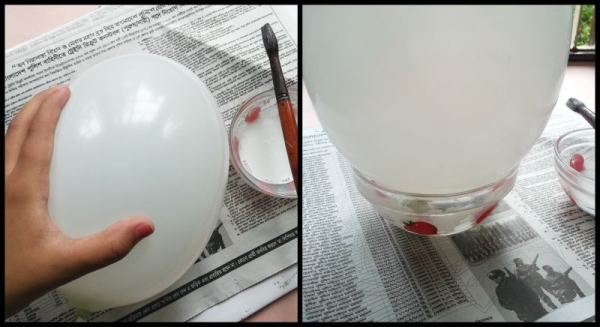
Step-2: Blow up a round balloon into the size required for the bowl. Place the balloon on a bowl so that it stays still.

Step-3: Apply glue on the teared papers and glue them on the balloon. Cover half of the balloon with the paper evenly. Add 2-3 layers of paper so that the bowl turns our sturdy. Keep the balloon in a dry place for the next 24 hours and allow the glue to dry completely.
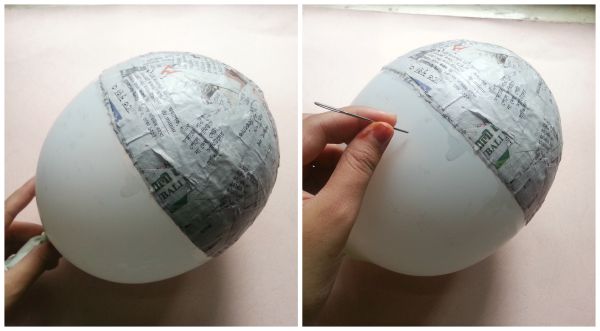
Step-4: It will a day for the bowl to dry completely. Before popping tha balloon release the paper mache from the balloon by pushing the balloon and releasing it from the paper. Use a needle to pop the balloon carefully.
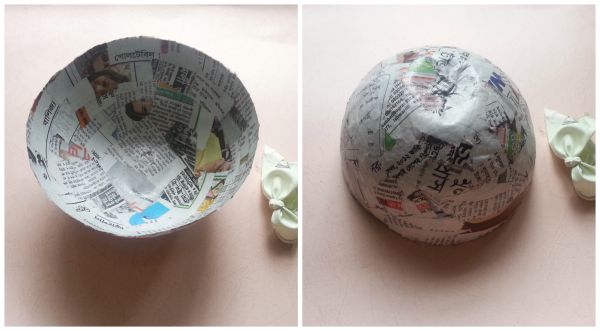
Step-5: This is how the bowl will look after popping the balloon.
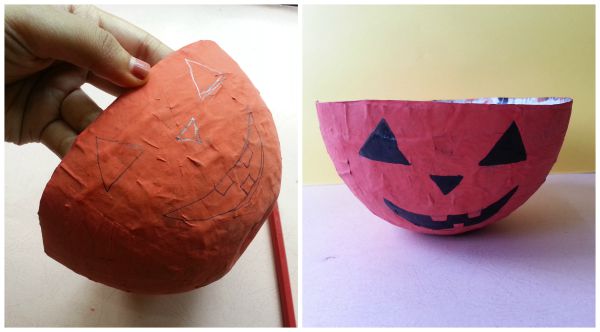
Step-6: Now simply paint the bowl as you like. I used orange poster color to paint the bowl and black poster color to draw a pumpkin face on it. You can add any design you want. Enjoy!



cute
how did you make the bottom of it flat?