
Bunched newspaper supports the wire and creates the hat’s heavy brow, nose and mouth. Cotton fabric soaked in diluted PVA glue is then wrapped and folded over the structure.
Once completely dry, the hat is painted brown and dry-brushed with black and grey paint to emphasise its expressive facial folds.
This version is intended as a freestanding party prop or Halloween decoration rather than a wearable costume hat.
Get more details about this project
What you need
Chicken wire or flexible garden wire mesh
Approximately 1 yard of inexpensive cotton fabric
Newspaper
White wood glue, PVA glue or strong craft glue
Water
Large mixing bowl or bucket
Pliers
Wire cutters
Protective work gloves
Safety glasses
Strong tape, optional
Drop cloth, plastic sheet or newspaper
Brown acrylic or house paint
Black acrylic paint
Grey acrylic paint
Large paintbrush
Small paintbrush
Dry-brushing brush or old stiff paintbrush
Cardboard base, optional
Flameless candle and wizard-themed accessories, optional
Instructions
The Sorting Hat is one of the most recognisable objects from the Harry Potter stories, and its twisted shape makes it ideal for a handmade Halloween prop.
You do not need advanced sculpting skills to make this version. Flexible chicken wire provides the basic structure, while newspaper and glue-soaked fabric create the distinctive face and deeply wrinkled surface.
The folds do not need to be neat or symmetrical. Creases, sagging fabric and uneven edges help the finished hat look old, expressive and magical.
Instructions
Step 1: Prepare the work area
Cover the table and floor with a drop cloth, plastic sheet or several layers of newspaper.
This project becomes messy once the glue-soaked fabric is added, so choose a work area where the hat can remain undisturbed for up to two days.
Keep children and pets away from loose chicken wire and sharp tools.
Step 2: Cut the chicken wire
Put on protective gloves and safety glasses.
Cut a large section of chicken wire using wire cutters. The piece must be large enough to form a tall cone and part of the brim.
Fold or crimp every cut wire end inward. Cover stubborn sharp ends with strong tape if necessary.
Step 3: Shape the hat cone
Roll the chicken wire into a broad cone.
Overlap the wire edges and twist adjoining mesh sections together with pliers. Continue shaping until the cone can stand upright.
Make the lower section wide and gradually narrow it toward the top.
Step 4: Bend the pointed tip
Manipulate the upper cone into the Sorting Hat’s recognisable crooked point.
Bend the top forward and slightly to one side. Compress the wire at the bend so the point remains in position.
The tip should droop rather than stand like a straight witch’s hat.
Step 5: Form the brim
Spread the lower wire outward to form an irregular brim.
Add a separate strip of chicken wire around the bottom if the original section is not wide enough. Twist the sections together securely.
Shape one side of the brim higher and allow other sections to sag. The uneven edge will look more natural once covered with fabric.
Step 6: Stabilise the structure
Bunch sheets of newspaper loosely and place them inside the wire framework.
Use enough newspaper to support the cone and bent tip without packing it completely solid.
The original project was designed as a display prop, so this internal newspaper remains inside the finished hat.
Step 7: Build the brow
Roll or bunch several smaller pieces of newspaper.
Position two thick forms across the front of the hat to create heavy, slanting eyebrows. Tuck them beneath the chicken wire or hold them temporarily with tape.
Angle the brow downward toward the centre to give the hat a stern expression.
Step 8: Add the nose
Create a long narrow newspaper form and position it vertically beneath the centre of the brows.
Build the upper section slightly wider and taper it toward the bottom.
Check the face from several feet away. The features will need to be exaggerated because the fabric softens their outlines.
Step 9: Shape the mouth
Roll a long piece of newspaper into a thick rope-like form.
Curve it across the lower front to create the upper edge of the mouth. Add another form beneath it if you want a deeper opening.
Leave an uneven gap between the folds so the mouth appears crooked and expressive.
Step 10: Test the face
Stand the hat upright and view it from the front and both sides.
Adjust the newspaper until the brows, nose and mouth remain visible. Secure loose pieces beneath the wire or with small amounts of tape.
Do not worry about fine details at this stage. The fabric folds will provide the final expression.
Step 11: Prepare the glue mixture
Pour white wood glue or PVA glue into a large bowl.
Add a small amount of water and stir. The mixture should be thin enough to soak into the fabric but remain much thicker than water.
Begin with only a little water. Additional water can be added gradually if necessary.
Step 12: Prepare the cotton fabric
Cut or tear the cotton cloth into several manageable pieces.
Larger pieces are useful for covering the cone and brim, while narrower strips can reinforce the facial features and pointed tip.
Rough torn edges will blend naturally into the wrinkled surface.
Step 13: Soak the fabric
Dip one fabric piece into the diluted glue.
Work the glue through the cloth and squeeze out the excess. The fabric should be completely coated but not dripping heavily.
Wear protective gloves if you do not want glue on your hands.
Step 14: Cover the cone
Drape the first glue-soaked fabric pieces over the chicken-wire cone.
Press the fabric against the wire and newspaper, but do not smooth it completely. Pinch, pleat and fold it to create natural wrinkles.
Overlap the fabric pieces so no chicken wire remains exposed.
Step 15: Sculpt the face
Press smaller glue-soaked fabric pieces over the newspaper brows, nose and mouth.
Push the cloth into the spaces around each feature. Form deep creases beneath the brows and along both sides of the nose.
Create the mouth with a strong horizontal fold. Tuck darker recesses beneath the upper edge so the expression can be enhanced later with paint.
Step 16: Cover the pointed tip
Wrap fabric around the bent top of the hat.
Add folds along the inside of the bend and allow several creases to travel down the cone.
Make sure the tip remains supported while the glue dries.
Step 17: Cover the brim
Lay glue-soaked fabric over the wire brim.
Wrap the fabric around the outer wire edge so all sharp ends are enclosed. Add a second layer where necessary.
Fold and wrinkle the cloth rather than stretching it flat. Let selected areas of the brim droop or curl upward.
Step 18: Refine the shape
While the fabric is still wet, step back and inspect the hat.
Strengthen any facial feature that has become too flat by tucking additional newspaper or folded fabric beneath it.
You have time to adjust the folds before the glue begins to set, so work carefully rather than rushing.
Step 19: Allow the hat to dry
Leave the finished structure in a warm, well-ventilated area for one to two days.
Turn it occasionally if the underside of the brim remains damp. Do not begin painting until the entire hat feels hard and completely dry.
Thick fabric folds may take longer than the exposed surfaces.
Step 20: Apply the brown base colour
Paint the entire hat with brown paint.
Work the brush into the deep folds, beneath the brim and around the facial features. Use a mixture of reddish brown and dark walnut tones if you want a more aged surface.
Allow the base coat to dry completely.
Step 21: Shade the face
Place a small amount of black or dark grey paint on a dry, stiff brush.
Wipe most of the paint onto scrap paper, then brush lightly across and inside the deepest creases.
Concentrate the shadows beneath the brows, along the nose, inside the mouth, around the bent tip and beneath the brim.
Step 22: Add highlights
Mix a small amount of lighter brown or muted tan paint.
Dry-brush it across the highest wrinkles, the bridge of the nose, the top edge of the mouth and selected sections of the brim.
Keep the highlights subtle so the hat retains its worn appearance.
Step 23: Display the Sorting Hat
Place the completed hat on a sturdy table, stool or cardboard base.
Surround it with antique books, parchment, a feather quill and flameless candles for a wizard-themed display.
For a talking Sorting Hat, hide a small wireless speaker or baby monitor behind or inside the prop. Keep electronic equipment dry and accessible.
Safety and Care
Chicken wire has sharp cut edges. Wear gloves and safety glasses while cutting and shaping it, and fold every wire end safely inside the structure.
Adults should complete all wire-cutting and plier work.
This newspaper-filled version is a decorative display prop. Do not place it on someone’s head or use it as wearable headgear.
Keep the hat away from real candles, fireplaces, heaters and moisture. Use only flameless lighting around the paper and fabric structure.
Dust the finished hat gently with a soft dry brush. Store it in a large box without crushing the pointed tip or brim.
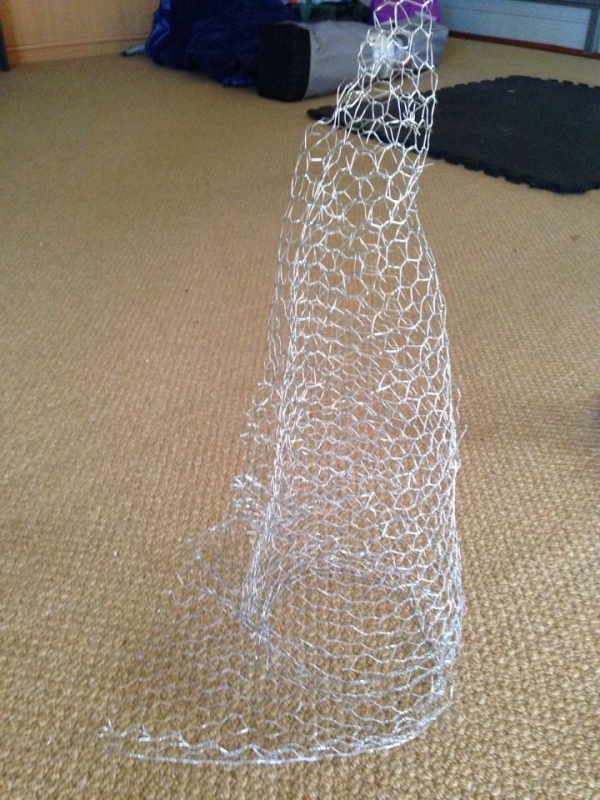
Start creating your hat by manipulating chicken wire or garden wire into a basic hat form. We didn’t want to wear our hat so we stuffed the wire with scraps of bunched up newspaper for stability.
Once you are happy with the basic form it is time to get messy. Soak your fabric into a bowl of white craft glue with a small amount of water mixed into the glue.
Place a drop cloth or lots of paper under your work area as it will get very messy. You want to add just enough water so the glue is thinned out and not like water. Dip your fabric into the glue. Squeeze out any excess glue and water, then wrap it around the hat form.
We created a face using some rolled up newspaper lumps which we tucked in as we went along. You have plenty of time to work the shape so don’t rush. Fold in the fabric make it look natural and authentic.
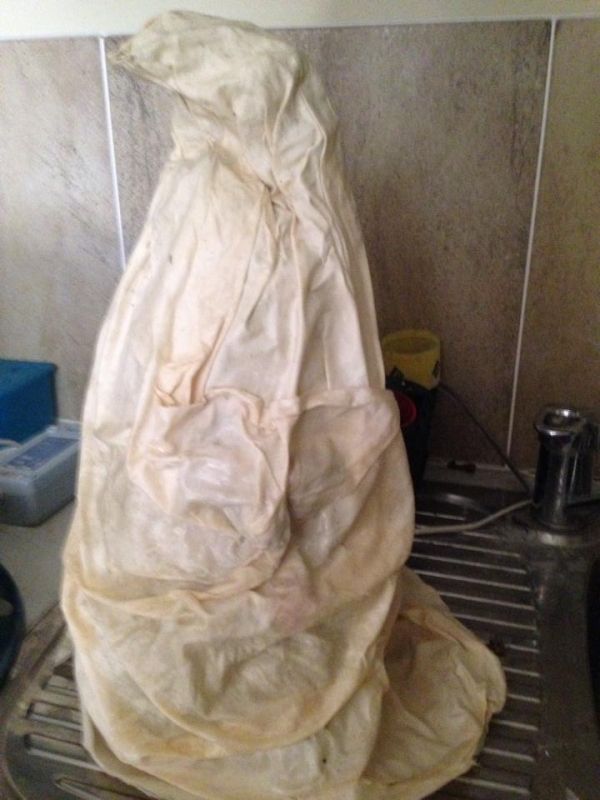
Let it dry in 1-2 days.
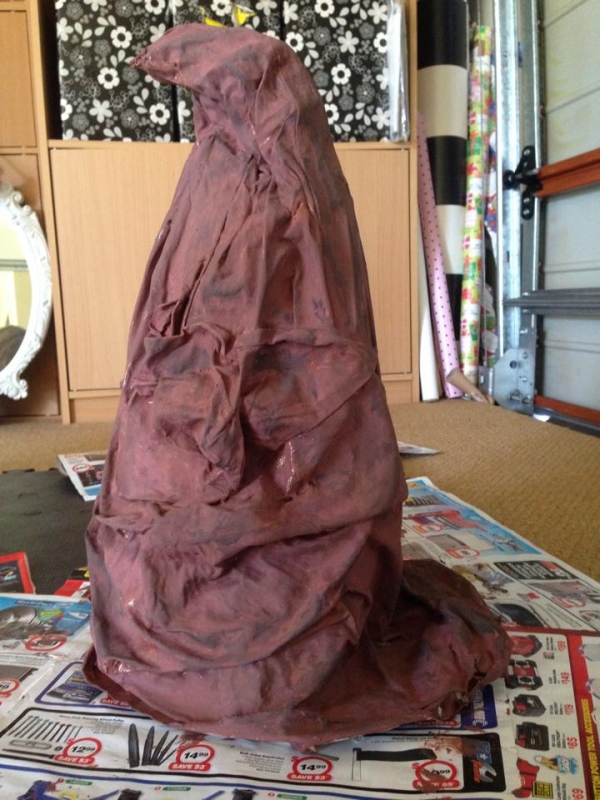
You can paint it with brown paint. Once the brown paint was dried we used some black/grey paint on a dry brush to highlight the facial features.
If you want you can add a baby monitor inside and have a talking hat too.
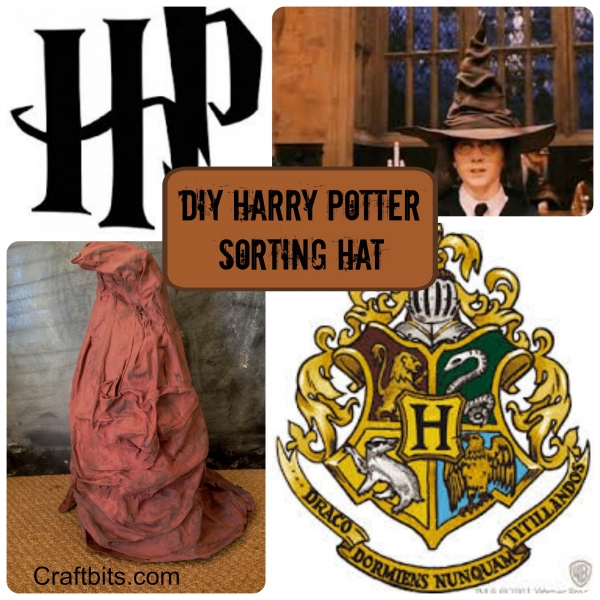
What do you think?



What do you think of this project? Let us know!