
This little tutorial will walk you through creating dimensional art using plaster compound, including a sweet (and slightly spooky) ghost painting you can whip up for Halloween or any time you want a playful touch.
Get more details about this project
What you need
- Canvas – Choose a sturdy one that can handle the weight of plaster.
- Plaster compound / joint compound – Available at most hardware stores.
- DIY shaping tool – For the ghost painting, make a rounded spatula from cardboard (a cut-down cereal box works perfectly).
- Palette knife or flat spatula – For spreading plaster or DIY cutout cardboard spatula
- Black acrylic paint – For your background.
- Small detail brush – For adding ghost eyes or other finishing touches.
- Paint for details – Black for eyes, or other accent colours for different designs, you could also use a sharpie pen
- Drop cloth & apron – Because plaster can get a bit messy.
Instructions
Dimensional art with plaster compound is addictive—in the best way. That first swipe of creamy plaster onto canvas feels almost like frosting a cake, and the finished result is as satisfying to look at as it is to make. The ghost canvas is a perfect starting point, but don’t be surprised if you find yourself covering every spare canvas in textured blooms, waves, and whimsical shapes.
This viral ghost canvas is the perfect beginner project—it’s quick, satisfying, and utterly charming. Here’s how to make it:
1. Prep Your Canvas
Paint your canvas solid black with acrylic paint and let it dry completely. This will make your ghosts pop against the background.
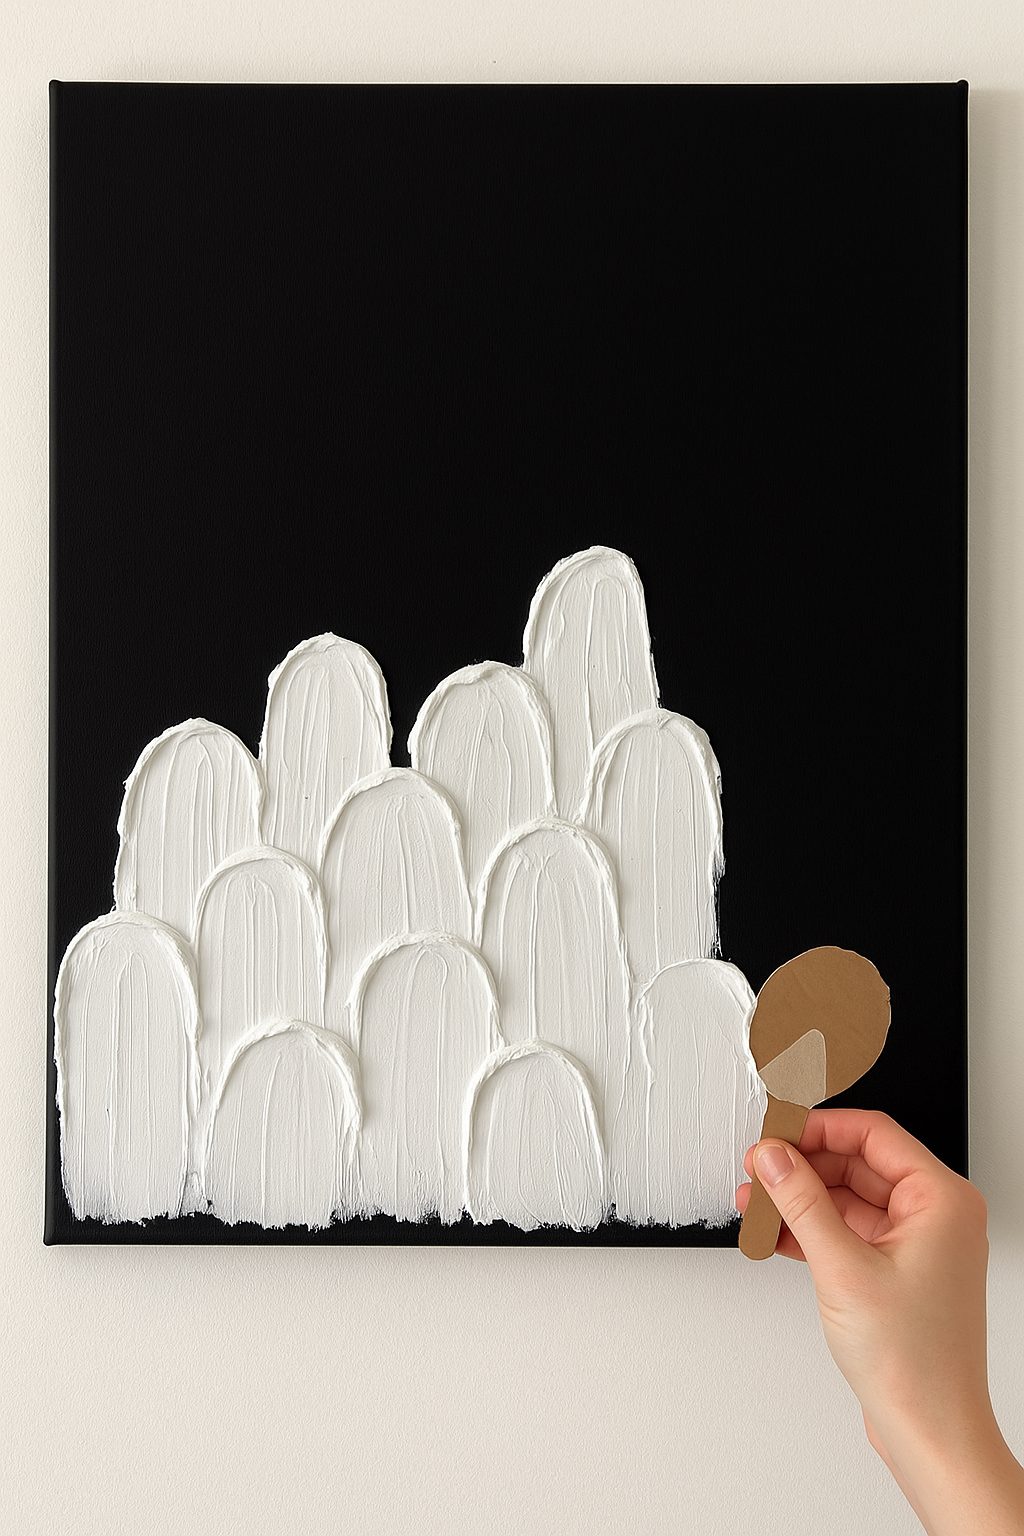
2. Make Your Ghost Tool
Cut a rounded shape from sturdy cardboard—think of the end of a spoon or a soft arch. This will be your “stamp” for creating the ghost bodies.
3. Scoop and Swipe
Using your DIY tool, scoop up a little plaster compound. Press the rounded edge to the canvas and swipe downwards, creating a thick, rounded ghost shape. Don’t overthink it—irregular edges add charm. Repeat, overlapping slightly so your ghosts look like they’re huddled together.
4. Layer for Dimension
Work in sections so the plaster doesn’t dry too quickly. Build up rows of ghosts, staggering them so they fill the space. start from the middle of your canvas and work down.
5. Drying Time
Allow your artwork to dry fully—this can take several hours to overnight, depending on thickness.
6. Add the Eyes
Once dry, use a fine detail brush and black paint to dot on two little eyes for each ghost. This simple step brings them to life (or, you know, “afterlife”).



Hi, I wanted to make you aware that a workshop business called The Clumsy Crafters appears to be using your DIY Plaster Ghost Painting photograph to advertise a paid “Ghost Canvas” workshop in Babcock Ranch, Florida, for $35 per person.
The project in their flyer appears to be the same photograph from your CraftBits post, but it has been cropped and placed into a different Halloween-themed background. I wasn’t sure whether they received permission from you to use it.
I have screenshots comparing the images, along with their promotional flyer, and would be happy to provide them or send you the link to their post if helpful.