
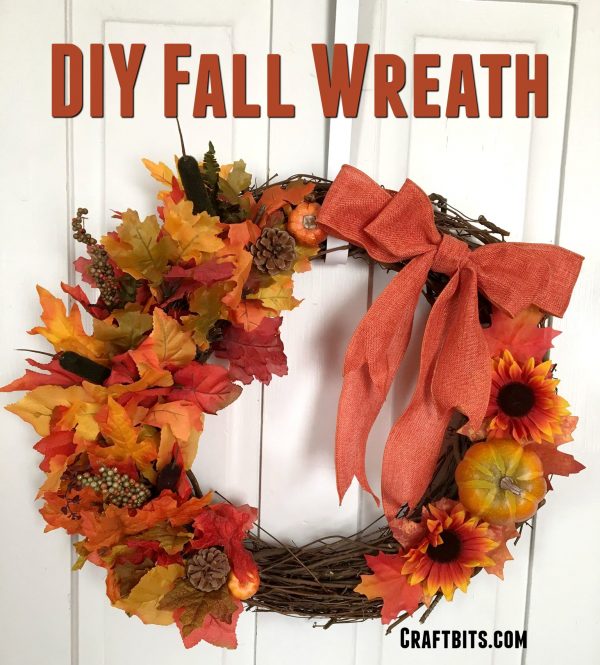
Large autumn leaves create the main foundation, while smaller leaves are nested between them for fullness. Miniature pumpkins, berry picks, pinecones and sunflowers add texture and seasonal colour. A large orange bow completes the wreath.
The decorations are arranged asymmetrically, leaving sections of the natural grapevine visible and creating a relaxed farmhouse appearance.
Get more details about this project
What you need
Grapevine or wicker wreath base
Large faux autumn leaves
Small faux autumn leaves
Miniature artificial pumpkins or gourds
Artificial sunflowers
Small pinecones
Autumn berry picks
Additional fall floral picks, optional
Wide rust-orange burlap ribbon
Floral wire, optional
Wire cutters
Scissors
Wreath hanger
Instructions
This Fall wreath is very cute and so easy to make, you can easily use items from the Dollar store, Dollar tree or discount stores. This tutorial uses Plastic Fall Leaves.
A handmade fall wreath is an easy way to add seasonal colour to a front door, porch, entryway or mantel. This design looks full and detailed, but it can be assembled using inexpensive artificial leaves and decorations from a Dollar Store or discount shop.
The original arrangement concentrates most of the foliage on the left side of the wreath. The right side remains lighter, with sunflowers, a small pumpkin and a large rust-orange bow balancing the design.
Leaving some grapevine exposed prevents the wreath from looking too heavy and gives it a rustic farmhouse finish.
Instructions
Step 1: Prepare the wreath base
Place the grapevine wreath flat on your work surface.
Remove any loose or broken twigs. Check the wreath for sharp ends and trim or tuck them into the grapevine.
Decide which section will be the top before adding the decorations. Position the wreath hanger temporarily if that helps you visualise how the finished wreath will sit.
Step 2: Plan the arrangement
Arrange the decorations loosely on the wreath before applying glue.
Concentrate the heaviest collection of leaves along the upper-left and lower-left sections. Leave a generous portion of the lower centre and upper-right grapevine visible.
Reserve the large bow for the upper-right side. Position the sunflowers and a miniature pumpkin down the right side to balance the dense foliage on the left.
Take a photograph of the arrangement before removing the pieces. This gives you a guide to follow while gluing.
Step 3: Attach the largest leaves
Begin with the largest faux leaves. These will form the base layer of the arrangement.
Apply a small amount of craft glue or hot glue to the stem and back of each leaf. Slide the stem between the grapevine branches and press the leaf firmly into place.
Work from the upper-left section down toward the lower-left side. Angle the leaves in slightly different directions so the arrangement looks natural.
Avoid gluing every leaf completely flat. Allow some edges to lift away from the wreath to create depth.
Step 4: Add the smaller leaves
Nest the smaller leaves between and underneath the larger leaves.
Use red, orange, mustard and muted green leaves to create variation. Place some leaves toward the inside of the wreath and others toward the outer edge.
Continue checking the overall shape as you work. The left side should appear full, but the open centre should remain clearly defined.
Step 5: Add berries and floral picks
Separate larger berry sprays or floral picks into smaller sections with wire cutters if necessary.
Tuck the stems among the layered leaves and grapevine. Place several picks near the upper-left and lower-left sections without distributing them too evenly.
Secure each stem with glue or a short piece of floral wire.
Step 6: Add the miniature pumpkins
Position miniature pumpkins or gourds among the foliage.
Place one or two small pumpkins near the upper-left arrangement and another near the lower-left side. Reserve a slightly larger pumpkin for the right side of the wreath.
Apply glue to the area that touches the wreath and hold it firmly until secure. Heavier pumpkins may need to be attached with floral wire as well as glue.
Step 7: Add the pinecones
Tuck small pinecones between the autumn leaves to add natural texture.
Place them where separate clusters of leaves meet or where a small gap needs to be filled.
Use floral wire for heavier pinecones. Wrap the wire around the base, feed the ends through the grapevine and twist them securely at the back.
Step 8: Attach the sunflowers
Position two or three artificial sunflowers along the lower-right side.
Angle one flower slightly upward and another toward the lower edge. Place the reserved miniature pumpkin between or beside the flowers.
Keep this section smaller than the foliage arrangement on the left so the asymmetrical shape remains visible.
Step 9: Make the large bow
Cut a generous length of wide rust-orange burlap ribbon.
Form two large loops with a smaller centre loop. Secure the centre with floral wire and adjust the loops until the bow looks full.
Cut two long ribbon tails and trim each end into an inverted V.
Alternatively, use a premade wired burlap bow.
Step 10: Attach the bow
Position the bow on the upper-right section of the grapevine wreath.
Secure it firmly with floral wire rather than relying only on glue. Feed the wire through the grapevine and twist the ends together at the back.
Arrange the ribbon tails so they hang into the open centre without covering the pumpkin and sunflowers below.
Step 11: Fill any obvious gaps
Hang the wreath temporarily and step back to inspect it.
Add individual leaves, small berries or another pinecone wherever the grapevine looks unintentionally empty. Do not fill every visible section—the exposed twigs are part of the design.
Check that the wreath still has a balanced open centre and a recognisable asymmetrical shape.
Step 12: Finish and display
Remove any visible glue strings.
Check that every pumpkin, pinecone and flower is firmly attached. Cover exposed wire ends and make sure nothing sharp projects from the back.
Hang the wreath indoors or in a sheltered outdoor area. Artificial leaves and hot glue may fade or weaken when exposed to strong sunlight, moisture or extreme temperatures.
Store the wreath in a sturdy box after the season, supporting the bow so it does not become crushed.
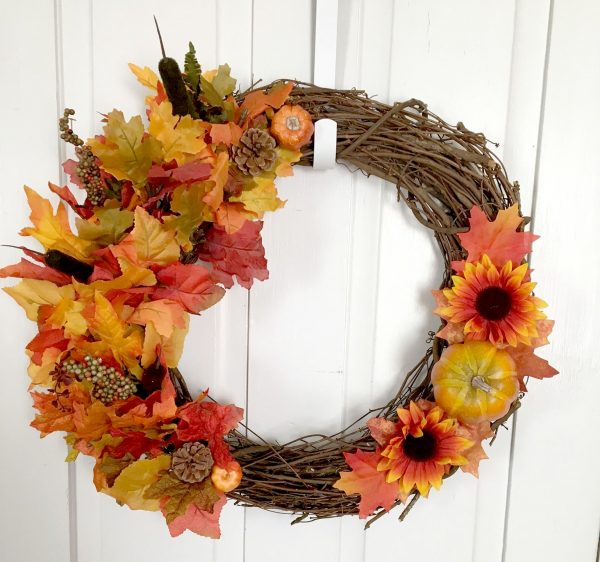
Finish off your wreath with some sunflowers and a Big orange bow.
This stunning wreath was created by Heather. K who is a member of our Facebook Christmas craft group. Thanks for sharing with us Heather.





What do you think of this project? Let us know!