
Hope you have fun creating this super simple idea!
What you need
For this project, you will need a total of 16 coat hangers (I have found that the kid sized (aka baby hangers) work best.)
Zip ties
Scissors
Instructions
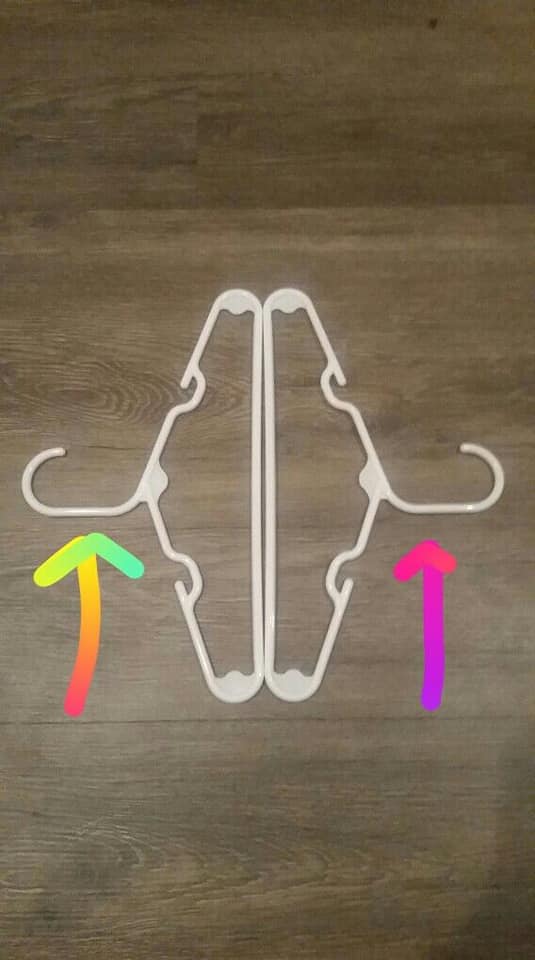
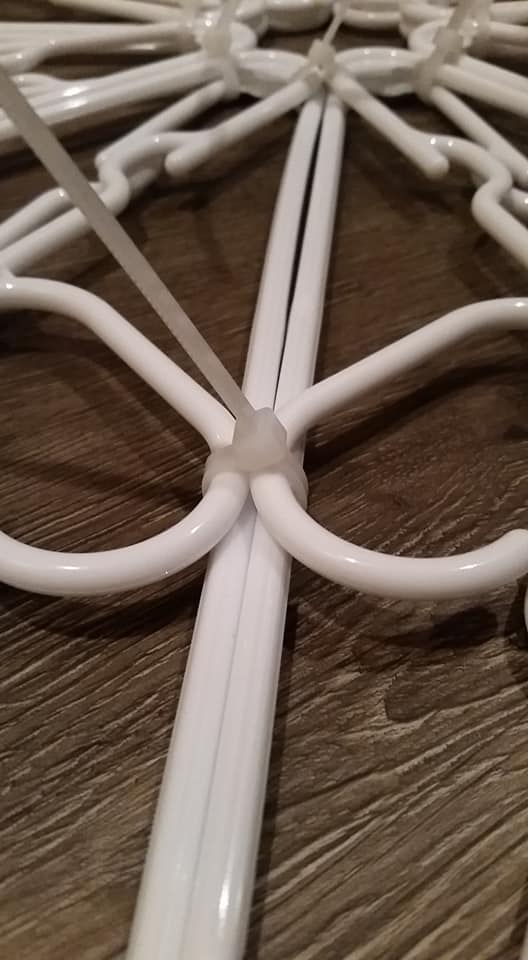
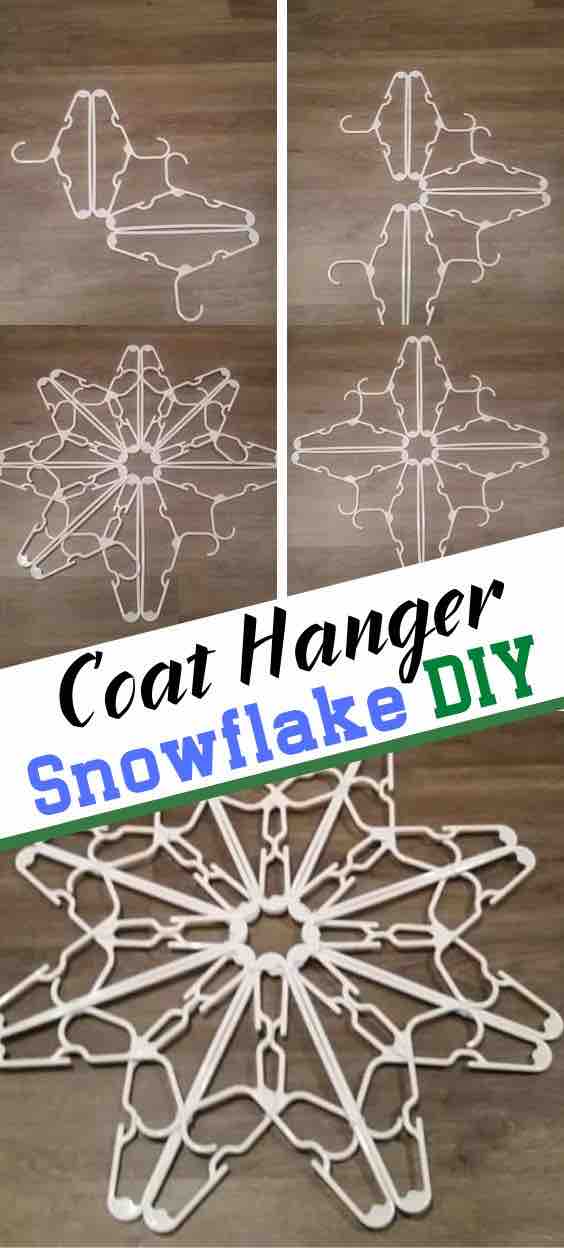
Step 1: Start with 2 hangers and place them as pictured. This is what I will call the “basic pair”. Make sure that the hooks of ALL of the clothes hangers face the same way!
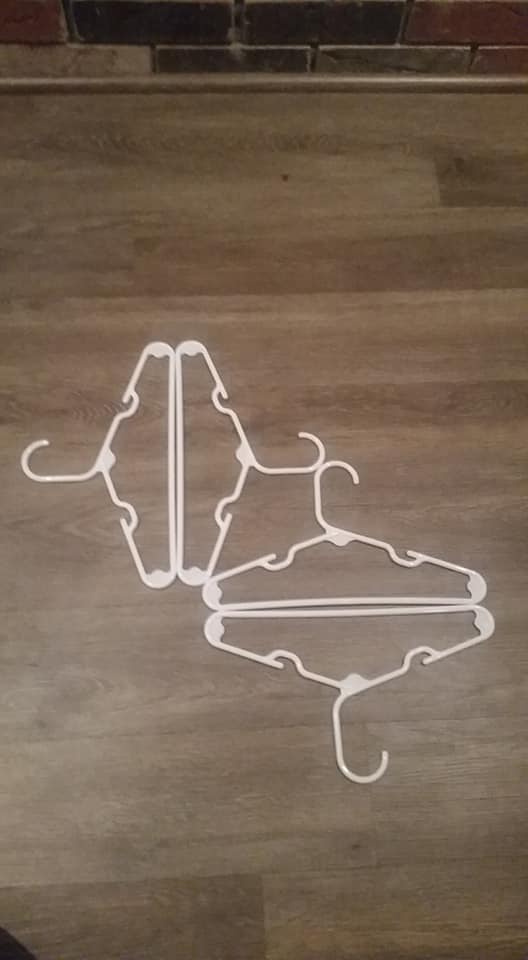
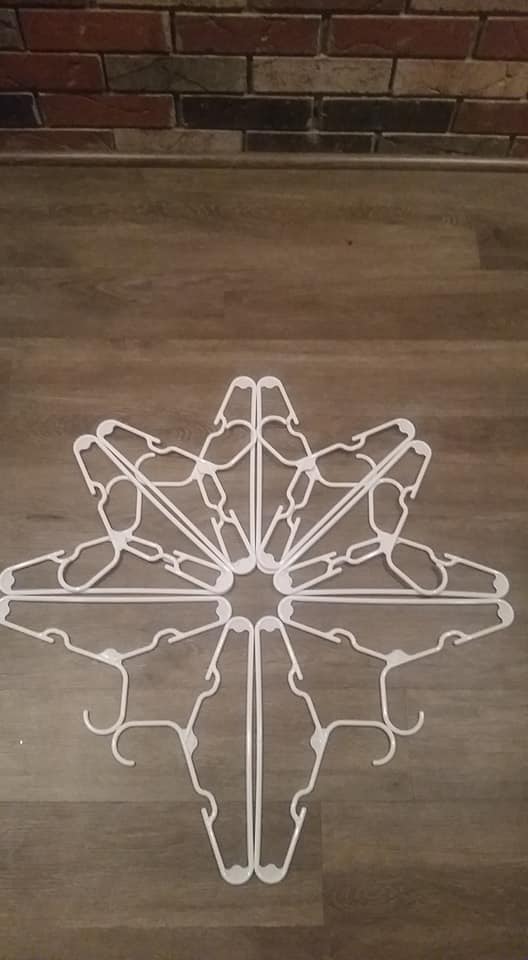
Step 2: Continue with the same pairing of clothing hangers to complete the first layer.
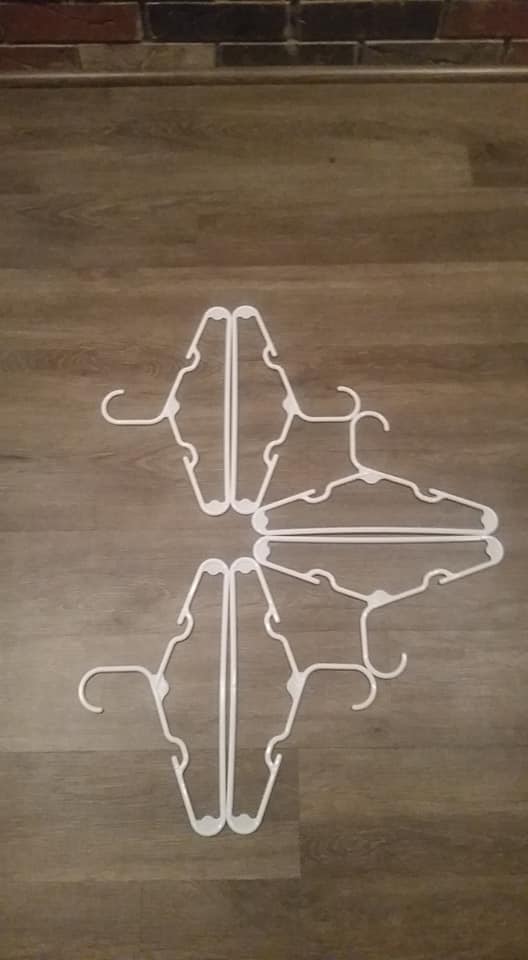

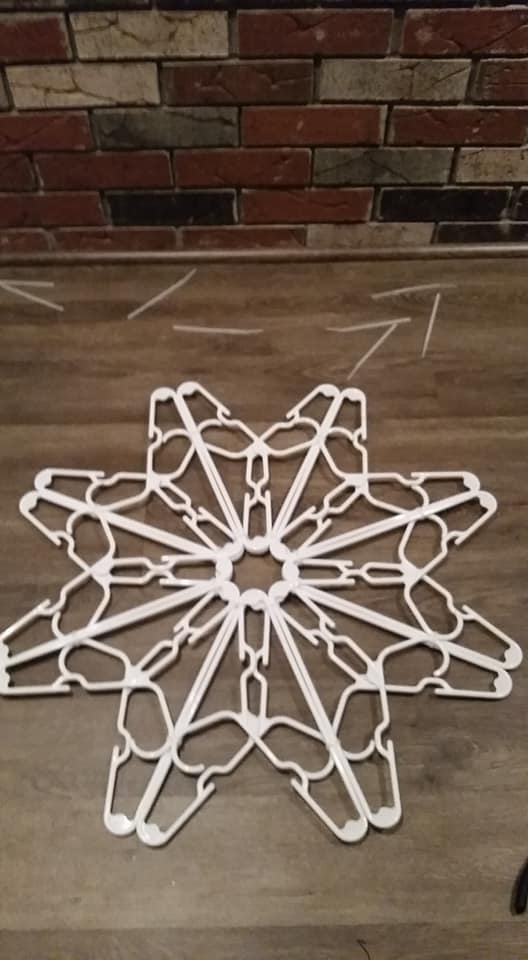
Step 4: 8 hangers, 4 pairs of hangers. This completes the 1st layer. Use the same base pair to begin layer 2, which is placed directly on top on the 1st layer. DO NOT zip tie your snowflake until BOTH layers are assembled.
Step 5: Align 2 hangers again to form your “base pair”. Place them on top of 2 hangers from the 1st layer, with the hooks of the hangers lining up with the bottom of the hangers in the 1st layer.
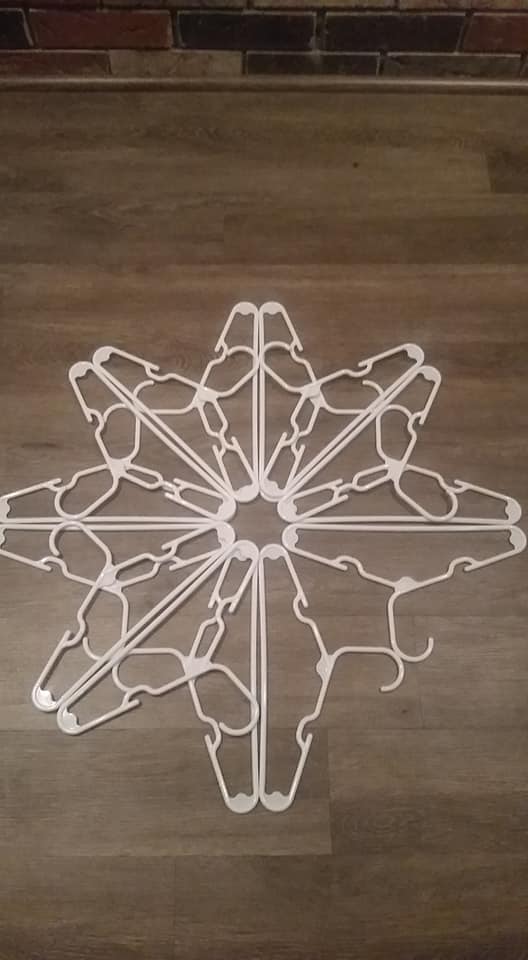
Step 6: Continue adding pairs of hangers as directed, until you have 8 hangers in layer #2 on top of your 8 hangers in layer #1. (See steps 6 and 7 for visual)
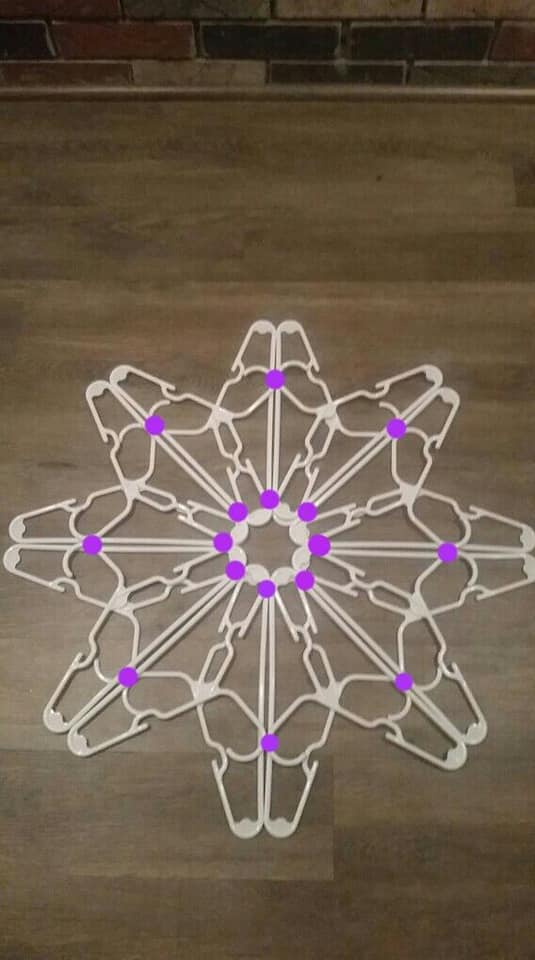
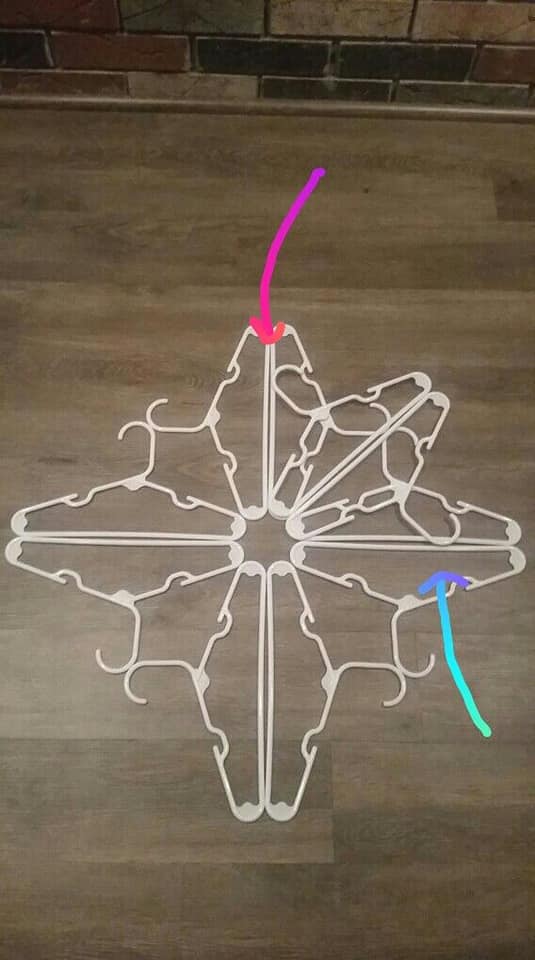
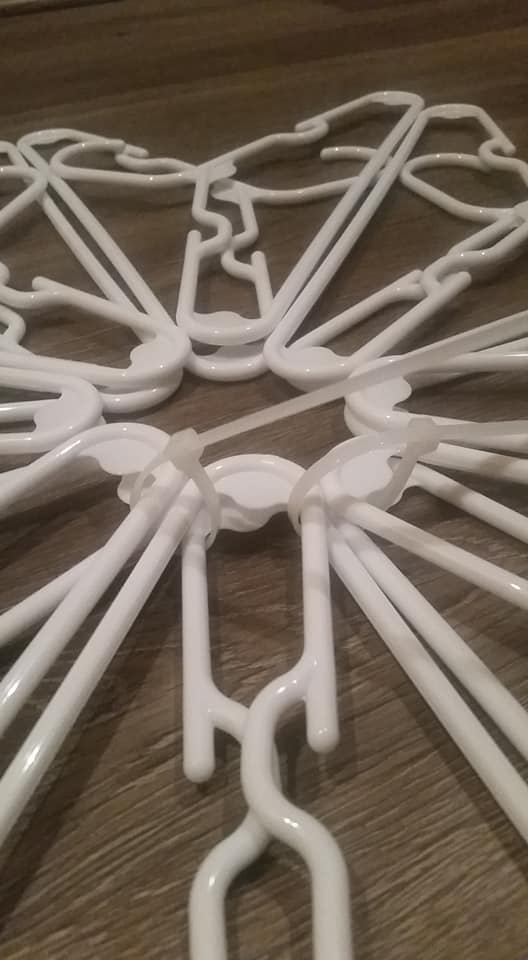
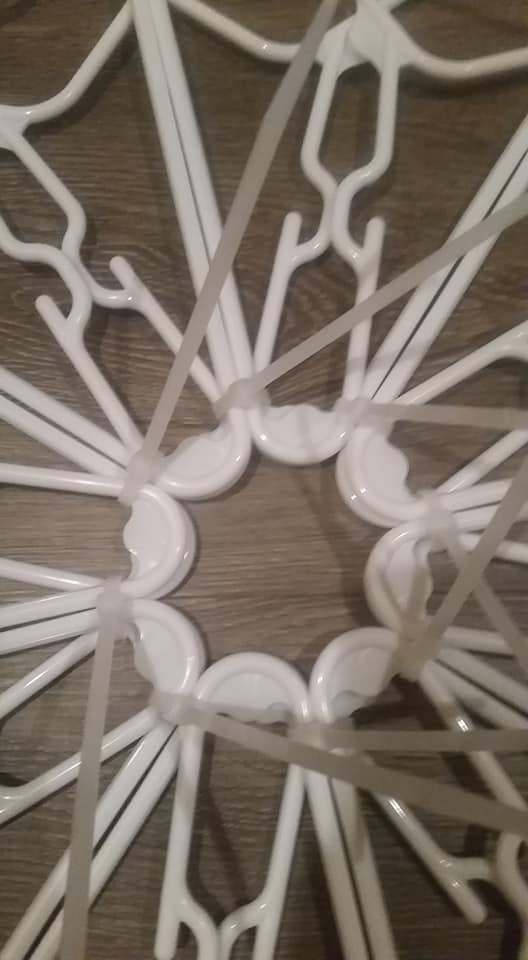
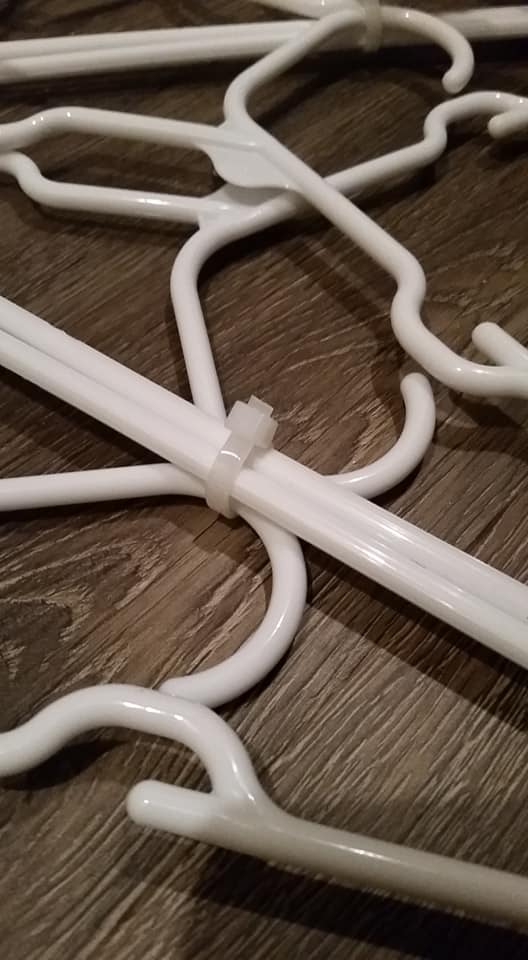
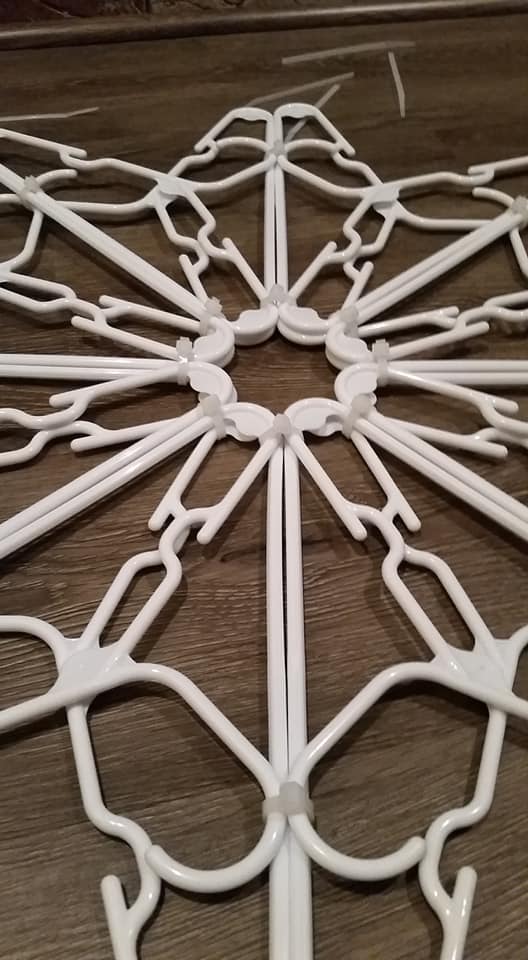
Step 7: The overall base of your snowflake is now complete, and ready for zip ties. Starting with the center, place a zip tie at each place 4 hangers meet. (See dots in picture) You should use 8 zipties for the center circle, and 8 for the outer circle. Each ziptie should hold 4 hangers
Step 8: Be sure NOT to tighten the ziptie all the way, until ALL 16 zipties have been placed. This will allow you to adjust and reposition your snowflake if needed
Step 9: Continue with inner circle
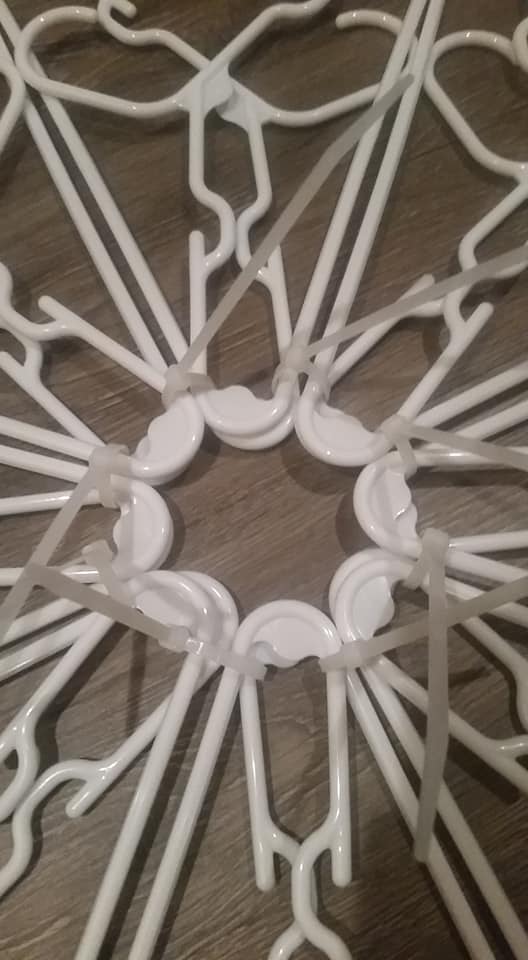
Step 10: Now that all 8 zip ties are loosely placed in the center, begin the outer circle
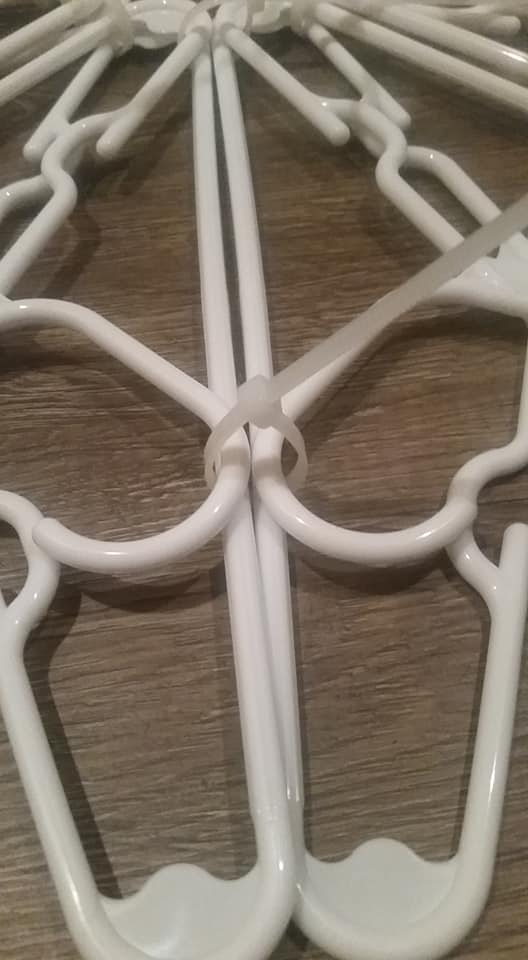
Step 10b: Find the spot where 2 hooks meet 2 bottoms and loosely place a zip tie.
Step 11: Continue around outer circle until all 8 zip ties are placed, each holding 4 hangers together
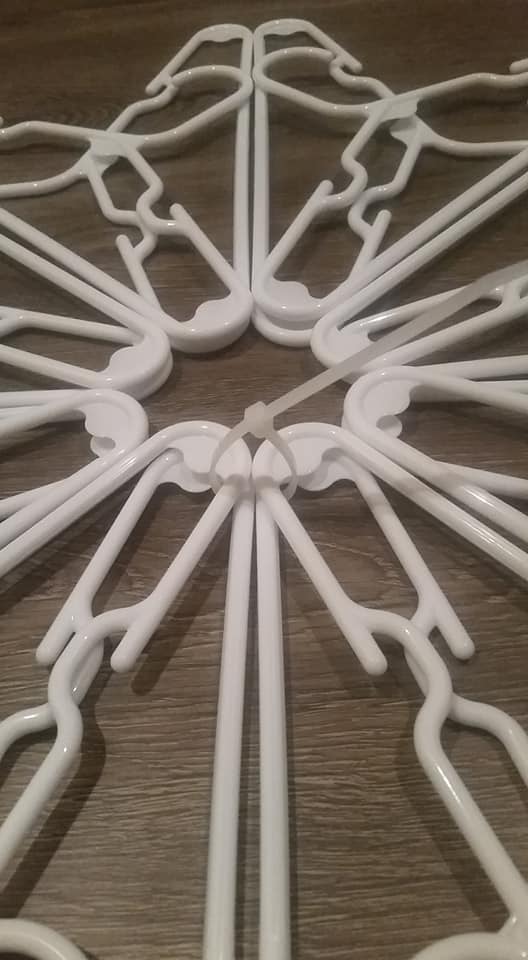
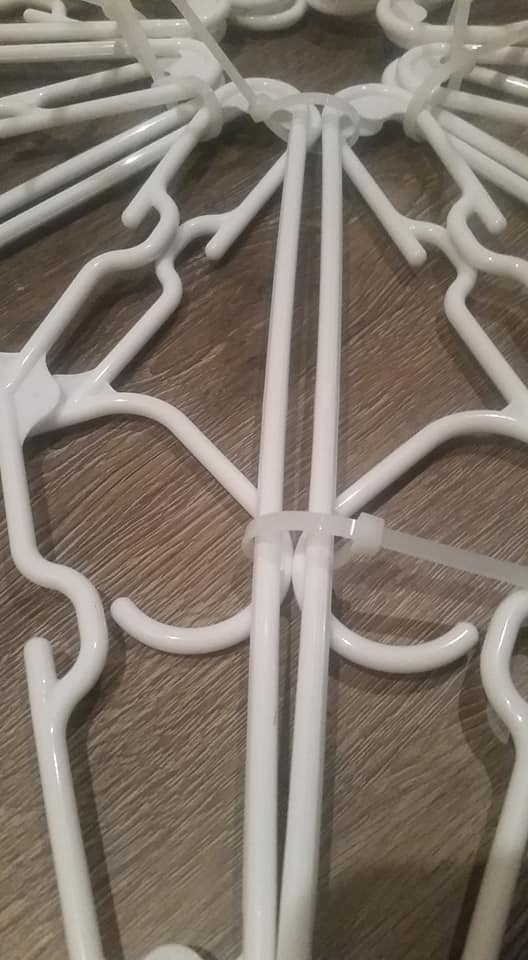
Step 12: Begin slowly tightening the zipties in the center. Adjusting your snowflake as needed, try to keep the hangers in the same layer from overlapping. You want to keep your hangers as flat as possible so that your end product will lay nicely
Step 13: Once you have finished tightening the inner zipties, begin tightening the outer ones. (Notice here what was meant about the hangers in the same layer not overlapping. They are side by side rather than over lapping each other)
Step 14: Once all 16 have been tightened, trim your zip ties
This amazing detailed tutorial was contributed by Amy L. Thank you so much for sharing your wonderful Hanger craft and tutorial with us.
Looking for another version? Here it is on CraftGossip.com: Clothing hanger snowflake.


Absolutely love this DIY project. I made several to hang outside in my yard.
Wanted to know, is there an easy way that small lights could be attached to the finished product?
Very creative and cool project! I sprayed the hangers and zip ties with spray paint, added ‘snow’ (while paint was wet), lights and a bow for my daughter’s school project.
Did the dowels work to prevent bending?
I love it. I am not very artistic and this is something that I can do. Just getting ready to make mine.
I made 2 and I have 1 that bends. I am thinking it’s because the hangers aren’t as strong as the first one I made.
Yes it would along with E6000.
I have made this one and a different one and both bend where I have put the zip ties, is there anyway of avoiding this or am I doing something wrong? :/
Why mess with hot glue when zip ties are easier and cheaper?
I was wondering, did you ever finish your snowflake? I just came across this an I think its absolutely amazing. Something I am most definitely going to try.
Excellent tutorial. Instructions were very clearly laid out step-by-step. My snowflakes are beautiful!
Thank you!
25 in diameter
So easy to follow with the detailed photos. Made one in 5 minutes. I got the baby hangers at the Dollar Store, 6 for $1.00! Watch out for hanger variations that won’t work as well, as noted by someone else. I’m going to add lights and hang a few along my fence. Note: if you keep these indoors then pipe cleaners would work. If outdoors you need waterproof fasteners.
Yes, snowflakes have 6 points in nature. This is a craft with one’s imagination. I am a crafter who uses her imagination to create new designs. I have found other designs on Pinterest that do have 6 sides. That you might enjoy. Search for clothes hanger snowflakes and see what ou can find.
Would a hot glue gun work? Just a thought…
What’s the best way to put the lights on it?
Walmart
Mine did also/ the hangers had to much plastic filled in.
Walmart and Dollar General often have them!
I bet theseb would look great with blue and white mixed!
A few hints… you CAN do the two layers separately and lay them on top of one another. I’m going to try using a pair wooden dowel rods to keep it from bending. If it works I will update it here.
Well it’s not really a snowflake you are making. It’s a conglomeration of hangers. Couldn’t you just pretend that it is a Christmassy thing?
When I was a child I wanted to sew. I’d follow the pattern instructions meticulously and could end up with 2 right sleeves. Some of us have a hard time with simple instructions. But you are right, this one seems simple enough. And it is just gorgeous, genius. I love it.
I used hangers from Walmart, made with adult and child’s sizes – added lights and some with greenery picks, hung outside – looks so good! Every year I try to do something different – thanks for sharing!
Thanks for the great tutorial & inspiration! I’m doing mine in red hangers and red garland with white twinkle lights! Can’t wait to try this
I used a string of 50 and it worked pretty good.
If you add lights, what count do you use
Made mine super quick and I love it. Excellent, simple tutorial! Thanks for the step by step pics. It is absolutely hysterical to me that anyone has trouble with this or anything negative to say.
I hear yah.
so simple but never would have thought of it awesome going to try it
They are pretty good sized. I started making mine before I saw the tutorial. In had just seen a picture of a friends and gave up before I was finished.
Anxious to try this. I know that snowflakes are white but has anyone tried using different colored hangers? Glitter paint sounds like a great idea.
I painted mine silver and it looks really really good I’m going to use white Garland on it and some red poinsettias
Don’t think anyone cares whether you make it or not! Really dumb comment!
Love this. Where did you find baby hangers.
I really enjoyed making the snowflake out of hangers, thanks for your tutorials
Brilliant! Who knew?? You do, with plastic coat hangers! I’m not crafty. But will attempt to try your Creation. Thank you, and Happy Crafting. Stay Safe
Could anybody tell me what size this end up being using baby hangers?
Snowflakes have 6 points!!! Spiders have 8 legs and stars have different numbers of points!!! Can’t bring myself to make a snowflake with wrong number of points in quilting or hangers!!!
Just finished making one it turned out great. Thank you for all the information.love it
Great idea, I used the Dollar tree hangers with zip ties. It doesn’t lay completely flat but even with that, its much bigger than I thought. Gonna be nice, can’t wait to finish it with the painting and glitter, it will be beautiful.
Great directions and easy to make. I used hot glue gun instead of zip ties..lays flat
The instructions are great. I used some previously used hangers, a little bowed on the bottom, difficult to lay flat. BUT love the star.
Just finished mine. I love it
Make sure your hangers are exactly as pictured. Our dollar store hangers are filled in on the ends making it impossible to tie them at the middle of the snowflake. Found this out too late.
I agree! I just spent 3 hours… oh well first attempt. Not much of a center and it buckles a bit. I will try again!
I seen two of the same snowflakes just layered different, I did 8 and 8 and then just slanted the frame got spray glue and plastic snow flakes and glitter and lights hanging from my tree
Easy to follow instruction but how do you keep it from spinning if you free hang it? Any ideas?
Ok followed directions but finished product will not hold shape. Wanted to hang from cup hook on porch. Keeps folding. Help
Hubby started working on it while I was printing the instructions. He did a great job. Hanging on the front door with poinsettias and lights. Thank you for the easy instructions.
Hi Ginger – we would love to see your work!
I am going to try this.
I had a great time working on this project. Love the pictures and instructions, easy to follow. Using baby hangers and the regular ones. Going to hang on my fence.
Thanks so much.
Mine didnt go together as well one part keeps popping up
With the pictures and clear instructions I will be making these. Thank you, you an excellent instructor. Beautiful.
Gosh I love it it’s different making and less expensive
i used pipe cleaners insteada zipties!
Have you tried this with the old metal hangers?
I love them. I am going to hang them from my trees. Want something unique this winter. Going to put lights on the and paint them with glitter paint. Thank you for the help in doing this.
Thank you for the details! Just made my first one and sprayed with glitter spray. Turned out great!
Love it! It’s Beautiful for all during the Winter Season!
I made 3. What keeps them flat? Mine want to bend.
Awesome pictures and directions!! Thank you so much! I have watched 3 videos on how to make these and it was very confusing. Thank you so much for all the little details!!!
I love your easy to follow instructions can wait headed to the dollar store
Very nice, would look great with color lights and a ribbon
I can’t wait to try this. Thank you for the step by step with pictures. Your tutorial is very detailed, which I find very helpful.