
Get more details about this project
What you need
Pink or skin-tone felt for the face, hands and feet
Bright pink felt for the dress
Yellow felt for the hair
White felt for the wings
Fabric glue suitable for felt
Fabric paint or fine fabric markers
Small bell charm
Needle and thread
Thin ribbon or cord for hanging
Sharp scissors
Paper and pencil
Optional pearl beads for the hair
cute-felt-angel-christmas-tree-ornament-printable-pattern
Instructions
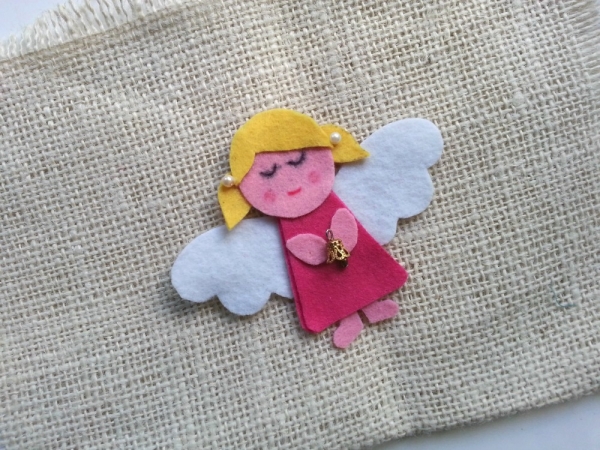
With her sleepy eyes, little pink dress and tiny bell, this felt angel makes a lovely addition to a handmade Christmas tree. The simple shapes leave plenty of room to choose your own colours and give each angel a little personality.
I like the idea of making a few together, perhaps with different hair colours and dresses chosen for the people receiving them. They’re also a sweet finishing touch for wrapped presents, ready to become a keepsake once the gift is opened.
Prepare the felt pieces first, then enjoy arranging the face, wings and hands before attaching everything.
Instructions
1. Prepare the shapes
Use the cutting photograph as a guide to draw paper templates.
Cut two dress shapes, one round face, two hands, two feet, a hair fringe, two side hair pieces and one joined pair of scalloped wings.
2. Decorate the face
Paint or draw closed eyes, a small smile and rosy cheeks. Test your paint on a scrap first and allow it to dry.
3. Assemble the dress
Position the feet between the two dress layers, with their toes showing below the hem. Glue the layers together.
4. Add the head and hair
Attach the face above the neckline. Glue the side hair pieces behind the face and the fringe across the forehead.
5. Attach the wings and hanger
Secure a ribbon loop behind the head with several stitches. Glue the wings across the upper back, covering the ribbon ends where practical.
Check that the ornament hangs upright.
6. Add the hands and bell
Stitch the bell securely near the centre of the chest. Glue the hands on either side so they appear to hold it.
Add optional pearl beads with thread.
7. Finish
Leave the ornament flat until the glue has dried completely. Check the hanger and decorations before placing it on the tree.
Making tip: Keep glue away from the outer wing scallops so the edges remain soft and neat.

Use bright colored felt for this project. You can create your own pattern for the angel or simply follow the one I did. Cut out the pieces for the angel as shown in this picture.

Use fabric paint to draw the face of the angel. You can also stitch out the face but it’s easier to draw, especially for the kids. Attach the hair and the other parts one by one. Use fabric glue to attach the parts together.

It would be great if you can collect a small bell charm. I had to make one using jewelry findings, it was fun to make though! Glue the bell between the hand of the angel.
You can add more details to it if you want to. Use different colored felt, different patterns and accessories for more variation.
Enjoy!





You say, “You can create your own pattern for the angel or simply follow the one I did,” but there isn’t a link to the pattern you used. Can you include the pattern or supply a link to it, please?