What you need
Empty can, beading (plastic) thread, crystal beads, chimes – 6, Awl and hammer, egg shells, acrylic paint and paint brush.
Instructions
Step (1): Clean the can before getting started. Use a marker to mark the spots where you want to make the holes (on the can). It’s better to keep even number of holes and equal distance between them. First, let’s make the holes on the bottom of the can (which will be the top side of the wind-chime). Make 6 holes around the center (for the chimes). Make 4 holes around the bottom edge (for the hanging mechanism). Make 6 more holes around the top open edge of the can (this will be bottom side of the wind-chime). Place the can on a wooden board and the awl on the marked spot and hammer 1-2 times on the awls’ handle to make the hole.
Step (2): Gather 3-4 egg shells and clean them nicely. Paint them using 3-4 different colors (acrylic paint), make sure that the color combination is good. After the paint dries crush the egg shells into small pieces (but not too small).
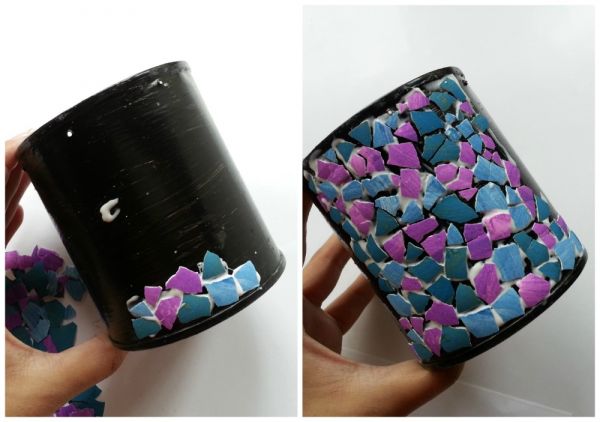
Step (3): Color the can using black acrylic paint and allow the paint to dry. Then, apply glue on the can and place the colored eggshell mosaics on the glue. Cover the whole can with eggshell mosaics and allow the glue to dry.
Step (4): Decide the length for the wind-chime (Including the hanging mechanism, the can, string and chimes). Take a beading thread (plastic thread) double the length of the required length for the wind-chime. Attach a chime on any one side of the string and a few beads but keep half of the string intact. Similarly prepare 2 more strings as you’ll need 3 of them to make the wind-chime.
Step (5): Take any one of the beaded strings and insert it through any one of the 6 holes around the center (on the bottom of the can), from the inside of the can. Lock the string with 2 beads before drawing it through the hole (one of those 6 holes) opposite to it.
Step (6): Now, bead the rest of the string and attach a chime on the end. Make sure to tie a knot or two to secure the beads and the chimes. Similarly attach the other 2 beaded strings (along with the chimes).
Step (7): Now to attach the hanging mechanism. Take 2 strings long enough to make the hanging mechanism. Insert the string through any 1 of the 4 holes around the bottom edge of the can and draw it through the hole next to it (see picture). Similarly attach the other string and bead them. Hold both strings together, keeping equal amount of string on all 4 parts and tie a knot or 2 tightly and neatly.
Step (8): Take 6 more beading threads of random length and bead them as you want. Attach them with the can around the open top edge (bottom side of the win-chime).


Just wonderful,and so easy to make