
What you need
Beads – any colors you like (glass, plastic, etc)
Earring wires and eyepins/headpins
Polymer clay – any brand – tan, green and spring colors (or colors of your choice)
Liquid polymer clay
Clay extruder – optional, but recommended
Circle shaped cutters – tiny size (optional)
Clay knife, or plastic knife
Acrylic roller or dowel
Toothpick or bamboo skewer
Work surface – ceramic tile, file folder or wax paper
Oven for baking
Instructions
This Easter craft project shows you how to make a little Easter basket with decorated easter eggs inside. Perfect for earrings or pendants. This is a great Easter alternative to chocolate gifts.
Condition each color of clay until soft and pliable by rolling and squeezing in your hands. Test to see if it cracks when you bend it – that means it needs more conditioning!
Roll your tan (basket color) color into a ball and then an even snake. If you use a clay extruder, this process is MUCH faster & the snakes are more even.
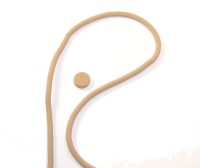


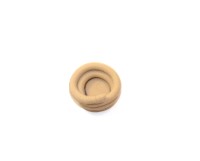
Also roll out an even sheet, about ¼ inch thickness and cut out circles for the basket bottom. You can also roll a tiny ball of clay and press it into a cirle if you do not have cutters.
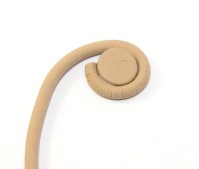
Add a tiny drop of liquid clay to the edge of the circle and begin wrapping the snake around it. Gently press as you go, so the clay adheres to itself. Trim off the end when you get to the desired height.


Now roll out a thinner snake of clay and twist it together for the handle & trim to the size you need.

Place a drop of liquid clay on either side of the basket and press the handle into place.
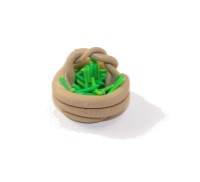
Now roll out VERY thin snakes of green clay. Extruder recommended. I used two shades of green mixed together.
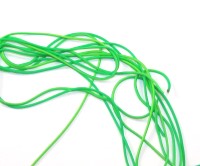

Put a few drops of liquid clay into the basket, cut the “grass” into tiny pieces and fill the basket. Gently press it into place.

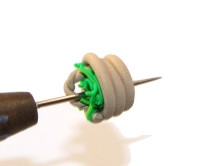
Now is the best time to make your hole or insert an eyepin, etc.
Now roll tiny balls of various colors to make Easter “eggs” and put into place with a drop of liquid clay.


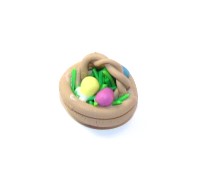
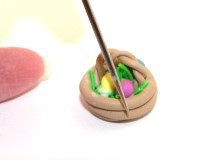
Add texture to the outside of your basket by pressing in lines with a toothpick or other tool.

Bake according to the manufacturer’s directions. You will need to add a drop of clear glue to the eyepins (if used) once cooled, as the clay will not adhere on its own.
Glaze if desired. I use varathane – found in most hardware stores. For small projects, use the clay manufacturer’s glaze. The bottles are smaller & more affordable!
Attach your beads to earring wires or add an additional eyepin with beads for sparkle!
Enjoy your new piece of jewelry for yourself or give as a fun & whimsical gift!
***Experiment with different sizes to create matching accessories!
***TIP***
***SAVE those pieces you trimmed off and roll them together to make swirly accent beads!
***Dark colored clay, like red, green, etc. can leave some pigment on your hands. To help keep lighter colors from turning pink, etc. handle most of the light clay first. You can also use baby wipes to clean your hands and tools (alcohol is a solvent for the clay) or wear latex gloves & switch in between colors.
***Once you use cookie cutters, pasta machine, etc for clay, it is recommended to no longer use it for food. Shop around for inexpensive cutters at your local craft store.


my mom will love it!