
Think beach house vibes meet nail salon leftovers. And yes, they make fabulous handmade gifts too.
Get more details about this project
What you need
Cleaned, dried oyster shells (any size, but palm-sized works best)
Nail polish (a few colors that swirl well together—think pastels, metallics, or moody blues)
Disposable container filled with room-temp water (an old takeaway tub works)
Wooden skewer or toothpick
Gloves (optional but recommended)
Clear gloss spray or Mod Podge (optional sealant)
Instructions
Step 1 – Prep Your Shells
Give your oyster shells a good clean. A soak in warm soapy water, followed by a scrub with an old toothbrush, usually does the trick. Let them dry completely before you begin. The smoother the inside surface, the better your marbled effect will turn out.
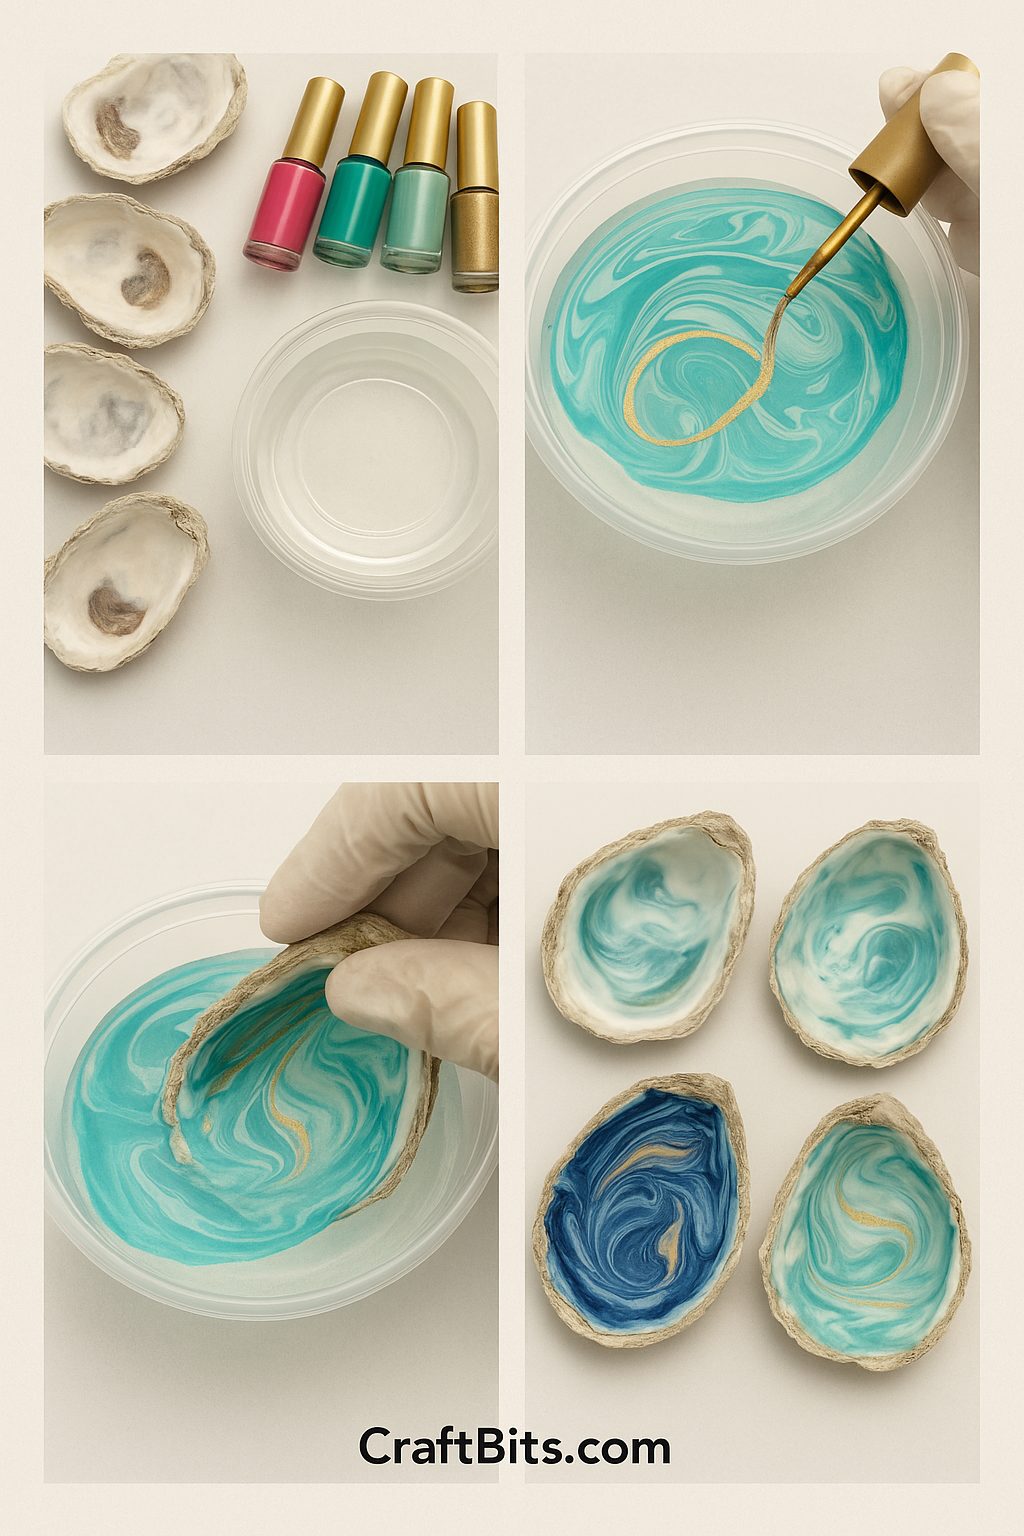
Step 2 – Drizzle the Nail Polish
Fill your disposable container with room-temp water. (Hot or cold water messes with how the polish spreads.) Gently pour a few drops of nail polish onto the surface. You can layer different colours one after the other. It’ll float!
Step 3 – Swirl & Dip
Use a skewer or toothpick to swirl the polish lightly—don’t overdo it. Holding your shell by the edge, dip it into the polish-covered surface. The polish will instantly cling to the shell’s surface in a marbled pattern. Lift it out and let it dry on a paper towel or drying rack.
Step 4 – Seal It Up
Once dry, you can spray or brush on a clear gloss or Mod Podge to give it a glassy finish and a little durability—perfect if you plan to use these for rings, earrings, or tiny treasures.
Crafty Notes:
- Water temp matters! Room temp is key to a smooth swirl.
- Work fast. Nail polish sets quickly on water, so have everything prepped before you pour.
- Customise it. Try gold leaf accents, glitter polish, or even hand-painting edges for a luxe finish.
These nail polish dipped oyster shells turn out so pretty, you’ll want to keep a few for yourself. They make thoughtful gifts for beach lovers, bridesmaids, or just your jewellery-hoarding bestie.
Pop a few in a box with some tissue and a ribbon, and you’ve got yourself a handmade treasure—coastal style.
Project by CraftBits.com


What do you think of this project? Let us know!