
What you need
2 pkg. of Stained Glass Cobbles ¢ Mixed Greens 2.5 oz.
4″ tall Glass bottle with a cork stopper
Glow in the Dark Polymer Clay Boxed Set
Copper Wire 22 ga.
Paper for Potion sign
Clear Glass adhesive such as E6000
Wooden Craft Stick
Protected Work Surface
Wire Cutter
Long Nosed Pliers
Wood Dowel for rolling out clay
Ruler
Knife
Toothpick
Instructions
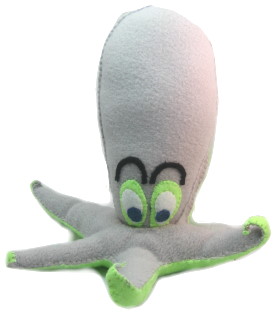
Witchey
For the face knead one block of pale yellow polymer clay until soft and then form into a ball. Roll out the clay into a 1/8” thick circle 4” in diameter. Cut in half. Carefully form a cone shape using ½ of the circle. Press the edges together with your finger tips to bond. Pinch off the top point of the cone making a small flat surface. Using the photo as a guide make Witchey’s nose, eyes, cheeks, mouth and hair, gently press on to the cone face to bond. Set aside.
For her hat knead one half of a block of black polymer clay until soft and then form into a ball. Roll out the clay into a 1/8” thick circle 2 ½” in diameter. Cut in half. Carefully form a cone shape using ½ of the circle. Press the edges together with your finger tips to bond. Set aside. Using the remainder of the black clay again form a circle and roll into a 3” circle. Gently attach the cone to the circle to bond. Decorate using the photo as a guide.
Carefully place the cone face on top of the uncorked bottle. Place the hat on the cone face and shape the hat brim using the photo as a guide. Bake Witchey on the glass bottle following the manufacturer’s directions. The bottle will help keep Witchey’s head shape. Let cool then remove Witchey’s head and set aside.
Mosaic Bottle
Use a craft stick to place a thin layer of glass adhesive on a small area of the clean glass bottle. Carefully place a glass Cobble onto the adhesive one at a time fitting them together as close as possible. There will be some small gaps. Allow the adhesive to set before moving on to the next section. Repeat until the bottle is complete. Set aside to dry. Grouting is optional. Wrap the neck of the bottle with copper wire. Twist the ends together to fasten.
Toe Jam Label
Knead the remaining scraps of black clay or another color and form into a ball. Flatten the ball with your hand then roll out into a thin flat sheet 1/8” thick using the wood dowel. Cut a rectangle 1” wide by 2” long. Using a toothpick make two small holes ¼” from the top of the rectangle for the wire hangar. Bake the sign following the manufacturer’s directions. The sign can be typed or hand written. The finished paper should measure 1 ¾” long by ½” wide. Once complete glue the paper to the baked clay board. Bend the wire into an open loop and stick the ends through the back holes in the sign board. Using the needle nosed pliers twist the wire from the front of the sign back over the top and secure on the back side. Place the sign over the neck of the bottle. Place the cork back on to the bottle with Witchey’s head on top.
Submitted by Rita Wise.


awesome but what is it for and its the best halloween project i’ve seen so far