
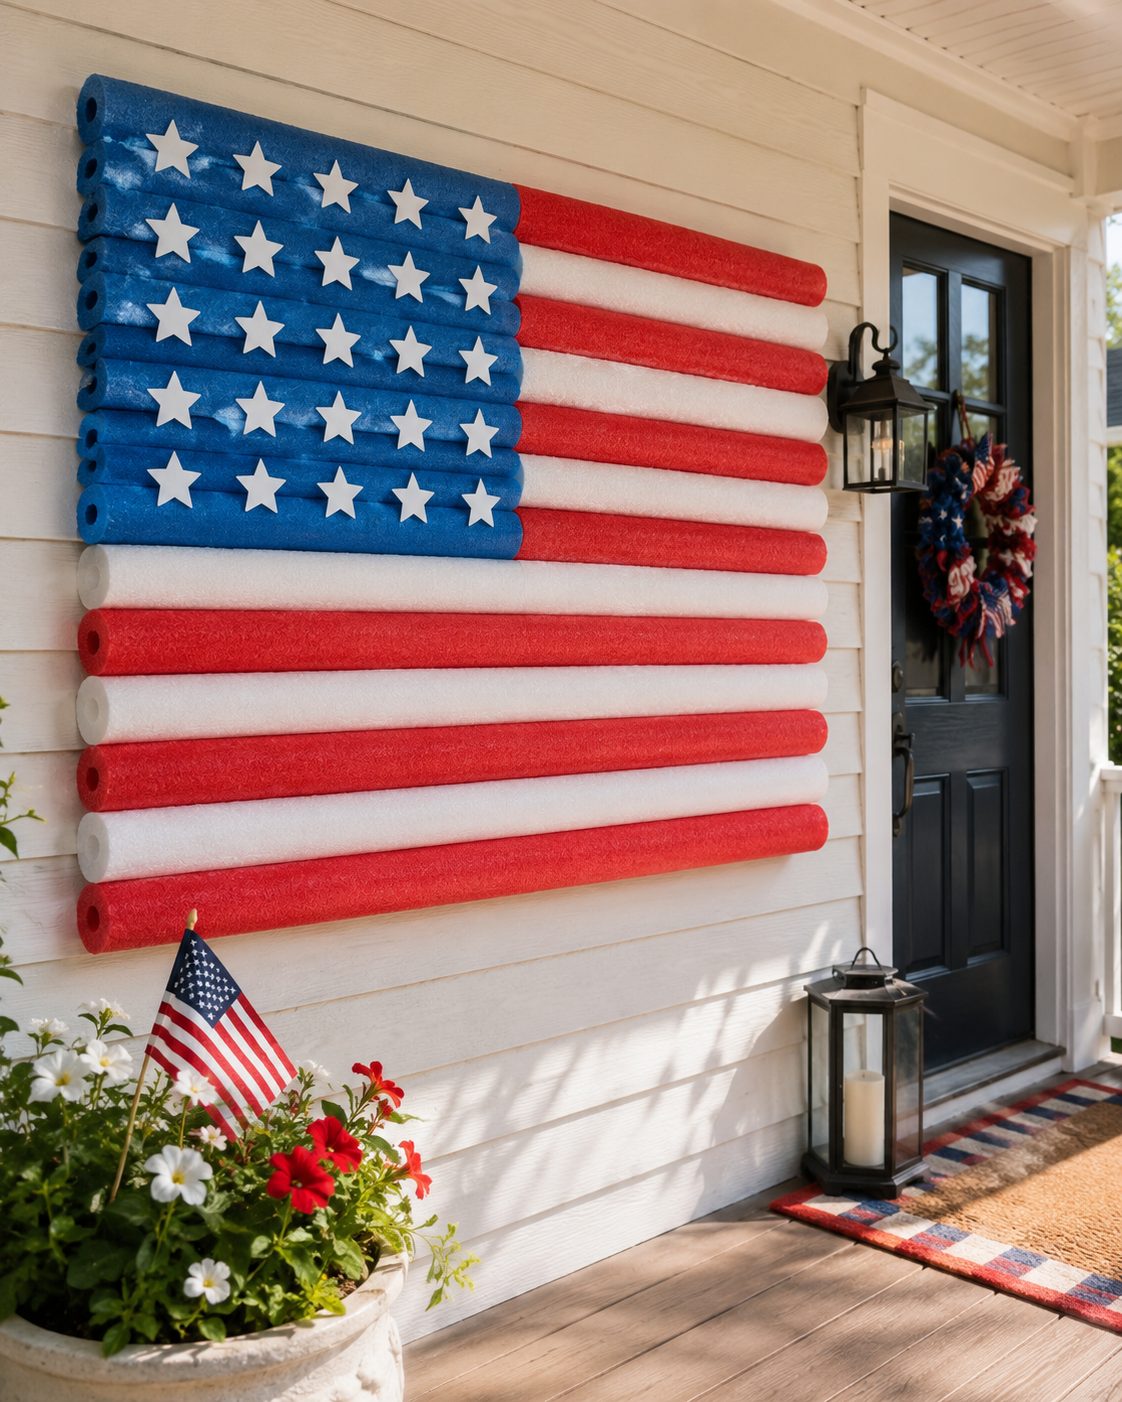
The idea is simple: red and white pool noodles are cut to size and layered horizontally to create the flag stripes, then a blue section is added in the corner with white cutout stars. Because pool noodles are lightweight, bright, and already weather-friendly, they make a fantastic base for oversized summer porch decorations.
This is one of those projects that looks impressive from the road but is actually very forgiving up close. Slightly uneven noodle cuts? No one will notice. A star that leans a little to the left? Handmade charm, darling.
Get more details about this project
What you need
large-star-cutout-templateRed pool noodles
White pool noodles
Blue pool noodle, blue foam sheet, or blue painted backing board
Foam board, corrugated plastic board, plywood, or recycled cardboard for backing
White craft foam, cardstock, felt, or adhesive vinyl for stars
Outdoor-safe hot glue, strong craft adhesive, or construction adhesive
Craft knife or serrated knife
Cutting mat or scrap cardboard
Ruler or measuring tape
Marker
Scissors
Star template or star punch
Clear outdoor sealer spray, optional
Command strips, wire, twine, or sawtooth hanger for displaying
Optional: red, white, and blue ribbon, fairy lights, wooden letters, or mini bunting
Instructions
If you are making this for outdoor use, I’d choose corrugated plastic board or lightweight plywood over regular cardboard. Cardboard is fine for a party backdrop or covered porch, but it will not love rain. You can usually find pool noodles, craft foam, adhesive vinyl, utility knives, and outdoor glue on Amazon, which is handy if your local dollar store has already been raided for patriotic supplies.
Finished Size
The size depends on your pool noodles and backing board, but a good porch-friendly size is approximately:
24 inches high by 36 inches wide
or
30 inches high by 48 inches wide for a larger statement flag
You can easily scale this up or down. Just keep the width wider than the height so it still reads clearly as a flag.
Star Template
Before You Start
Lay your pool noodles out before cutting so you can plan your stripe placement.
A traditional American flag has 13 stripes, starting and ending with red. For a craft version, you can use fewer stripes if you want a chunkier, more modern porch decoration. Seven stripes still gives a strong flag look and is much easier to fit onto a smaller backing board.
For a fuller traditional-style layout, use:
7 red stripes
6 white stripes
1 blue field in the upper left corner
White stars placed on the blue section
Instructions
Step 1: Prepare the Backing Board
Cut your backing board to the size you want your flag to be.
For a sturdy porch piece, foam board works well for a protected porch, while corrugated plastic board or thin plywood is better if it might be exposed to humidity or rain.
Mark the front of the board lightly with horizontal guide lines. This helps keep the pool noodle stripes straight, which is very useful because pool noodles have a mind of their own once glue gets involved.
Step 2: Cut the Pool Noodles in Half Lengthwise
Carefully slice each red and white pool noodle in half lengthwise so you have long half-round pieces.
The flat side will glue onto the backing board, while the rounded side faces outward. This gives the flag that big, chunky, raised look.
Use a serrated knife or craft knife and work slowly. Place the noodle on a cutting mat or scrap cardboard so you are not carving festive stripes into your kitchen table.
Step 3: Cut the Stripes to Length
Measure the width of your backing board and cut the red and white noodle pieces to fit.
If you are adding a blue field in the upper left corner, the top few stripes will need to be shorter so they stop beside the blue section.
A simple layout is:
Top 4 stripes shortened to leave room for the blue star field
Remaining stripes full width across the backing board
Lay everything out dry before gluing. This is the moment to adjust the spacing and trim anything that looks too long.
Step 4: Glue the First Stripe
Starting at the top, glue a red pool noodle half onto the backing board with the flat side down.
Press firmly and hold it in place for a few moments while the adhesive grabs. If using hot glue, work in sections so it does not cool before you place the noodle.
Continue adding stripes, alternating red and white.
Step 5: Build the Red and White Flag Stripes
Keep layering the pool noodle stripes down the board.
For a bold porch flag, leave no gaps between the noodles. The rounded pool noodle edges will create a lovely dimensional striped effect.
If your noodles are slightly different widths, do not panic. Trim where needed and keep the best-looking edges toward the outside.
Step 6: Create the Blue Star Field
For the blue section, you have a few options.
You can:
Use a blue pool noodle cut into shorter horizontal sections
Glue on a rectangle of blue craft foam
Paint the backing board blue before adding stars
Attach blue felt or blue adhesive vinyl
The easiest option is a rectangle of blue craft foam or painted board. Cut it to fit the upper left corner of the flag, then glue it in place over the stripe area or directly to the backing board before adding the shorter stripes around it.
For a more dimensional look, use blue pool noodle halves cut to the same height as the top section and glue them together side by side.
Step 7: Add the Stars
Star Template – large-star-cutout-template
Cut stars from white craft foam, felt, cardstock, or adhesive vinyl.
You can use a printed star template, a star punch, or a Cricut if you want them neat and uniform. If you are cutting by hand, fold the paper template first and trim until you like the shape.
Glue the stars onto the blue field.
For a simplified porch version, use 9 to 15 larger stars rather than trying to fit all 50. It will read better from a distance and save you from cutting tiny stars until your hand cramps.
Step 8: Reinforce the Back
Once the front is dry, flip the flag over and check the backing.
If the board feels flexible, glue two wooden paint stirrers, bamboo garden stakes, or thin dowels across the back. This stops the flag from bending and makes it easier to display.
For a larger porch flag, add one support near the top and one near the bottom.
Step 9: Seal for Outdoor Use
If your flag will be on a covered porch, this step is optional but helpful.
Spray the finished piece lightly with clear outdoor sealer. Do a test patch first, as some sprays may react with foam. Hold the can farther back than usual and use light coats rather than soaking the noodles.
Let it dry completely before hanging or displaying.
Step 10: Display Your Giant Pool Noodle Flag
You can hang the flag, lean it against a porch wall, or attach it to a fence or party backdrop.
Display options include:
Command strips for a protected door or wall
Twine or wire attached through the backing board
A sawtooth hanger if using plywood
Leaning it against a porch chair or crate
Attaching it to a party photo backdrop
For outdoor use, keep it under cover and away from high wind. Pool noodles are light, which is lovely for making and hanging, but less lovely if your porch gets a gust and your flag decides to visit the neighbour.
Tips for a Better Finish
Use a sharp blade for cleaner cuts.
Cut all stripes before gluing so you can adjust the layout.
Use a ruler or strip of cardboard as a spacer if you want very straight lines.
Choose thicker pool noodles for a chunkier, bolder flag.
For a rustic look, lightly dry-brush white paint over the edges after assembly.
If using hot glue, low-temperature glue is safer for foam.
If using construction adhesive, check that it is foam-safe before applying.
Kid-Friendly Version
For a kids’ group craft, skip the knife work and pre-cut all the pool noodles ahead of time.
Let kids help with:
Arranging the stripes
Gluing stars
Painting the backing board
Adding ribbon or mini bunting
Decorating with foam stickers
This would be a fun classroom, summer camp, or backyard party craft, especially if you make a smaller version for each child.
Creative Variations
Make a vertical porch flag by placing the stripes lengthwise down a tall backing board.
Add battery-operated fairy lights around the edge for evening parties.
Use glitter foam stars for a little sparkle.
Attach wooden letters spelling “USA” across the bottom.
Make a rustic version with muted burgundy, cream, and navy noodles or paint.
Create a matching mini version for a mantel, buffet table, or tiered tray.
Safety Notes
Adults should cut the pool noodles.
Use strong adhesive in a well-ventilated area.
Do not place near candles, grills, fire pits, or outdoor heaters.
If hanging outside, secure it properly so it does not blow away.
Bring indoors during storms or heavy wind.


What do you think of this project? Let us know!