
It’s big, bold, and absolutely perfect for your front porch, mantel, or even as a table centerpiece for Easter dinner. And best of all, it costs a fraction of what you’d spend buying one from a home décor store.
Get more details about this project
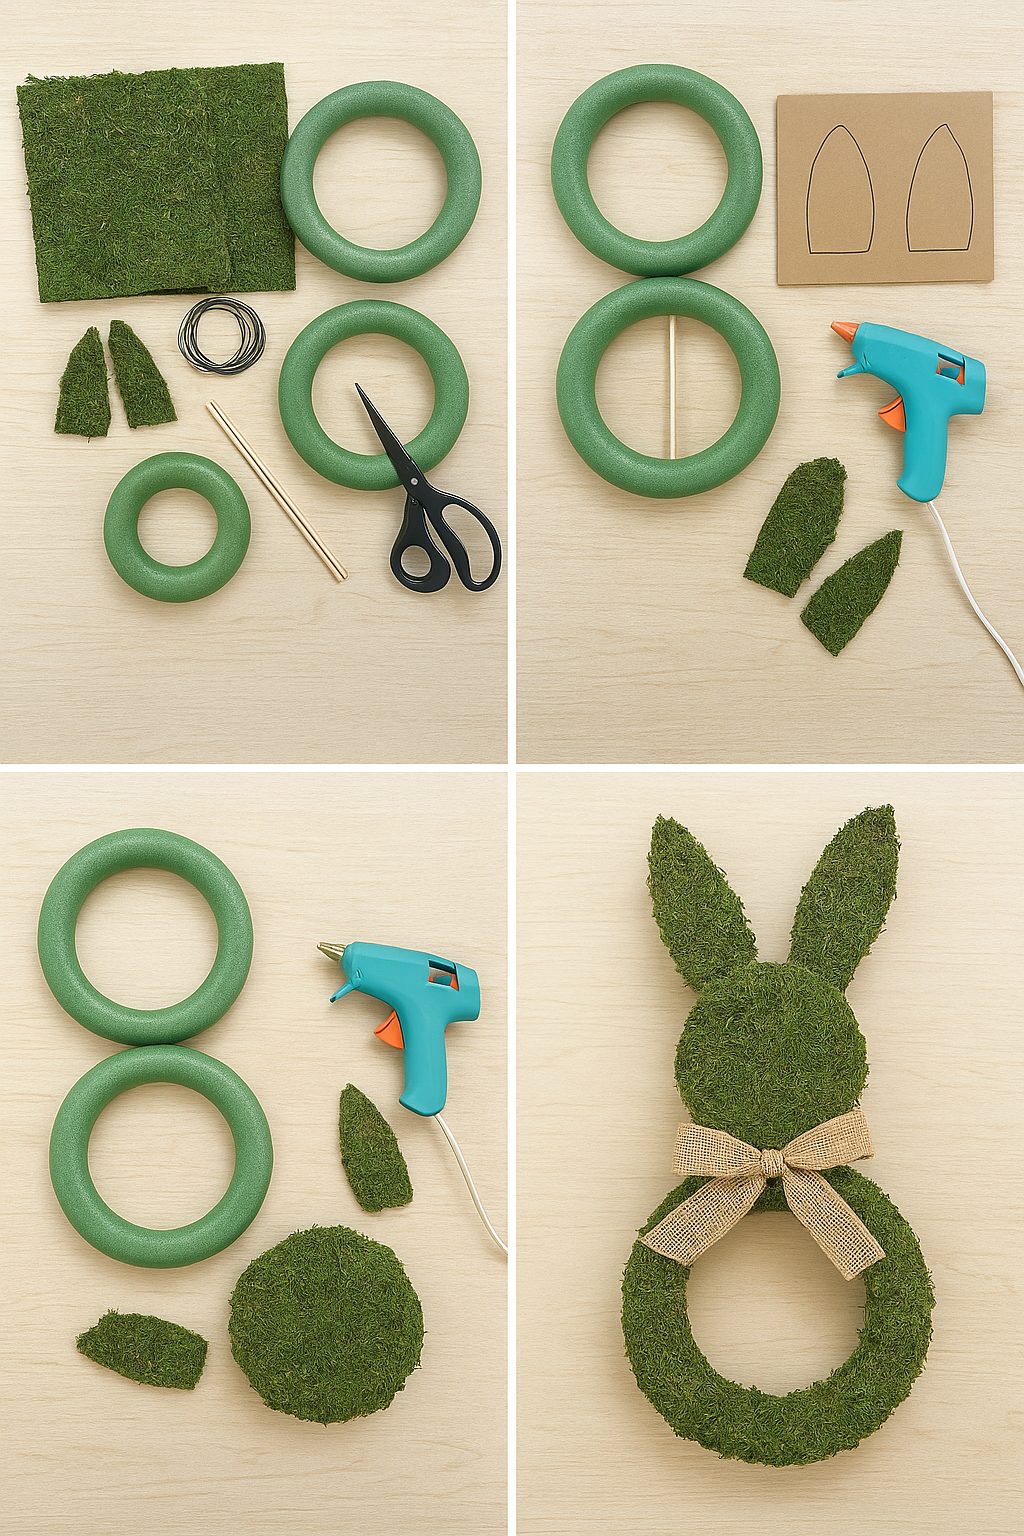
What you need
All supplies can be found at Dollar Tree (or any budget craft store):
- 2–3 packs of moss sheets or loose floral moss
- 2 foam wreath forms (different sizes for head and body)
- 1 pack of floral wire or hot glue sticks
- 1 pack of wooden skewers or dowels (to connect shapes)
- Cardboard or foam board (for ears)
- Ribbon or twine for a bow (optional)
- Scissors and hot glue gun
Instructions
It’s budget-friendly, easy to customize, and looks far more expensive than it is. Whether you’re hosting Easter brunch or just want something cheery for your spring décor, this giant moss bunny will be the star of the season.
Step-by-Step Instructions
1. Shape the Bunny Body
- Start with two foam wreath forms, one large (for the body) and one smaller (for the head).
- Use skewers or dowels to connect the two pieces together securely. Hot glue around the seam for extra hold.
2. Create the Ears
- Cut two ear shapes out of cardboard or foam board.
- Cover them with moss by either hot gluing moss sheets directly or pressing loose moss into a layer of glue.
- Attach the ears to the smaller wreath form (the head) with skewers and hot glue.
3. Cover Everything in Moss
- Working in small sections, apply hot glue to the foam forms and press moss firmly into place.
- Continue until both the head and body are completely covered, giving it that lush, natural look.
- Don’t worry if it looks messy at first—the more uneven and fluffy, the more realistic your bunny will look.
4. Add the Finishing Touches
- Tie a ribbon or twine bow around the bunny’s neck for a polished farmhouse touch.
- For extra charm, you can glue on a little cotton ball or pom-pom as a tail.
Display Ideas
- Front Porch Bunny: Place it in a planter with faux flowers for a grand Easter entrance.
- Mantel Decor: Nestle it among greenery garlands, pastel eggs, and candles.
- Table Centerpiece: Stand it in the middle of your dining table with a wreath of flowers around its base.
Tips & Variations
- Use green floral spray paint to fill in any gaps where the moss didn’t stick.
- Try making a mini version with smaller foam balls for place settings.
- Add fairy lights tucked into the moss for a magical evening glow.


What do you think of this project? Let us know!