
Get more details about this project
What you need
Large tin “lunch box” that opens from the top
Scrapbook paper (cardstock and patterned paper)
Scrapbook embellishments (ribbon, brads, chipboard letters, etc)
Templates or a cutting system (for the letters)
Scissors
Adhesive
Instructions
One suggestion is to make it into a card organizer to organize your greeting cards. You can also make it into a recipe box to store and protect your recipe secrets. Both projects should include file cards to help sort each category.
Here is what you will need to decorate your altered tin organizer:
Step 1
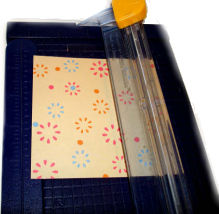
Measure the Paper
Cut your paper to fit the lunch box tin, my paper was 4 1/4″x 12″ (once piece for each side). You will have to measure the dimensions of your tin box and cut the paper accordingly. You can cover the outside of the tin completely or you may want to leave a white border around the paper. The “body” of the lunch box may be too large to wrap one piece of paper so you may have to cut two pieces and overlap them in the back or on the sides. For a flawless finish you should try to match up the patterns where the papers overlap each other. You will want to cut separate pieces of paper to cover the top of the box and the rim of the lunch box tin. Patterned paper works well for an altered tin project.
Step 2
Use a strong adhesive to glue the scrapbook paper to your tin. If you use liquid adhesive be sure to use it sparingly and be careful not to get the paper too wet or it may warp. Also you may want to go over the paper with a plastic spatula in order to smooth out any wrinkles or lumps from the glue. Liquid glass a product used in scrapbooking is a good alternative for gluing the paper to the tin. It can also be spread over the top of the paper to give it a glossy finish. This product will work similar to modge podge, but unlike the modge podge product the liquid glass is acid-free.
Step 3
Once you have covered the tin then you are ready to embellish it. Ribbon can be used to line the rim of the lunch box, as a border and to decorate the handle (like in the picture of the cards tin). Stamp letters and cut them out to spell CARDS or use your computer to print RECIPES. Die cuts, paper flowers and brads are other friendly embellishments that are easy to use and look great on altered tins.
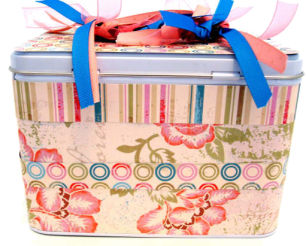
Embellish the tin 1
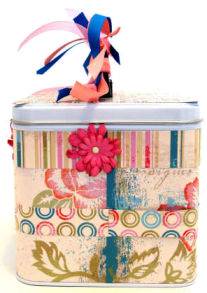
Embellish the tin 2
Step 4
In order to make file cards you can cut out your own file folders or just purchase the dividers that are available at craft and office supply stores (dividers in the picture were purchased from a craft store). Stamp or write the categories at the top of the file divider and decorate the front of the card if you wish.
Step 5
When your tin is completed and your file dividers are ready then you can organize the greeting cards or recipes into your tins and display them for everyone to admire.
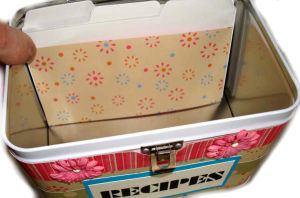
Add the recipes
A Scrapbooking altered lunch box tin organizer makes a great gift for almost any occasion. These projects are fairly inexpensive, (lunch box tins run about $5-$6) but they look so “rich” when they are complete.


hey yo this be koo
This tin is from Oriental Trading. Thanks for the nice comments.
This is such a CUTE idea!!! Some people said they found these tins @ hobby lobby… Is there anywhere else? For example, walmart or target.. I live in practically the middle of NOWHERE, so is there a more general place to find these?
i did this i got the box a hobby lobby it’s easier than it looks!
where did you get this tin?
so cute wish i had time to make it before school!
Wonderful gift idea. Thanks
Gorgeous. Love this
what’s wrong with the tin as it is? Looks twee
Gorgeous!
Cute idea!
OOooooo nice idea!