
Get more details about this project
What you need
Thrifted quilt, quilted bedspread, or quilted fabric scraps
Fabric scissors
Sewing machine
Coordinating sewing thread
Hand-sewing needle
Strong upholstery thread, embroidery thread, or crochet cotton
Polyester stuffing
Straight pins or sewing clips
Twig pieces, cinnamon sticks, wooden stems, or fabric-covered stems
Hot glue gun and glue sticks
Optional felt or fabric leaves
Optional raffia, ribbon, lace, or twine
Optional embroidery floss
Optional dried moss
Optional orange, cream, mustard, green, or brown quilted fabric
Instructions
There is something rather lovely about finding an old quilt at the thrift store and imagining what it could become. Even when a quilt is too stained, torn, faded, or worn to use on a bed, there are often plenty of good sections tucked between the damaged areas. Those textured pieces are perfect for making soft quilted pumpkins.
These thrifted quilt pumpkins have all the cozy charm of traditional autumn decorations, but they are made from fabric that might otherwise have been discarded. The quilting adds instant detail, so even a very simple pumpkin shape looks beautifully finished. It also means you do not need to spend hours piecing tiny scraps together before you can begin.
I especially like this project because the pumpkins do not need to match. In fact, they look far better when they are made in a mixture of sizes, shapes, and quilted textures. A tall pumpkin, a squat pumpkin, and one slightly wonky pumpkin grouped together will always look more interesting than six identical ones lined up like they are waiting for school photos.
White and cream quilts create soft neutral pumpkins that work beautifully with farmhouse, cottage, primitive, and vintage decor. Orange quilted fabric gives the project a more traditional Halloween feel, while faded green, mustard, rust, and brown fabrics work well for a richer autumn display.
You can use these handmade quilt pumpkins in table centrepieces, tiered trays, baskets, mantel displays, Halloween arrangements, or even as handmade gifts. They are lightweight, easy to store, and much less likely to roll off the table than a real pumpkin—which is always helpful when the craft room is already balancing three unfinished projects and a cup of tea.
Choosing a Quilt for This Project
Look for quilts with interesting stitched textures and fabric that is still strong enough to sew.
Good options include:
- Old patchwork quilts
- Machine-quilted bedspreads
- Candlewick quilts
- Matelassé coverlets
- Vintage quilted pillow shams
- Damaged baby quilts
- Quilt offcuts
- Pre-quilted cotton fabric
Avoid quilts with heavy mould, strong musty odours, or fabric that tears easily when gently pulled.
Wash and dry the quilt before cutting into it. If the quilt is very old or delicate, wash it gently by hand and allow it to dry flat.
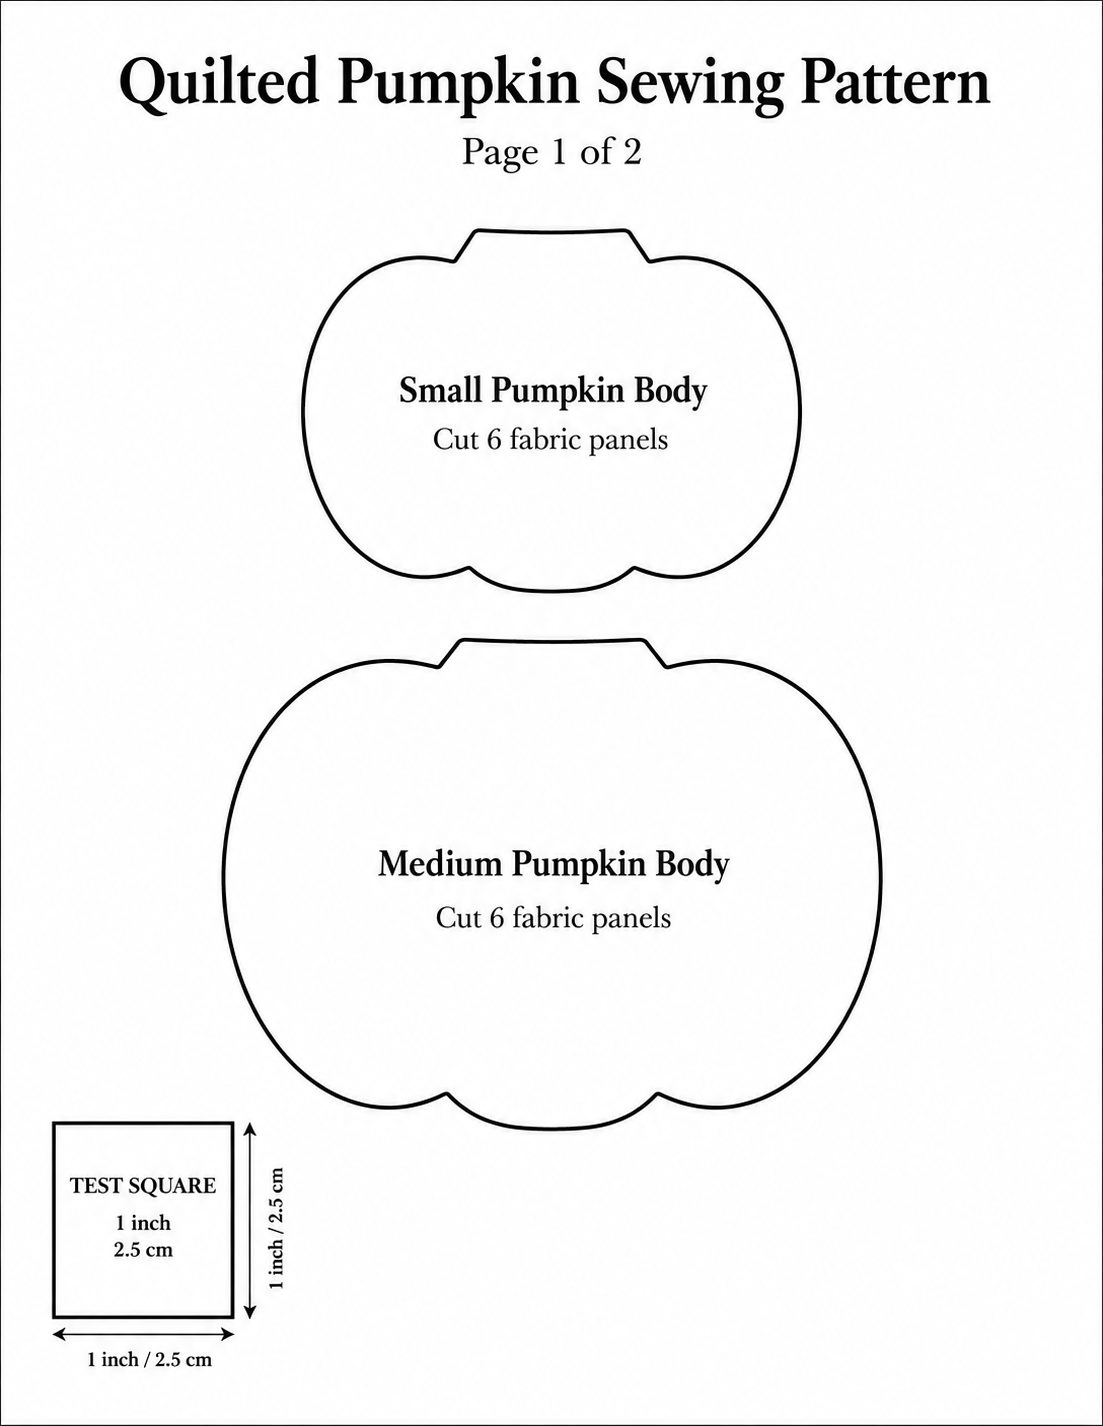
Pumpkin Size Guide
You can adjust the size of the fabric rectangle to make different pumpkins.
Small Pumpkin
Cut one rectangle approximately:
- 20 cm wide x 12 cm high
Medium Pumpkin
Cut one rectangle approximately:
- 30 cm wide x 18 cm high
Large Pumpkin
Cut one rectangle approximately:
- 40 cm wide x 24 cm high
These measurements are only a guide. Wider rectangles create fuller pumpkins, while taller rectangles create more upright pumpkins.
Instructions
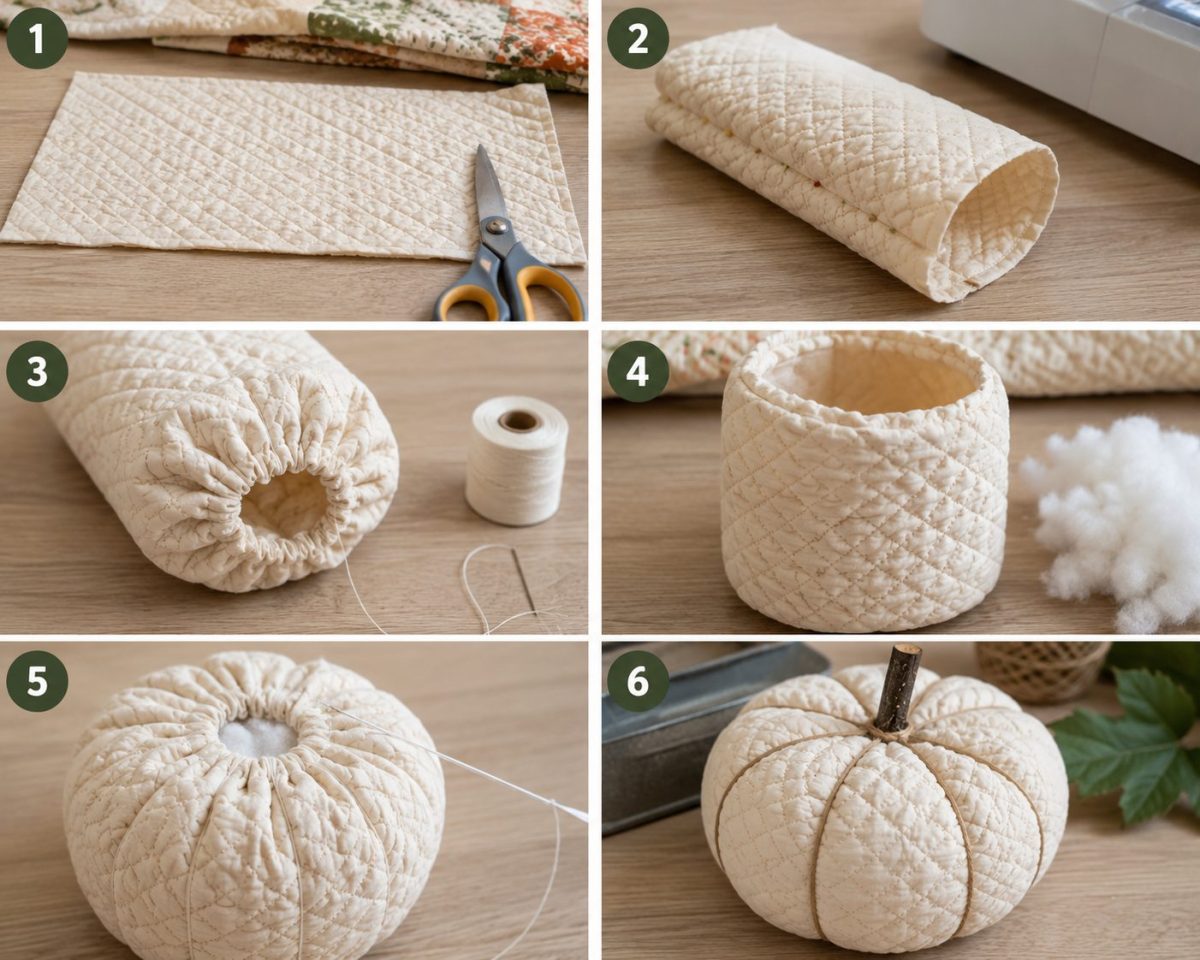
Step 1: Cut the Quilt Fabric
Choose a section of the quilt with attractive stitching.
Cut one rectangular piece for each pumpkin.
Try to avoid placing a bulky quilt seam directly where the side seam of the pumpkin will be sewn, as multiple layers can become difficult to stitch through.
If the quilt has a patchwork design, position the rectangle so the most attractive section will appear at the front of the finished pumpkin.
Step 2: Fold the Fabric
Fold the rectangle in half with the right sides facing each other.
Match the short edges.
Pin or clip the short edges together.
You should now have a fabric tube shape once the side seam is sewn.
Step 3: Sew the Side Seam
Sew along the pinned short edge using a 1 cm seam allowance.
Backstitch at the beginning and end.
If the quilt is thick, use a longer stitch length and sew slowly.
Trim away any very bulky seam allowance, but do not cut too close to the stitching.
Step 4: Gather the Bottom
Thread a hand-sewing needle with strong thread.
Sew a running stitch around one open end of the fabric tube, approximately 1 cm from the edge.
Use fairly large, even stitches.
Pull the thread firmly to gather the opening closed.
Push the raw edges inward as you tighten the thread.
Sew across the gathered area several times and knot the thread securely.
This gathered section will become the bottom of the pumpkin.
Step 5: Turn the Pumpkin Right Side Out
Turn the fabric tube right side out.
Use your fingers to gently shape the gathered bottom.
Place the pumpkin on the table and check that it sits reasonably flat.
Do not worry if the bottom is not perfect. The stuffing and shaping will help even it out.
Step 6: Stuff the Pumpkin
Fill the pumpkin with polyester stuffing.
Add the stuffing gradually, pushing it into the lower edges first.
For a soft, relaxed pumpkin, use less stuffing.
For a rounder, firmer pumpkin, add more stuffing, but avoid packing it so tightly that the quilting becomes stretched or distorted.
You can also use clean quilt offcuts or fabric scraps as part of the filling, although polyester stuffing will give a smoother shape.
Step 7: Gather the Top
Thread the needle with another long piece of strong thread.
Sew a running stitch around the top opening.
Pull the thread to gather the opening, but do not close it completely yet.
Leave a small opening large enough to insert the stem.
Add or remove stuffing until you are happy with the pumpkin shape.
Pull the gathering thread firmly and secure it with several stitches.
Step 8: Shape the Pumpkin Sections
Cut a long piece of strong thread, crochet cotton, or thin twine.
Place the centre of the thread underneath the pumpkin.
Bring both ends up and over the pumpkin, crossing at the top.
Pull gently to create the first pumpkin groove.
Take the thread back underneath the pumpkin and bring it up again in a different position.
Repeat this process until the pumpkin has six or eight sections.
Keep the spacing as even as possible, but it does not need to be exact.
Pull the thread firmly enough to create visible ridges without crushing the pumpkin.
Tie the ends securely at the top.
For very thick quilted fabric, strong waxed thread or upholstery thread may be easier to use than ordinary sewing thread.
Step 9: Add the Stem
Trim a small twig to the desired length.
Apply hot glue around the base of the twig and press it into the gathered opening.
Hold it in place until the glue begins to set.
Other stem ideas include:
- Cinnamon sticks
- Wooden dowels
- Rolled brown felt
- Fabric-covered wire
- Wine corks
- Short wooden craft sticks
- Twisted paper stems
If children are helping with the project, an adult should handle the hot glue gun.
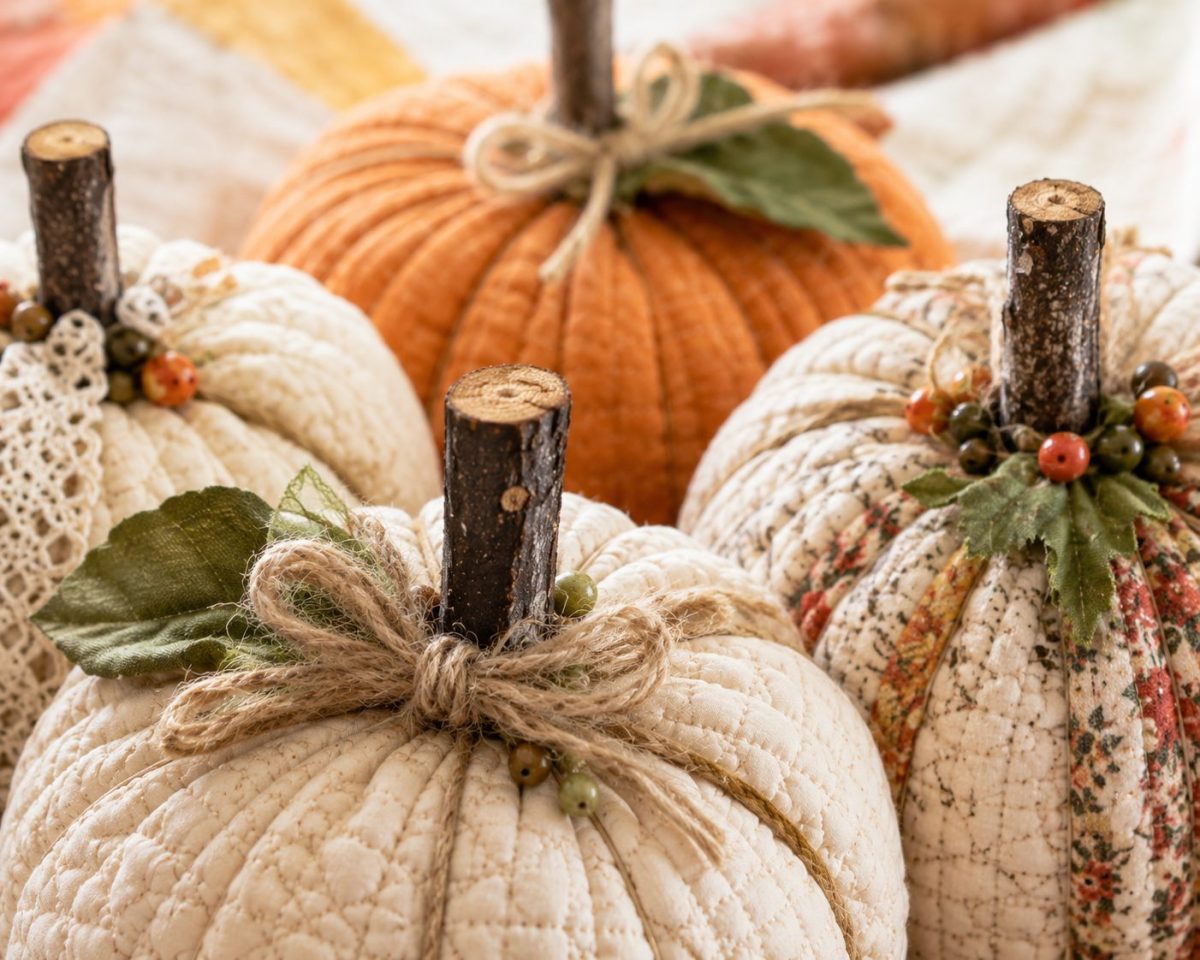
Step 10: Add Leaves and Embellishments
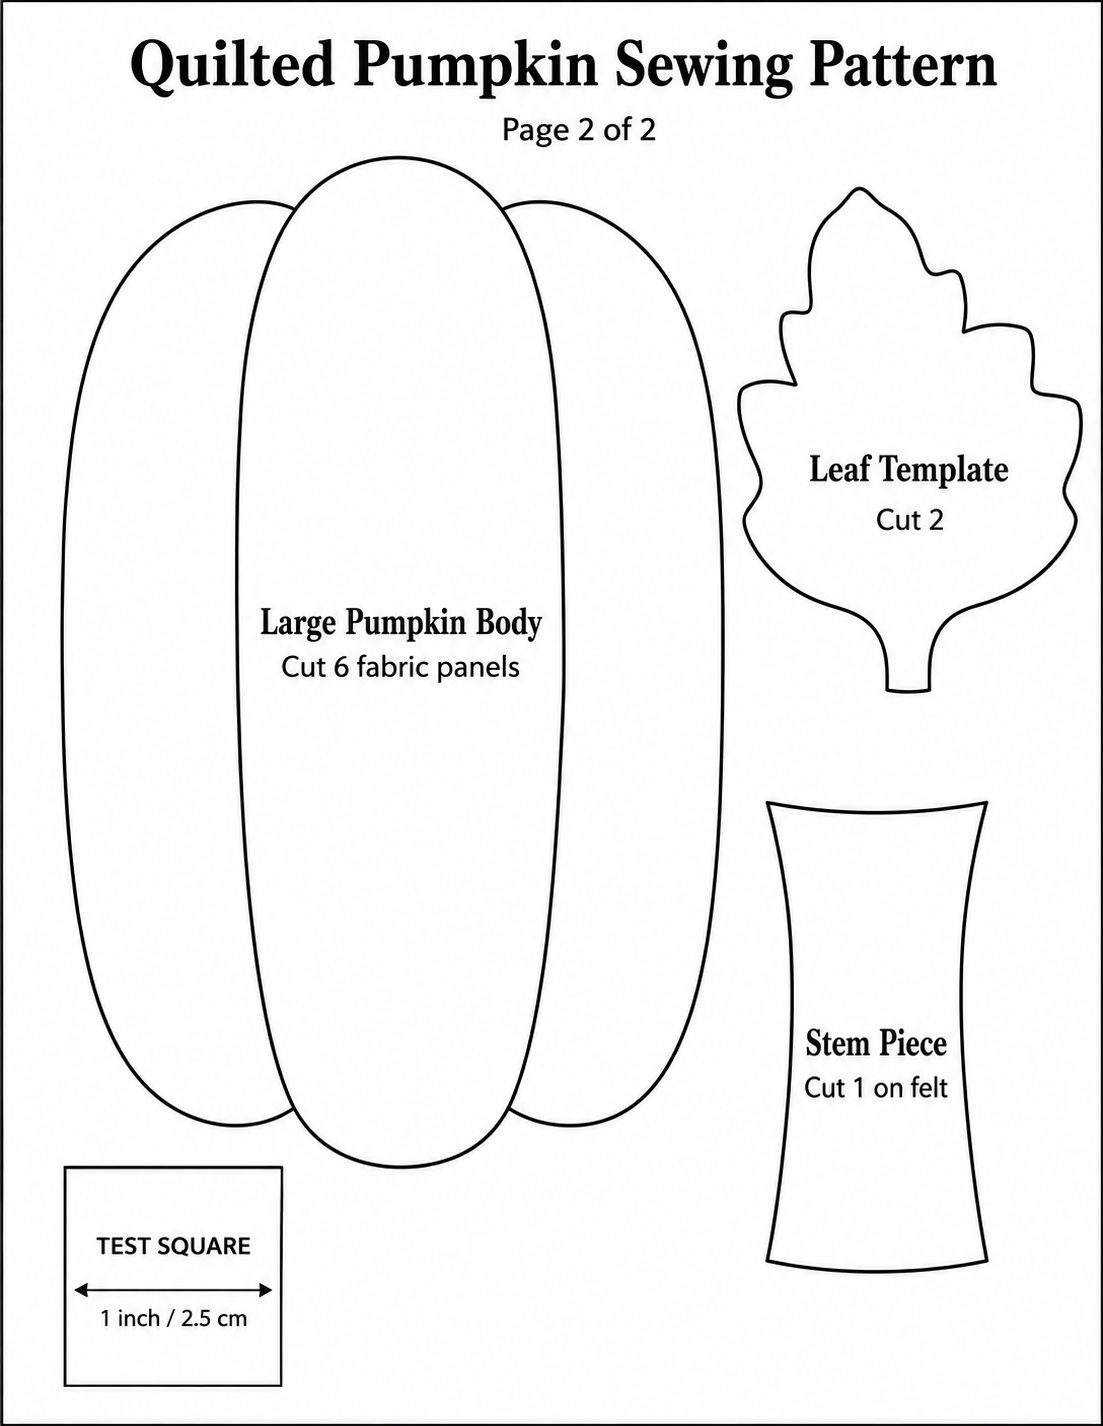
Cut one or two simple leaf shapes from felt, quilt scraps, or green fabric.
Glue or stitch them around the base of the stem.
Tie raffia, twine, lace, or ribbon around the stem if desired.
You can also add:
- Small wooden buttons
- Fabric tendrils
- Dried moss
- Embroidery details
- Tiny bells
- Vintage lace
- Torn fabric strips
Try not to cover too much of the quilted surface. The texture of the old quilt is what makes these pumpkins special.
How to Make a Squat Pumpkin
To make a flatter, wider pumpkin, begin with a rectangle that is much wider than it is tall.
Stuff it fairly firmly, then pull the shaping thread tightly around the pumpkin.
Push down gently on the centre while shaping the sections.
A squat pumpkin looks especially good beneath a taller one in a basket or table display.
How to Make a Tall Pumpkin
Use a taller rectangle and do not overstuff the sides.
Shape the pumpkin sections using thread, but pull more gently so the pumpkin remains upright.
A tall pumpkin works beautifully with a long twig stem and a torn fabric ribbon.
Raw-Edge Pumpkin Variation
For an even more rustic pumpkin, sew the side seam with the wrong sides together so the seam remains visible on the outside.
Trim the seam with pinking shears or allow it to fray naturally.
This works particularly well with old cotton quilts and primitive-style autumn decorating.
No-Sew Shortcut
A very simple version can be made by wrapping quilted fabric around a ball of stuffing.
Gather the fabric tightly at the top and secure it with strong elastic bands or twine.
Wrap more twine around the pumpkin to create the sections.
Glue a twig stem into the centre.
The no-sew version is quicker, but the sewn pumpkin will usually hold its shape more securely and last longer.
Decorating Ideas
Arrange your quilted pumpkins in:
- A wooden bowl
- A vintage basket
- A dough bowl
- A tiered tray
- A mantel display
- A Halloween centrepiece
- An entryway vignette
- A shelf beside old books and candles
- A basket with matching quilt ghosts
A group made from the same thrifted quilt will coordinate beautifully, while pumpkins made from several different quilts will create a more collected, patchwork look.
These soft pumpkins are also a practical option for homes with children or pets because there is no glass to break and no real pumpkin to slowly collapse into something suspicious behind the display.
Once you have made one, it is very easy to turn the remaining quilt into a whole pumpkin patch. Start with a small pumpkin, add a tall one, make a slightly crooked one from the awkward fabric offcut, and before long you will have used almost every salvageable piece of that old quilt.



What do you think of this project? Let us know!