
Get more details about this project
What you need
Pinecones – small to medium size, cleaned and dried
Wooden beads – round, about 1 inch in diameter
Acrylic paint – in your chosen skin tones, hair color, and white for the pinecones
Fine-tip black marker – for drawing the face
Gold or silver chenille stems (pipe cleaners) – for halos
Twine or string – for hanging
Cardstock or thin cardboard – for the angel wings
Scissors and glue gun
Printable Templates – [Download the Wing Template and Face Guide at CraftBits.com]
Instructions
1. Prepare Your Pinecones
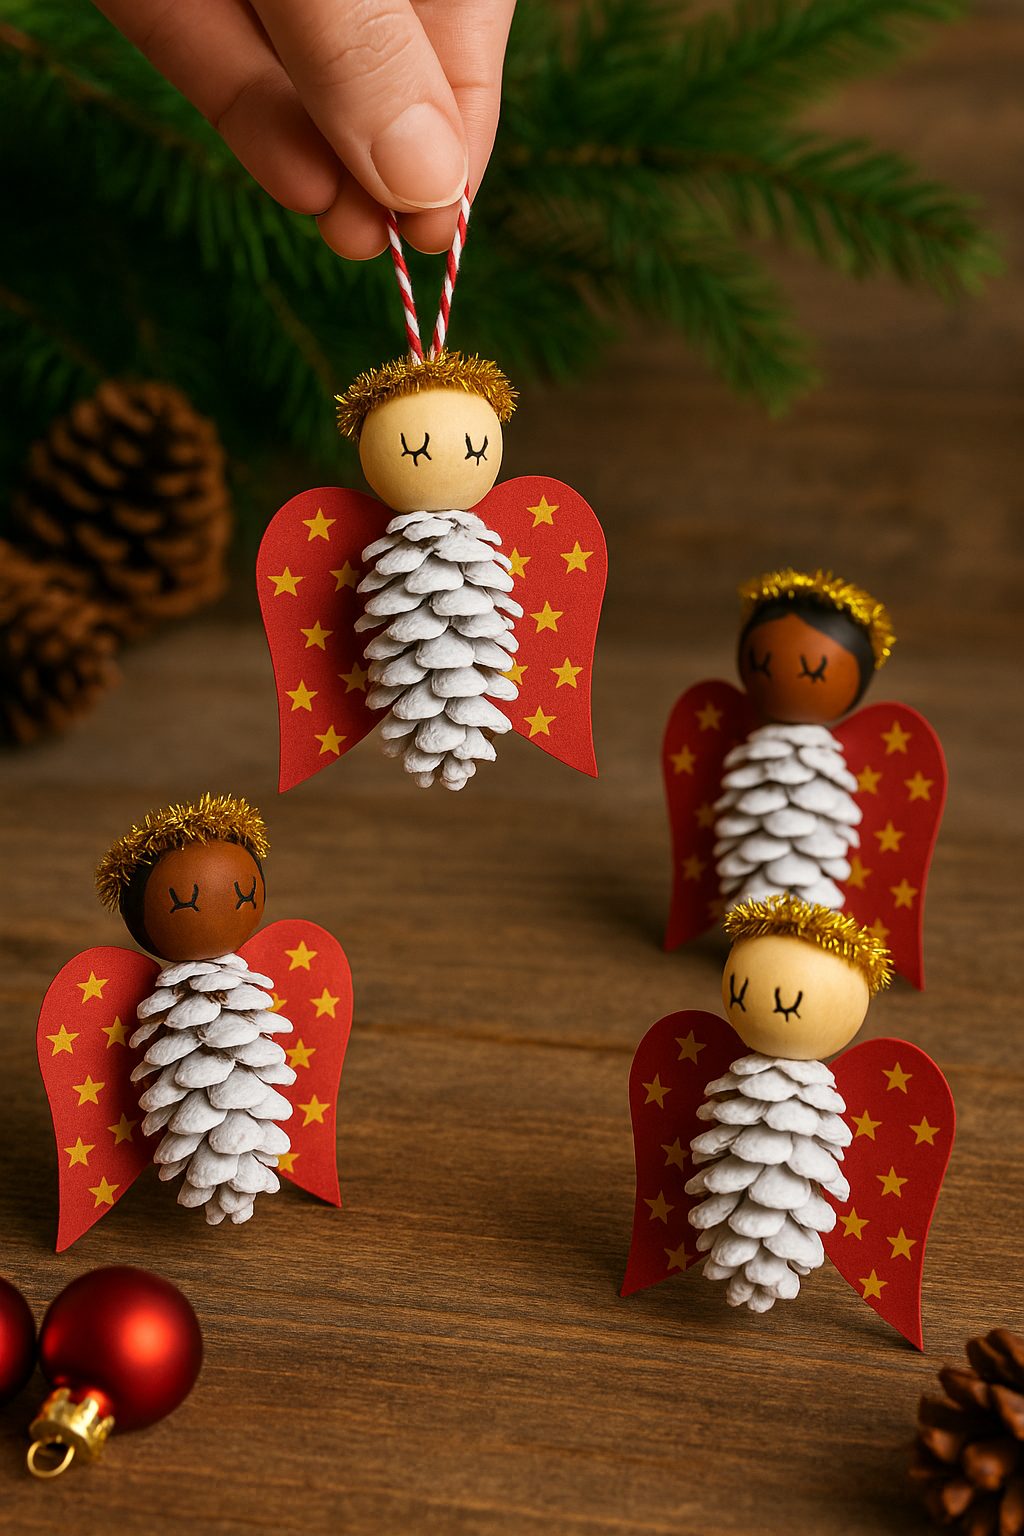
Gather a few pinecones and give them a good brush to remove any dirt or loose bits. If they’ve been outside, bake them at 100°C (212°F) for 20 minutes to remove bugs or moisture. Once cooled, paint the pinecones white (or leave them natural for a rustic look). Let dry completely.
Tip: For a snow-dusted effect, dry-brush just the edges of the scales with white paint.
2. Paint the Wooden Beads
Using acrylic paint, paint your wooden beads in skin tones of your choice. Once dry, use a smaller brush to paint on the hair color. Don’t worry about perfection — a bit of brush texture adds to the handmade charm.
Crafty shortcut: You can paint a few different hair shades so each angel looks unique.
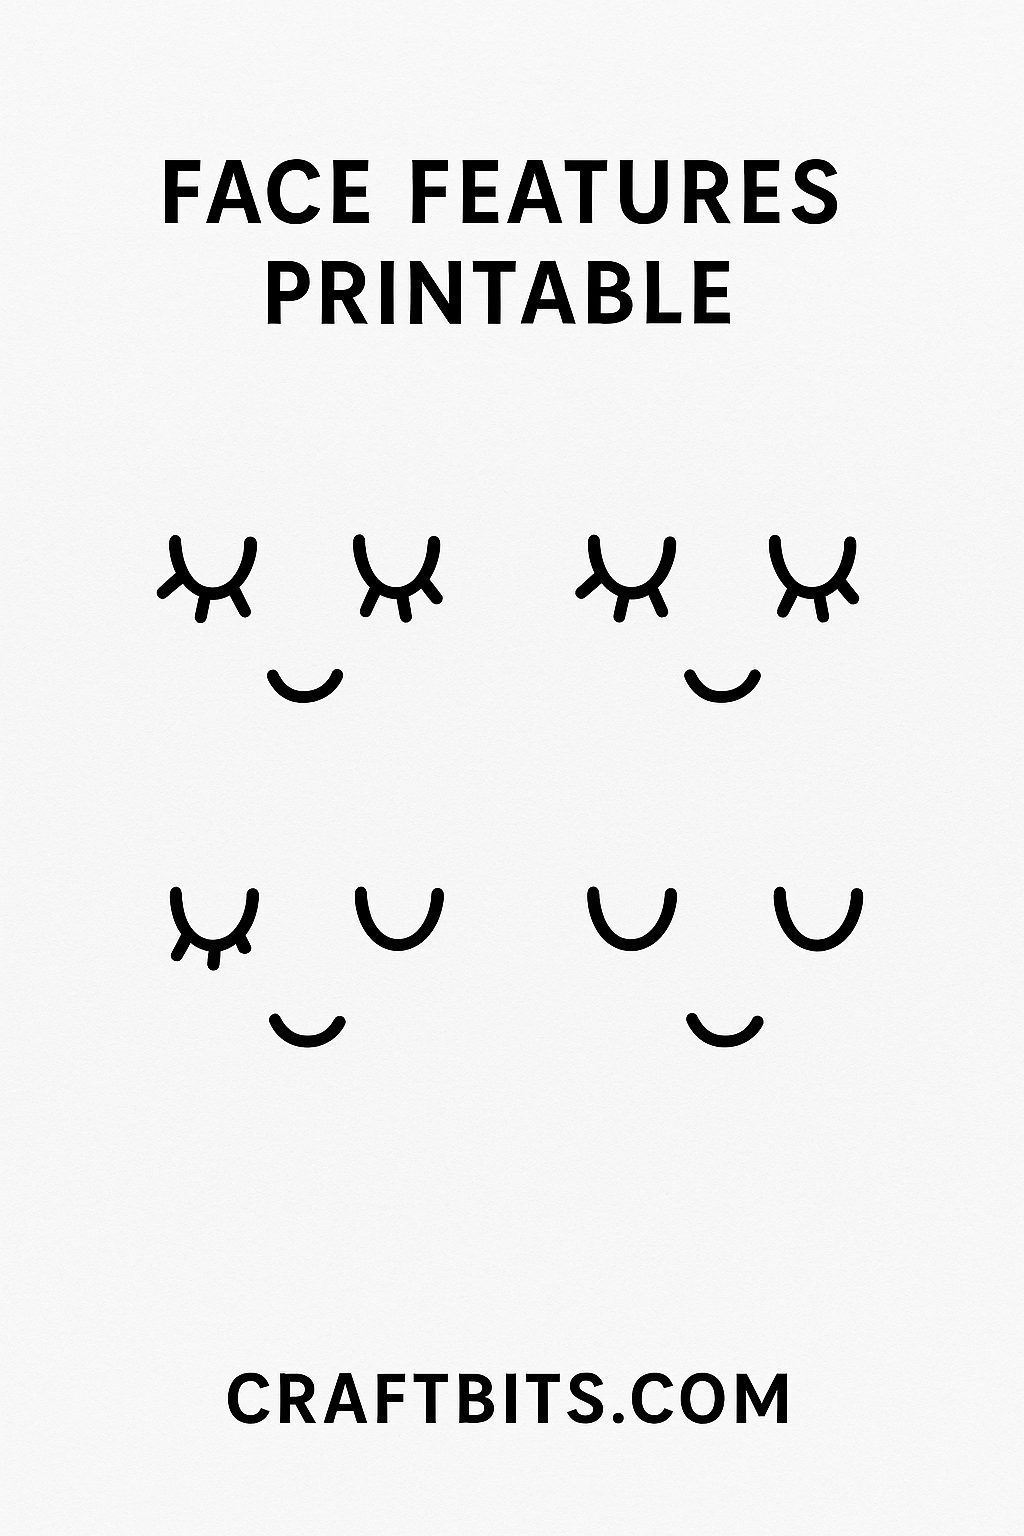
3. Draw the Angel’s Face
Use your fine-tip black marker or a tiny brush to draw sleepy eyes and a sweet smile. You can lightly trace from the Face Features Printable before filling them in — it’s a foolproof guide for keeping all your angels consistently adorable.
4. Create the Halo
Cut a small length of your chenille stem and twist it into a circle. Glue the halo to the top or back of the bead’s head. If you want the angel to look like it’s glowing, use gold or iridescent chenille stems.
5. Attach the Head to the Body
Add a generous dab of glue to the top of your pinecone and press the bead in place. Hold for a few seconds until it’s firmly set. Your angel should now be starting to take shape.
6. Make the Wings
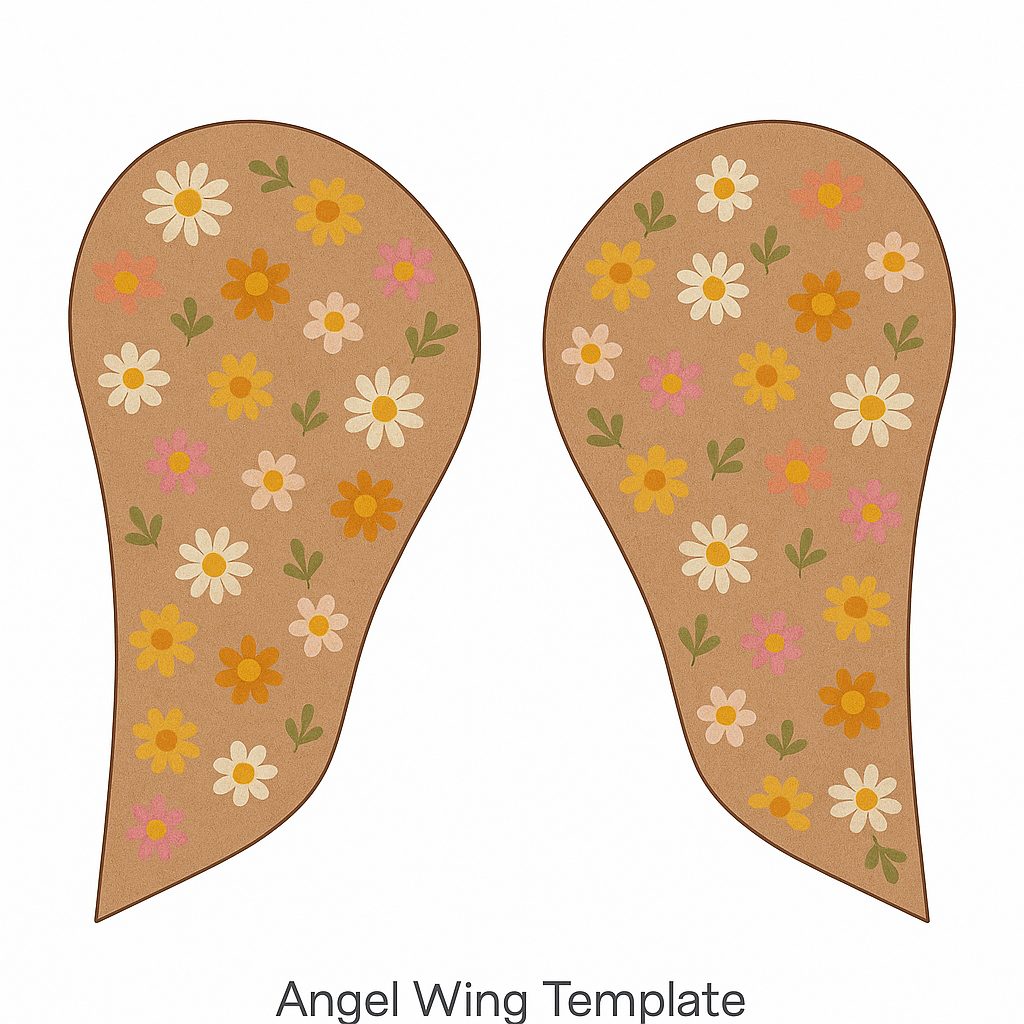
Print the Angel Wing Template on cardstock or trace it onto recycled cereal box cardboard for a rustic feel. Cut out the wings and decorate them however you like — you can paint floral motifs, use decoupage napkins, or glue on dried flowers for a natural look.
The version shown here uses the CraftBits Floral Printable Template, which gives you sweet daisy-inspired wings that match perfectly with a woodland or boho holiday theme.
7. Add the Wings
Once decorated, glue the wings to the back of the pinecone, aligning them just below the bead head. Make sure they’re even — a quick peek from the front helps to adjust them before the glue sets.
8. Add a Hanging Loop
Cut a small piece of twine, form a loop, and glue it behind the head or thread it through the halo. This loop will allow your angel to hang beautifully on the tree.
Extra Tips
- Personal Touches: Add lace trim or a little glitter on the wings for sparkle.
- Table Decor: These angels make lovely placeholders — just attach a name tag to the twine.
- Gifting Idea: Tie one to a wrapped present or include in a handmade ornament exchange.
Printable Templates
- Angel Wing Template (Floral Design) – printable and cuttable design that perfectly fits standard pinecones (7–10 cm tall).
- Face Features Guide – includes sleepy-eye, smiling-face designs you can trace directly onto your bead.
Both templates are free and available for download at CraftBits.com — just print, cut, and craft!
There’s something deeply comforting about creating these pinecone angels by hand. The mix of nature, simplicity, and love that goes into each one makes them feel timeless. Whether you’re crafting solo with a cup of tea or sharing the table with grandkids, you’ll end up with a little piece of joy to hang on your tree.
And best of all? Each angel will have its own personality — just like the people you’ll be gifting them to.


What do you think of this project? Let us know!