What you need
Broom handle (a branch about 1-inch in diameter and 3 feet long is featured in these photos, but you can use any size you prefer, from a small hand broom to the size of a traditional kitchen broom).
Herbs and greenery
Drill
Cotton string or twine
Scissors
Hot glue gun and glue sticks
Twisted raffia (approximately 1 yard)
Embellishments
Instructions
Many people enjoy the ritual of spring cleaning, but magical folks also want to cleanse the energy of their home after removing the dust and cobwebs. When not in use, your energy cleansing broom can hang in your kitchen or next to the front door, disguised as an attractive decoration for your home.
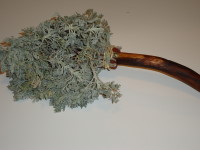
The cleansing broom featured in these tutorial photos is made with a branch of walnut wood, chosen for its magical affiliation with good health, and from olive branches (for peace), rosemary (for purification) and Artemisia (for love). Other good choices are:
Cedar (purification)
Verbena (purification)
Lavender (peace)
Willow (love)
Eucalyptus (healing)
Thyme (healing)
Horehound (exorcism)
If possible, use herbs and greenery available in your own yard. When collecting live materials for magical use, remember to “ask the plant’s permission” before harvesting.
Clean the branch with a scrubbing sponge and water, just enough to remove dirt and loose bark. You can strip away all the bark, sand and stain it you prefer, or leave the branch rough and natural. The handle featured in these photos has been cleaned, lightly sanded and oiled to preserve the wood, but otherwise left in a mostly natural state.


Drill a hole through the top (the thickest end) of the branch and loop a piece of string through it for a hanger.
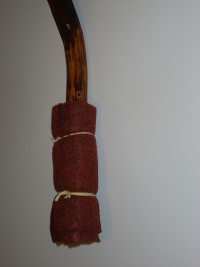
Wrap a 3- to 5-inch piece of thick felt, canvas or leather on the end of the broom and tie it securely in place with string. This will serve as a foundation for applying your greenery and act as a glue barrier. Later, when the herbs become old and you want to change them, you can remove the foundation and reuse the handle. Without the foundation, you would have a difficult time removing glued materials from the wood.


Strip the foliage from the top 3 inches or so of your stems. Gather a layer of greenery and arrange it around the foundation. When you’re satisfied with the placement, securely tie the branches onto the foundation with string.
Tips for Applying the Greenery:
Think layers when applying the greenery. Whether you’re using only one type of herb, or mixing several items together, attach them in two or three layers.
Don’t be worried if your broom looks a little scraggly with the first layer. Fill in blank spaces and create an attractive shape as you build the second and third layer.
If you’re using more than one type of herb, consider putting the fullest variety on first and saving the most decorative item for the outer layer.
Trim the bare tops of the stems to be even with the top of the foundation after each layer is applied.
Tie the greenery onto your broom as securely as you can. As the stems dry they will shrink in size. Items that were not tied on tightly might fall out.
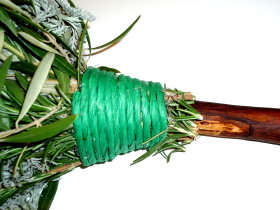
Wrap a layer of twisted raffia around the stem tops. Begin and end at whichever points you feel are the most attractive or necessary, but do not extend the raffia past the top of the foundation. Apply two generous dollops of hot glue on opposite sides of the broom, make a few tight wraps around, then apply more glue and wrap, glue and wrap. Alternate the placement of the glue each time to be sure the raffia is secure from all sides. The hot glue will also help keep the stems in place as they dry and shrink. After the glue has cooled, take a few minutes to clean away any glue that seeped through the raffia strands.
Trim the bottoms of the greenery to improve the overall shape if needed, or enjoy it in its natural state.
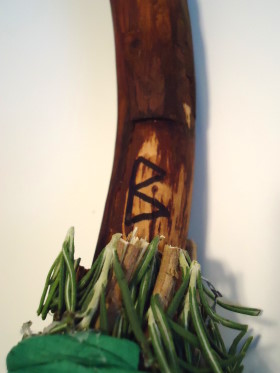
Empower your energy cleansing broom further with embellishments. You can whittle a hole in the top of the handle to imbed a crystal, or decorate the hanging loop with stones, beads or feathers. Use a wood burning tool or permanent marker to draw a symbol that represents spring and renewal, such as the rune known as Berkano.


What do you think of this project? Let us know!