What you need
 1. Popsicle sticks. (large or medium).
2. Scissors.
3. White Glue.
4. Paint.
5. Paint Brush.
6. Ruler.
Instructions
Popsicle Sticks Airplane Craft
Instructions:

Step 1:
To make the popsicle stick airplane craft, first, you’ll need to gather all the listed supplies.
Take a clean medium or large-sized popsicle stick.

Step 2:
Paint the popsicle stick with red paint.
Allow the paint to dry completely.

Step 3:
While the paint is drying, take another popsicle stick and cut it in half vertically.
Then, measure 3 or 4 centimetres gap on the popsicle stick and then draw a curved line there.
Make sure the curved line is similar like the curve on the other end of the popsicle-stick.
Step 4:

Cut out the popsicle stick along the curved line. This piece is going to be our plane’s horizontal stabilizer.
Step 5:
Now paint the horizontal stabilizer and leave it to dry.

Step 6:
Now take two more popsicle sticks, and cut off the top of the sticks about 1 or 2 centimetres.

Step 7:
Now, take one of the popsicle sticks and the small cut out and glue the cut out on the flat side of the
popsicle stick.

Step 8:
Then take the other popsicle stick and place it on top of the previous stick.
Glue the top of the popsicle stick on the small piece and glue both ends of the large popsicle sticks
together.
Allow the glue to dry.

Step 9:
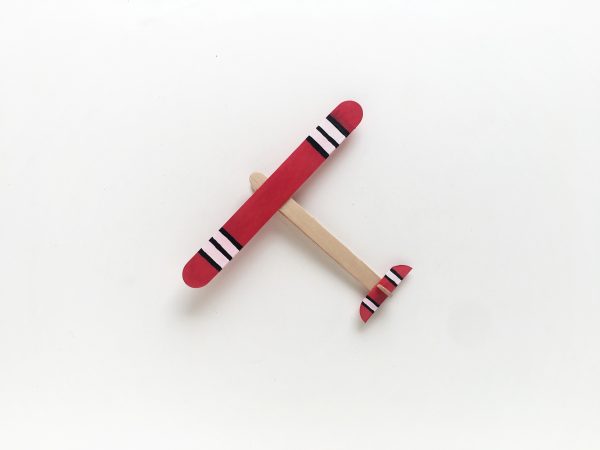
Glue the red large popsicle stick horizontally over the body of the aeroplane.
Then take the remaining small cut out from STEP-6 and glue it on the horizontal stabilizer.

Then glue the whole piece on the end of the aeroplane’s body.
Step 10:
To decorate the plane, take some white paint and a paintbrush.
Then paint 1 inch with white paint on both sides of the plane’s wing.
Allow the paint to dry.

Step 11:
Then use a thin paintbrush and black paint to draw small lines over the white paint to finish off the
decoration.


What do you think of this project? Let us know!