
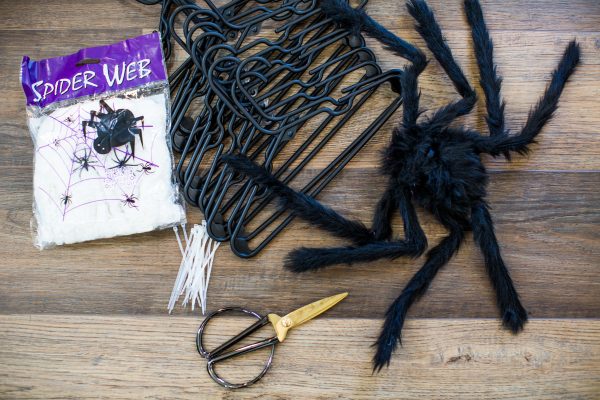
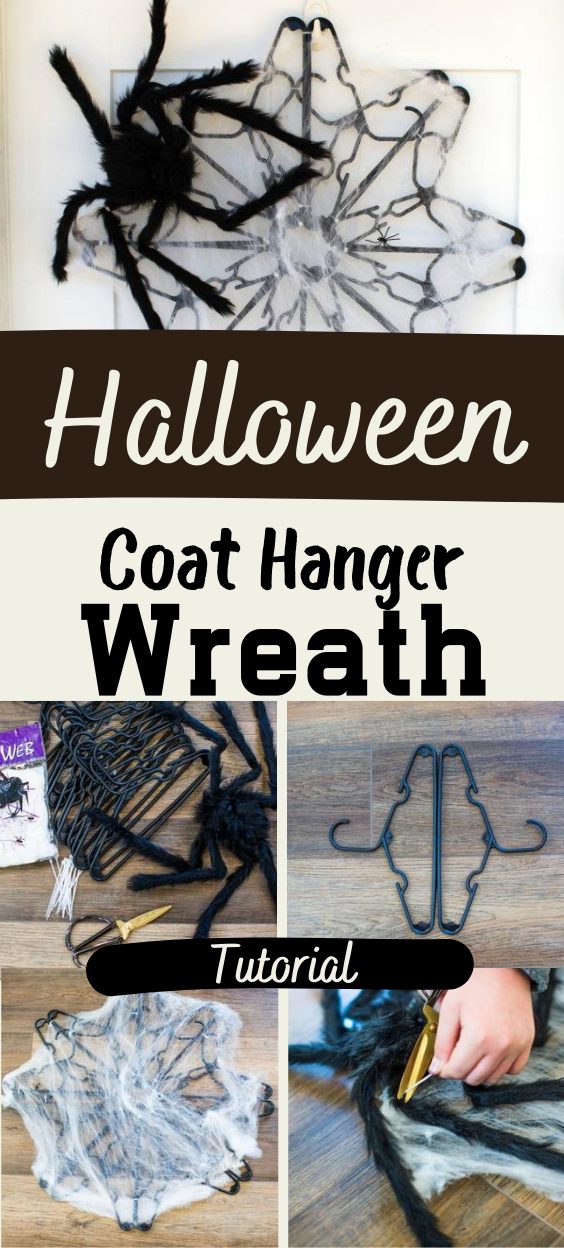
What you need
-You will need a total of 16 coat hangers (I have found that the kid/baby sized coat hangers work best.)
-Zip ties
-Scissors
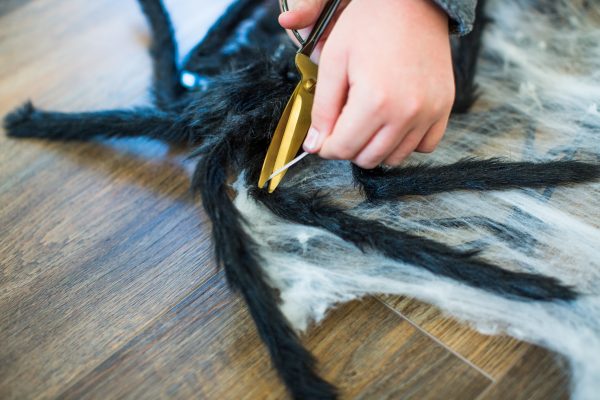
-Webbing
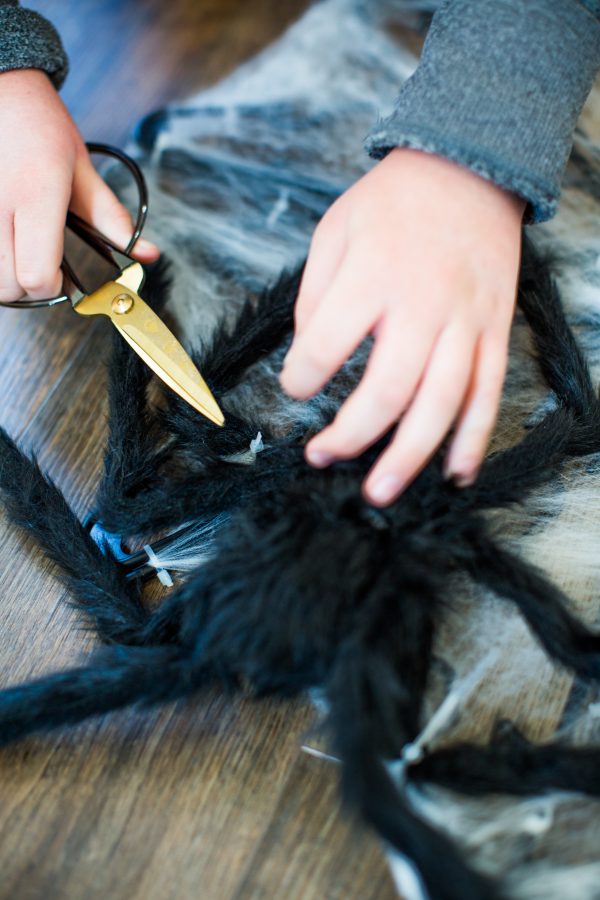
-large spider (your preference on size, no right or wrong way!)
Instructions
Tips before getting started:
You will place all of your coat hangers

I am such a visual person that I hope all of these pictures truly help you go step by step…although I’ve written them out for you here too!
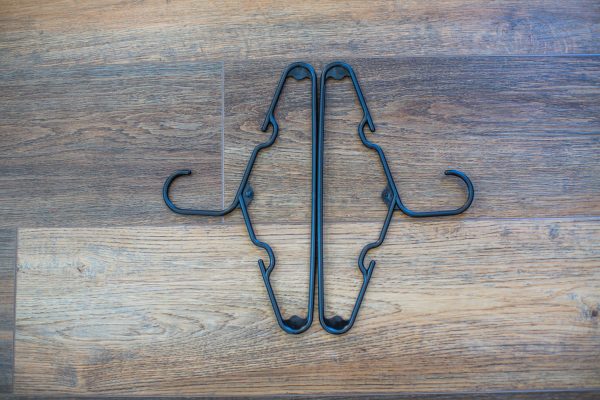
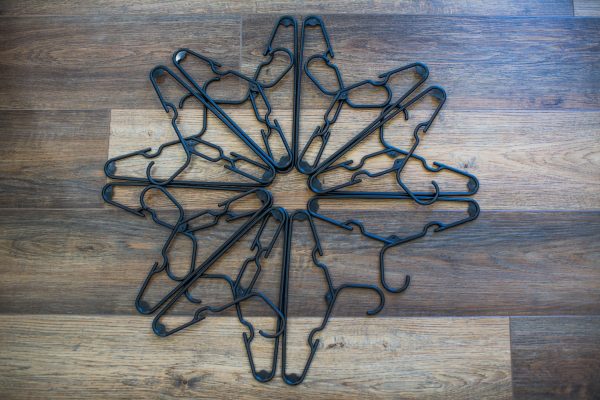
Step 1: Start with 2 hangers and place them side by side as pictured above. This is what we will call the “basic pair”. IMPORTANT: Make sure that the hooks of ALL of the clothes hangers face the same way!
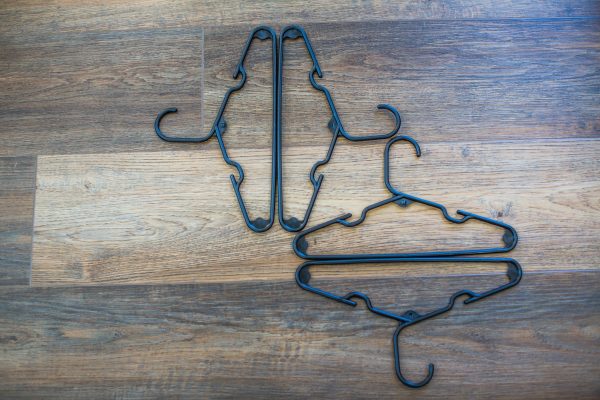
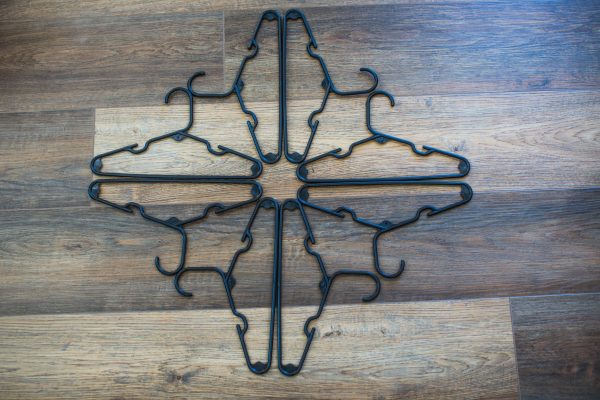
Step 2: Continue with the same pairing of clothing hangers to complete the first layer, as seen in the pictures.
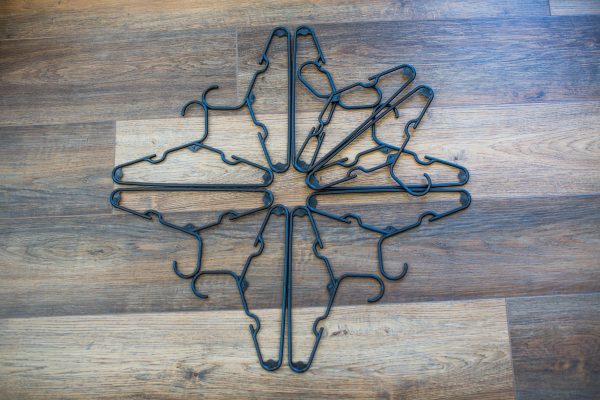
Step 3: This completes the 1st layer. Now using the same base pair we will begin layer 2, which will be placed directly on top of the 1st layer. REMINDER: DO NOT zip tie your web until BOTH layers are assembled and in place.
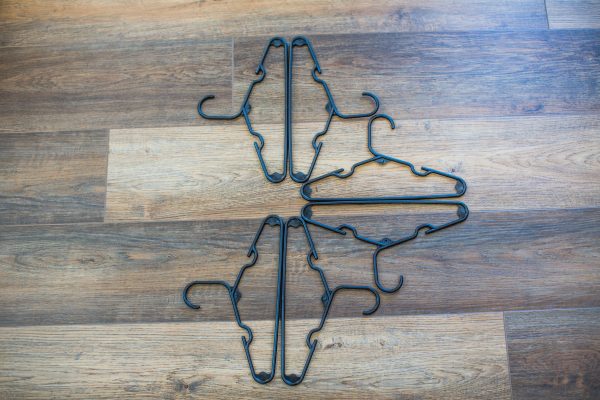
Step 4: Now align 2 hangers to form your “base pair”. Place them on top of 2 hangers from the 1st layer, with the hooks of the hangers lining up with the bottom of the hangers in the 1st layer.
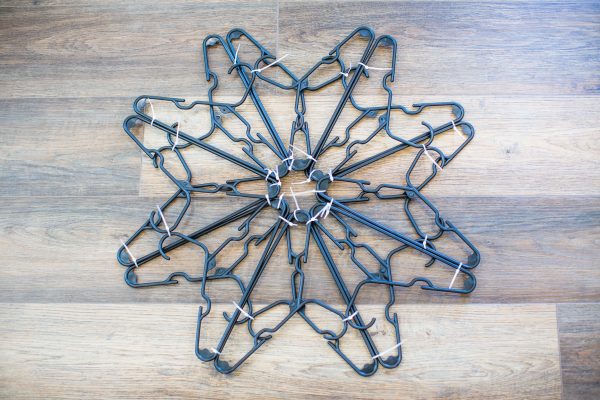
Step 5: Continue adding pairs of hangers as directed, until you have 8 hangers in layer #2 on top of your 8 hangers in layer #1.
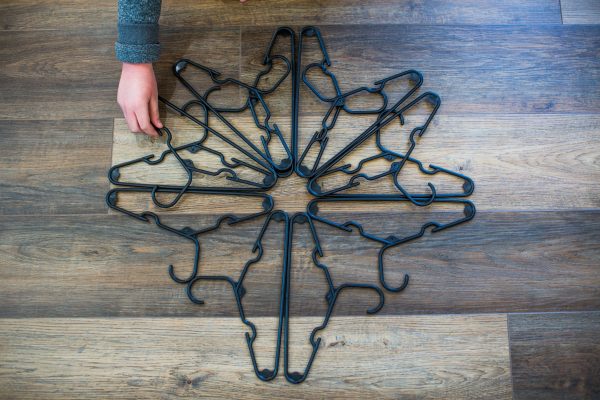
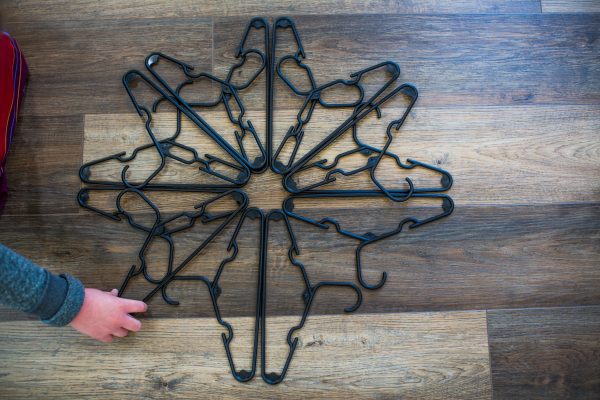
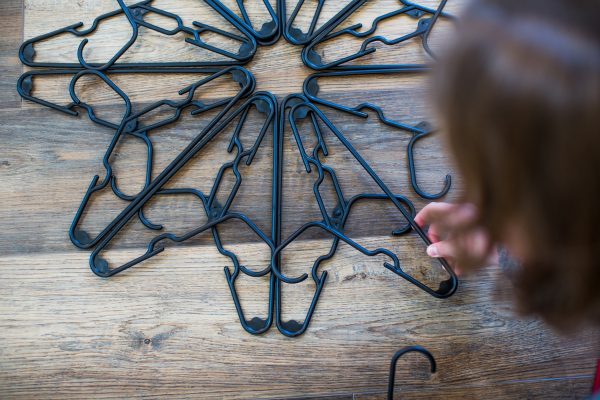
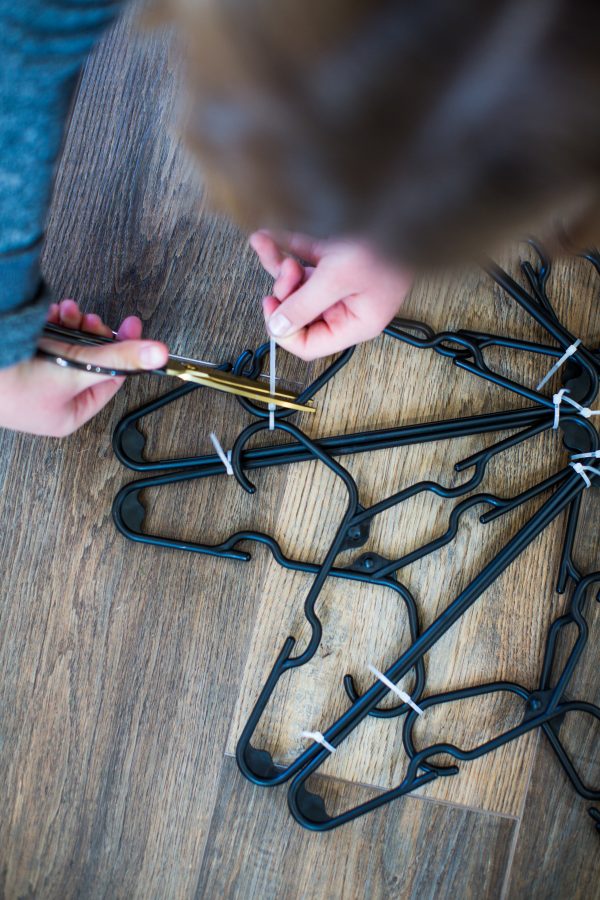
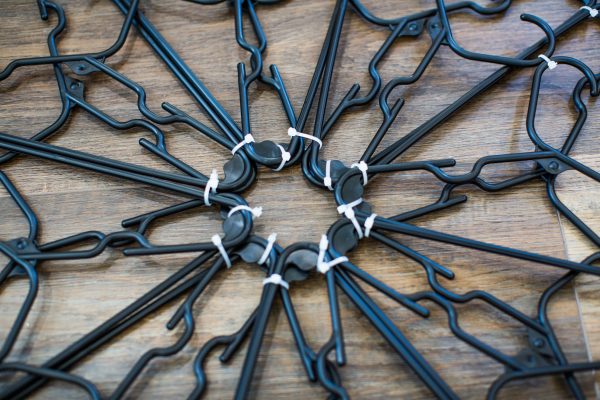
Step 6: Starting with the center, place a zip tie at each place 4 hangers meet. You should use 8 zipties for the center circle, and 8 for the outer circle. Each ziptie should hold 4 hangers
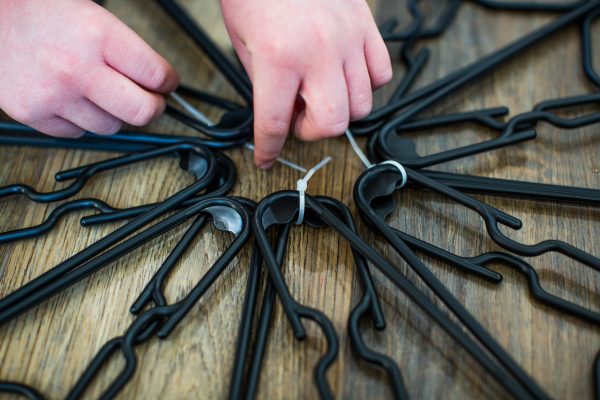

Step 7: Be sure NOT to tighten the zip tie all the way, until ALL zip ties have been placed. This will allow you to adjust and reposition your spider web if needed. Now continue with zip ties for your inner circle.

Step 8: Find the spot where 2 hooks meet and place a zip tie with those hooks. Also place a zip tie where the 2 bottoms of the hangers meet and loosely place a zip tie. Continue around outer circle.
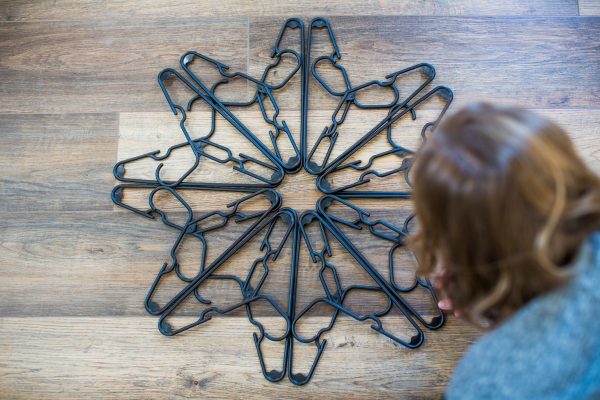
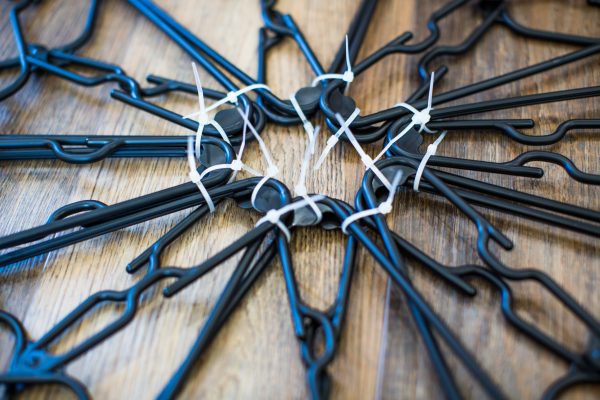
Step 9: Now the fun begins! Slowly start tightening the zip ties in the center and work your way out to the edge of the spider web by tightening each zip tie.

Feel free to adjust your fake spider web

Your hangers need to stay as flat as possible so that your end result will lay nicely.
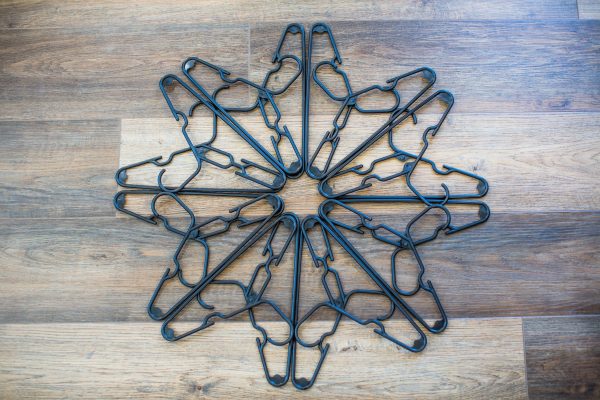
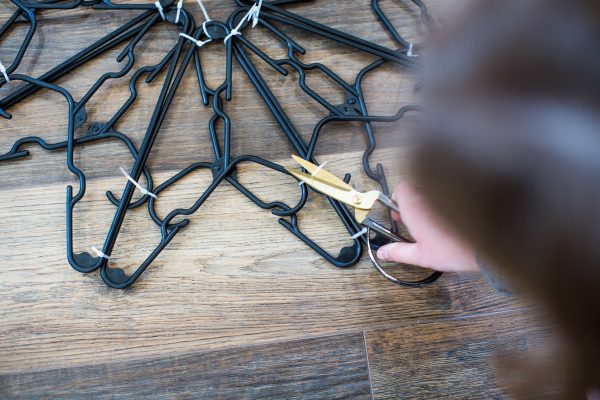
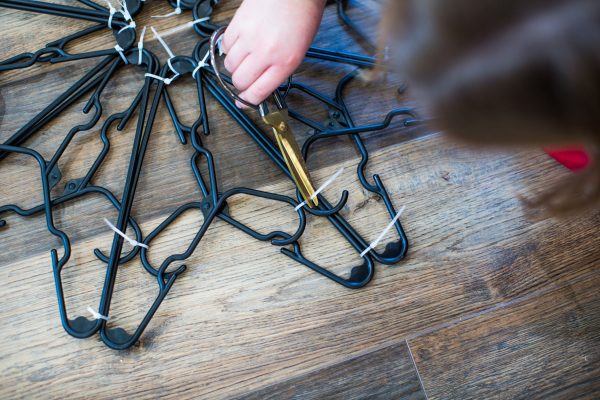
Step 10: Once all zip ties have been tightened, trim your ties.


Loved it will make it for my door.