
What you need
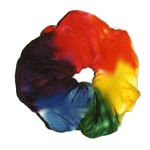
Wool roving in the following colors (Merino or Corriedale is best for this project)
2 ounces white roving
Less than 1 ounce green roving
Less than 1 ounce blue-violet roving
Less than 1 ounce pink roving
Felting needle (any shape, fine gauge)
Wool carders or paddle-style dog brushes (optional)
An old pillow or cushion
Elastic thread (silver, gold or black)
Darning needle
Instructions
Wool roving usually comes in long, combed out tresses. Because wool is condensed during the felting, it can sometimes be difficult to gauge how much roving to start with. Here’s an easy measuring system: gently pull off a section of roving. Never cut wool roving with scissors. Roll it into a tight ball. This is how big that piece of roving will be after felting.
The Body and Head
The bear is basically two balls, one about 2.5 inches for the body and 2 inches for the head. Pull off two lengths of white roving, 24 inches and 18 inches. Because roving tresses can come in different thicknesses, roll up each length of roving to be sure that they will be the proper size after felting.
Start with the 24-inch piece of roving. This will be the body of the polar bear. Wool is easier to felt when the fibers are messed up and ripped. Pull this tress apart, rip it into many small pieces and mess it up. You can use your carders or paddle brushes to help separate the wool. Shape the torn roving into a rough ball.
The pillow or cushion is your work surface. Put it on your lap or on a table. Do not felt on a hard surface or you may break your needle. Begin stabbing the ball of wool with the needle. Turn the ball as you stab to keep the round shape. After 5 to 10 minutes of stabbing, the ball will be condensed down enough to shape. At this point, you can concentrate the stabbing action, on the areas that need to be rounded. When done, your ball should be firm like a plush toy.
Repeat the process with the 18-inch piece of roving to make the head.
Troubleshooting: If your balls are not round, continue stabbing, turning, stabbing, until they round out. If one ball is too big, condense it down with more stabbing. If a ball is too small, add some wool roving and continue to condense it down. It is not important that your balls are exactly 2.5 and 2 inches, but only that one is slightly smaller than the other.
Stack the 2 inch white ball on the 2.5-inch ball. Using your needle, stab the top ball from the side, piercing downward into the bottom ball. This draws the fibers from the small ball into the larger one. Repeat this many times, turning the balls to pierce all the way around. Flip the ball upside down and pierce from the bottom up, turning the balls with each stab. Now you are drawing fibers from the large ball into the smaller one. At this point, the balls should be stuck together. Gently, try to pull the balls apart. If they separate, even a little, continue to stab, until they hold tightly.
Adding the legs and arms
Pull off two 2-inch pieces of roving and two 1-inch pieces. It is important to separate the wool for the legs and arms at the same time, before felting, to be certain that they are the same size. Begin with a 2-inch piece. Prepare it by ripping it and messing it, then roll it into a vague log shape about one inch long. Stab it with the needle until it is reduced down by half. Be sure when you stab the roving, you turn it evenly to keep the log shape. Repeat with the other 2-inch piece and the two 1-inch pieces. These are the legs and arms.
Attach the legs the same way you attached the head. Draw the fibers first from the leg into the body and then from the body into the legs. Repeat with the arms.
Cover the seams (where the legs and arms join the body) with a small amount of white roving and felt it smooth.
Make 12 tiny balls (about 1/8 inch) from the blue-violet roving. Attach these three of these balls to each paw, along the top of the flat surface. Make 4 ovals (about 1/4 inch) from the blue violet. Attach these as the main pad on each paw. With the needle, continue felting each paw until the blue details are flat and smooth.
The Face
Pull off two 1-inch pieces of white roving. This time, instead of ripping them, fold the pieces in two. On your pillow, felt each into a petal shape, with the fold at the top of the petal. Attach these to the bear?s head. Add a small amount of pink roving into the inside of each ear. Felt until smooth.
Pull off three 1-inch pieces of white roving. These will build up the nose and cheeks of the bear. Rip up the first piece and form it into a rough ball. Felt this onto the left side of the face, where the cheek should go. Repeat with the second ball for the right cheek. Cover any seams with extra roving and felt until smooth.
For the nose, rip up the last 1 inch piece. Form into a rough tear drop shape. With the fat end pointing down, felt the tear drop between the cheeks. If you find the nose is not big enough, add more roving and repeat the felting. Add a 1/2-inch ball of blue-violet felt to the end of the nose, and felt it smooth.
Shape two 1/4-inch balls from the blue-violet roving and felt them onto the head for the eyes. Add a 1/8-inch ball of white roving to the center of each eye. Be sure to felt the eyes on securely. As a last detail, take a small amount of white roving (about 1/2 inch), roll it into a loose log-shape and felt it onto the bear as eyebrows. Try angling the eyebrows in different directions to give the bear different expressions.
The Hat and Scarf
The scarf doesn’t require the roving to be ripped and tangled. For this one, gently tug off a tress of green roving about 6 inches long. Separate the tress lengthwise. Pull off a piece about 1/4 inch wide by six inches long. Add wisps of white and blue-violet to the tress to give it the mottled look. Roll the tress vigorously between your palms as if you are rolling out a snake from clay. It helps if your palms are slightly damp. After vigorously rubbing the whole 6-inch tress, you can felt in any loose pieces with the needle. Leave the ends of the scarf unfelted to resemble tassels.
Wrap the scarf around the bear?s neck and cross it over his shoulder. Tack it there and then attach it all around his neck, leaving the long ends to dangle free.
For the hat, pull off a 12-inch piece of green roving and prepare it for felting. Form it into a rough ball. This time, as you felt, be aware that you need to make the ball into a cone shape. So, felt it tighter at one end to create the point. Add more roving around the thick end if needed. To make the hat brim, add another thin tress of green roving around the thick end of the cone and felt it smooth. For a thicker brim, add another tress and repeat.
Take a thin wisp of white roving, about 6 inches long, and roll it gently between your palms. Starting from the base of the hat, wrap it in a spiral around the cone and tack it with your needle. Once it is in place, felt it until it?s secure.
Pull off a 1/2-inch piece of white roving. Rip it and then form it into a loose ball. Tack this ball directly to the top of the hat, securing it, but not felting too much. You want this to look like a puffy pom-pom.
Now attach the hat to the head, with the same method as used for the other parts.
Thread an 8-inch piece of elastic thread on the darning needle. Thread it through the top of the polar bear?s hat (but not through the pom-pom) and tie it to make a loop. Your snowman is now ready to hang on your tree!
What is felting?
Felting is the process of condensing wool into a compact material known as felt. Wet felting happens when wool is made wet and agitated, until it shrinks down, like the old-fashioned process of boiled wool. This technique works particularly well for knitted garments.
Needle felting is a dry process. Each strand of wool fiber has tiny barbs. The felting needle has inverse barbs, like tiny indentations that catch the wool and draw it inwards. In this way, wool roving can compacted into tight forms and then shaped or sculpted. Like many needlework projects, felting is methodical and time-consuming, but very therapeutic. It?s easy to learn and can be self-taught.
Wool roving is raw fleece from sheep, lamas or alpacas. Once the fleece is washed, dyed and combed, it is ready for felting. Wool comes in many textures and is sold by the ounce or the pound. The softer, finer wools such as Merino or Corriedale and are better for most needle felting projects. Coarser wools such as Leicester and Cotswold are more difficult to work with, but make excellent hair and beards.
Felting needles are used in industrial machines to convert raw wool into felt. Fiber artists use individual needles to sculpt wool. They come in many sizes (or gauges) and shapes. A star shape will have more needle-surface than a triangle and will therefore pull more wool. The needle gauge (usually 36, 38 or 40) relates to the thickness of the needle. Thin needles are for finer work and leave smaller holes in the final product. The higher the number, the finer the needle.
Most craft stores don’t stock wool roving or felting. Below are a few online stores that have felting supplies. If you live in a rural neighborhood, you might find roving and felting supplies at local sheep farms.
Stores that specialize in spinning supplies will have roving and carders (wool brushes), but not necessarily felting needles. The paddle-style dog brushes are an inexpensive alternative to wool carders and can be found at any good pet supply store.


their are so many directions. But that’s okay because this is so cute!
WOW this thing is sooooo cute!!!!Speaking of witch i love felt things!!!!
Holey cow! I’ve never seen anything like it! Bravo!!!!
CUTE i’m totally trying this!!!
this is really hard 2 make but it is sooooo cute!!!!
CUTE CUTE CUTE CUTE CUTE etc. this thing is adorable im so trying this out later!
Cool!!!!
wow how did u do that wow wow wow bravo!bravo!
hes adorable!
Excellent needle felting project – can’t wait to try this out!!
This thing is the most fun idea yet! Alot of families will really injoy making this adorable little bear. People can give this bear away to someone or they can make it for themselves. I HIGHLY recomend this to anyone who loves to take challenges!! FUN!