
This project is one of those “how is this so easy but looks so good?” crafts that I keep coming back to year after year. Perfect for serving cookies, holding ornaments, or giving as a handmade hostess gift.
Let’s dress up that plain tray with festive cheer!
Get more details about this project
What you need
Kraft paper mache tray (or any unfinished wooden tray)
Christmas napkin (use the top printed ply only)
Mod Podge or matte decoupage glue
Foam brush or soft paintbrush
Scissors
Sandpaper (fine grit)
Optional: white acrylic paint for base coat
Optional embellishments: gold leafing, ribbon trim, or mini handles
Instructions
Step 1: Prep the Tray
Lightly sand your kraft or wooden tray to smooth any rough spots. Wipe clean.
Optional: Give it a coat of white or cream acrylic paint to brighten up the napkin print. Let it dry fully.
Step 2: Prepare Your Napkin
Gently peel away the backing layers of your napkin and keep only the top printed one. Trim to fit the tray bottom or tear the edges for a more vintage, rustic look.
You can cover the whole tray, just the base, or create a patchwork style with multiple napkin designs.
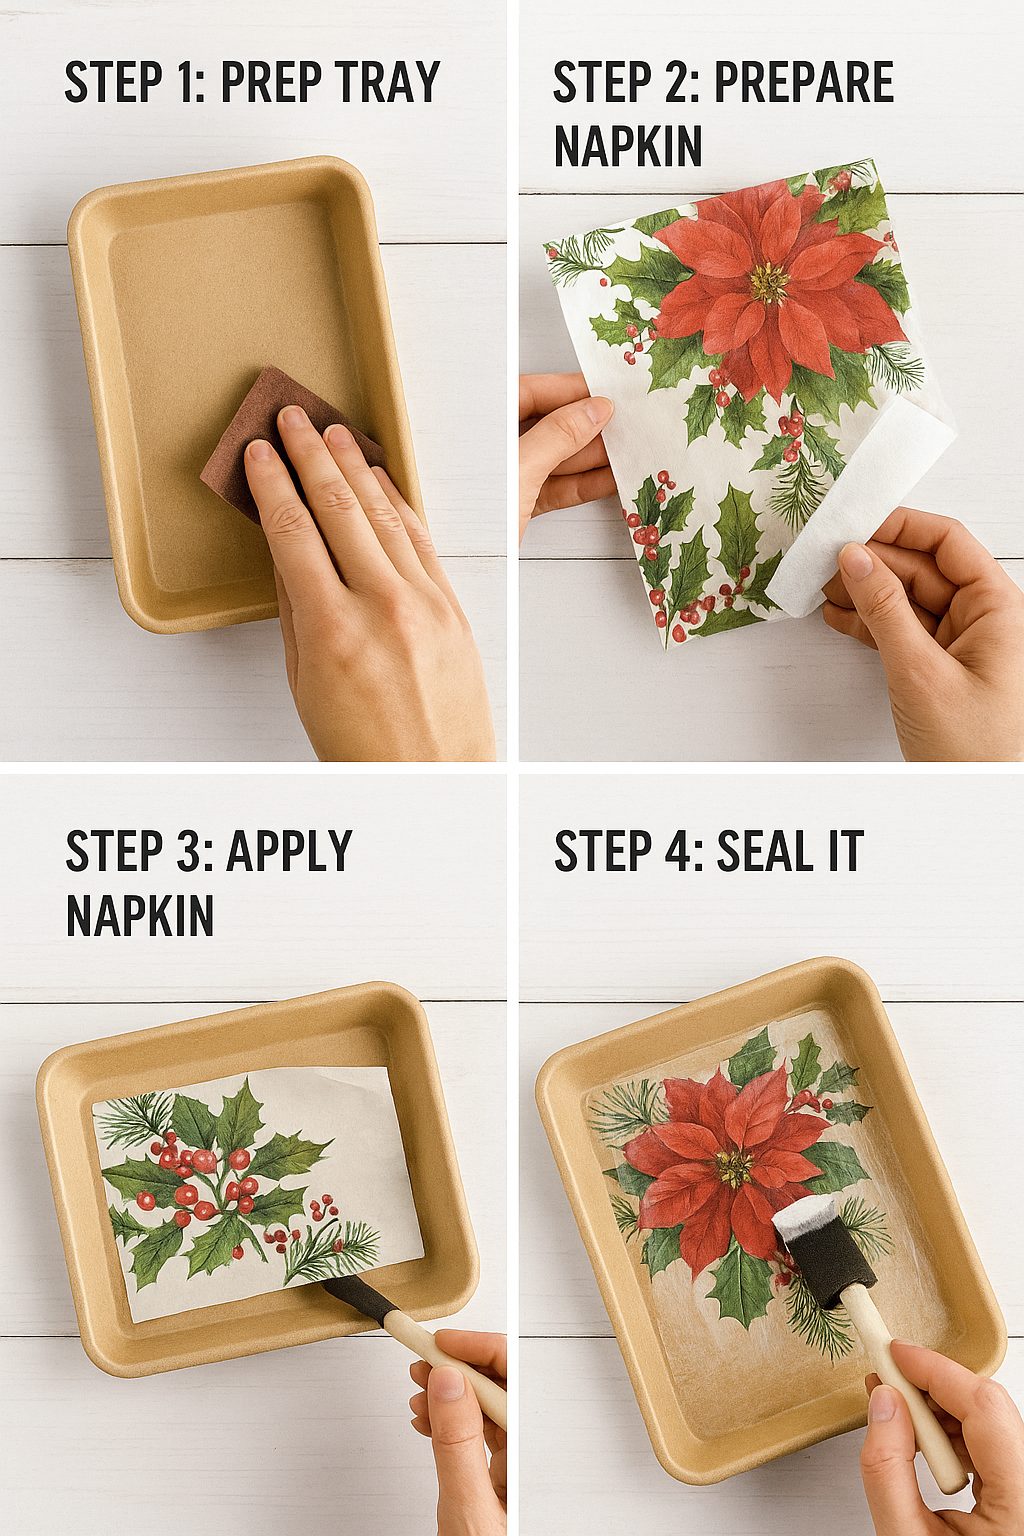
Step 3: Apply the Napkin
Brush a thin layer of Mod Podge onto the tray where the napkin will go. Carefully lay down your napkin, starting at one end and smoothing gently as you go. Use plastic wrap or a soft brush to ease out bubbles and wrinkles.
Pro tip: Don’t overwork it—the napkin is delicate. Let it be a little wrinkly if it needs to be.
Step 4: Seal It
Once the napkin is fully dry, brush a second coat of Mod Podge over the top to seal and protect. If you’re feeling fancy, you can lightly sand the top after it dries and apply a second seal for durability.
Step 5: Add Embellishments (Optional)
Wrap the outer edges with festive ribbon, glue on mini handles, or add gold accents for an elevated finish.
Ways to Use Your Festive Tray
- Serve Christmas cookies, hot cocoa, or snacks
- Hold candles, pinecones, or ornaments on a sideboard
- Create a base for a holiday centerpiece
- Use it as a gift tray: add a mug, treats, and wrap with cellophane
- Display cards or trinkets on your coffee table
Tips & Tricks
Don’t worry about perfection—rustic is charming.


What do you think of this project? Let us know!