
Get more details about this project
What you need
- Wooden, plastic, or blown-out real eggs
- Decorative printed napkins (floral, botanical, or Easter-themed)
- Mod Podge or PVA glue thinned with a touch of water
- Small paintbrush or sponge brush
- Scissors
- Tweezers (optional, but helpful for positioning tiny napkin pieces)
- Old egg carton or drying rack
Instructions
Napkins are the unsung heroes of the decoupage world. They’re cheap, come in endless patterns (florals, vintage prints, bunnies, birds—you name it), and the thin top layer melds beautifully onto curved surfaces like eggs. The finished look is almost painterly, as if you’ve hand-painted the designs yourself.
Step-by-Step Instructions
1. Prep Your Eggs
If you’re using real eggs, blow out the contents and let them dry completely. For a longer-lasting project, I recommend wooden or plastic craft eggs—they won’t crack and can be reused year after year.
2. Separate the Napkin Layers
Most napkins are 2–3 ply. Carefully peel away the plain backing layers so you’re left with just the top printed layer. This is what you’ll use for decoupage.
3. Cut or Tear Your Designs
Cut around bunnies, florals, or patterns, or simply tear into smaller sections for a more rustic, “painterly” look. Tearing helps the edges blend more naturally.
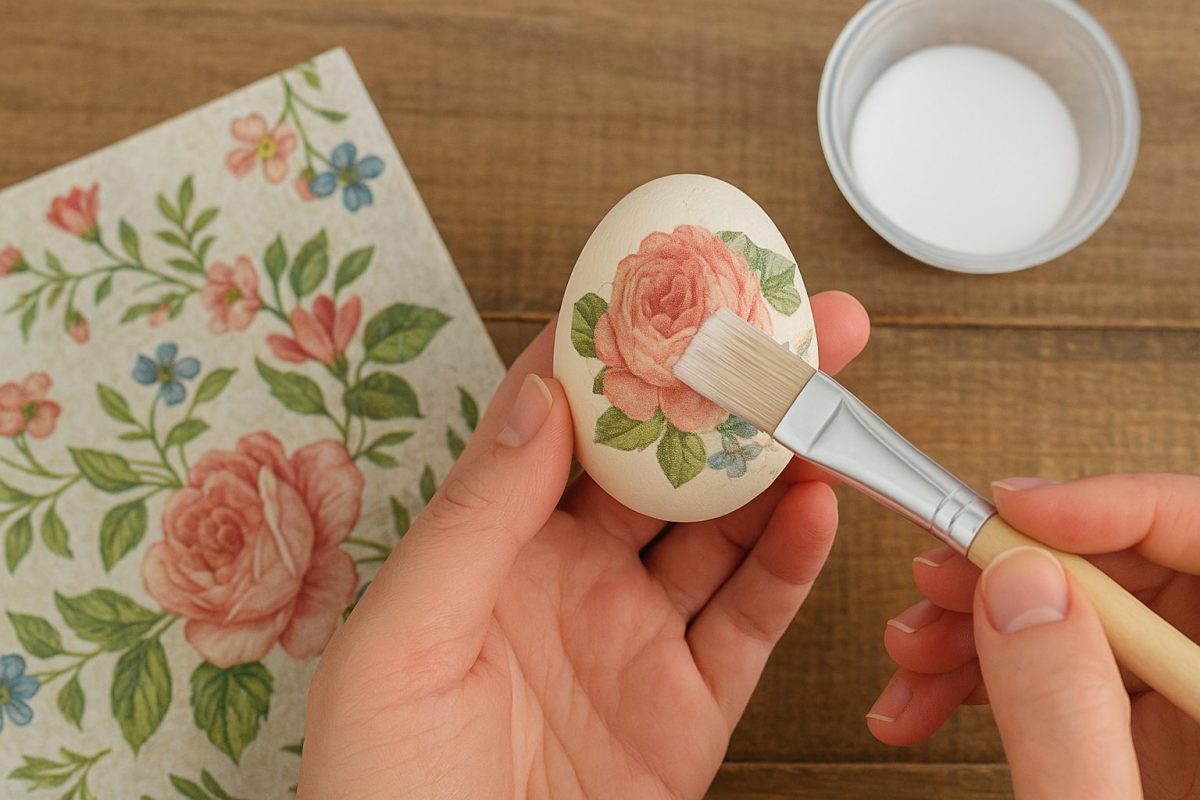
4. Apply the Napkin
Brush a thin layer of Mod Podge onto the egg. Gently press the napkin piece on top, smoothing it with the brush or your fingertips. Don’t panic if it wrinkles—wrinkles add charm and texture.
5. Layer and Seal
Continue adding pieces until your egg is covered. Once finished, brush a very light layer of Mod Podge over the whole surface to seal it. Let dry completely.
6. Display Your Eggs
Nestle them into bowls of moss, display them on candlesticks, or tuck them into an Easter centerpiece. They look especially pretty grouped together in different napkin patterns.
Tips & Variations
- Vintage look: Use sheet music or book-page print napkins for a shabby chic style.
- Botanical twist: Choose floral napkins and display your eggs in a nest of real twigs and moss.
- Shimmer finish: Add a dusting of gold leaf flakes or pearl paint over the top layer for a luxe touch.
Why You’ll Love This Craft
It’s quick, inexpensive, and lets you play with endless designs. Once you make a batch, you’ll find yourself hunting down pretty napkins year-round just for crafting (confession: I have a whole drawer full).
Decoupaged napkin eggs also make lovely hostess gifts—pop a few into a cellophane bag with ribbon, and you’ve got a thoughtful handmade Easter surprise.


What do you think of this project? Let us know!