What you need
Plastic Dollar Tree Shovel
Spray Paint – Satin Sea side color
Silicon or caulking for the sand , White or cream will work well.
Optional Keepsake sand
Seashells
String for hanging
Plastic knife for spreading caulking.
Instructions
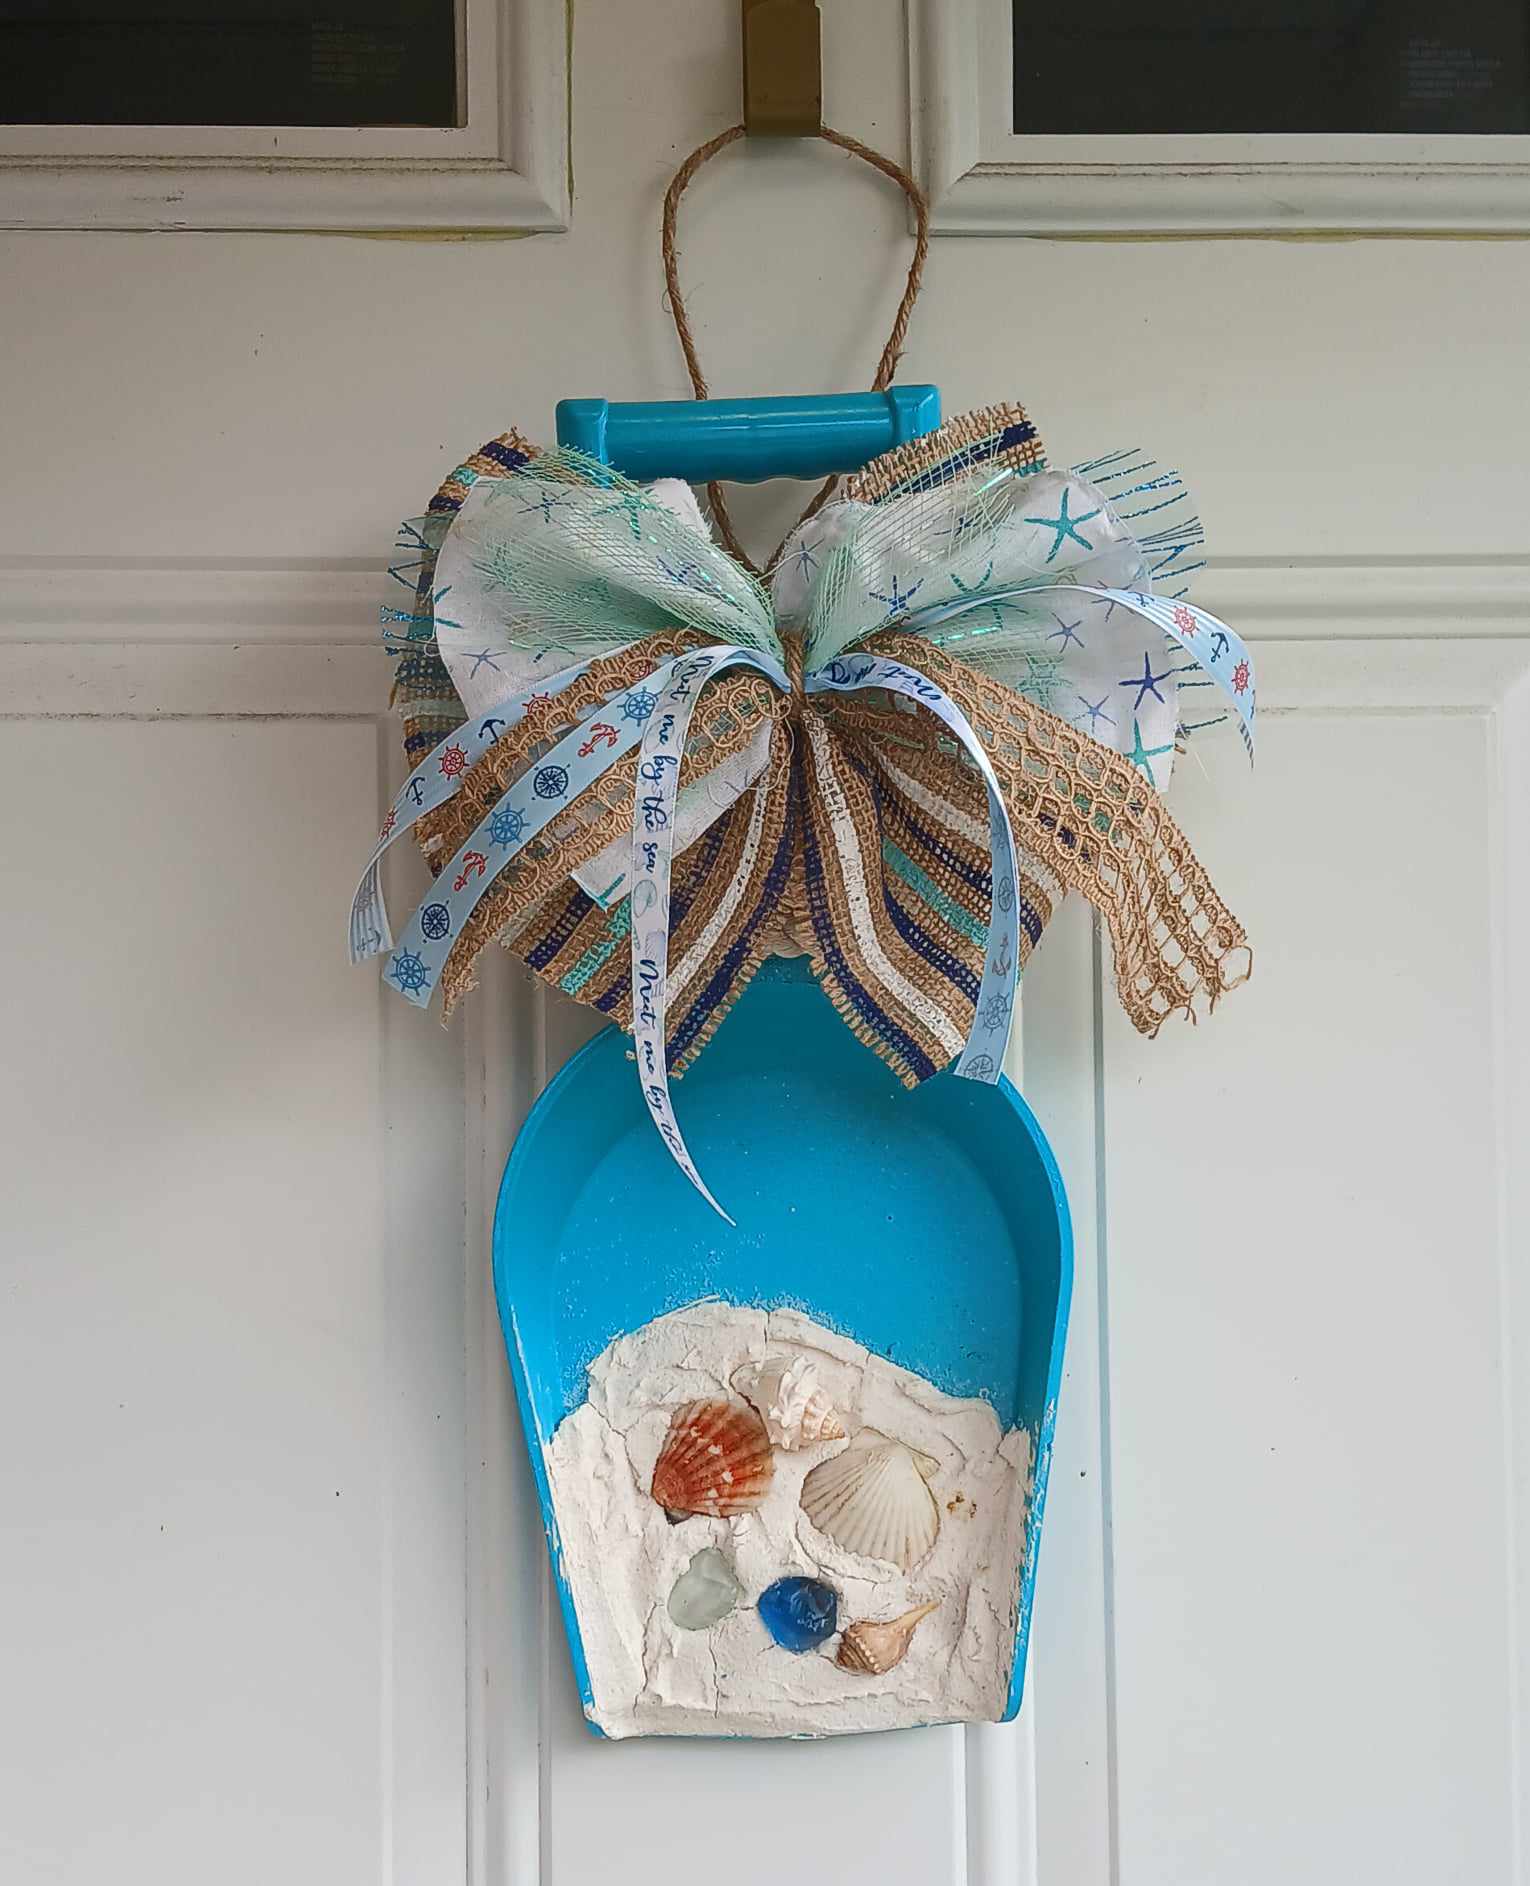
This craft idea and image was shared by Amber Snooks Perry, Thank you so much for contributing your photo.
For this DIY craft project you can buy all the supplies such as shells and optional sand, or you can collect them from a holiday as a keepsake idea.
To start, give your shovel a thorough cleaning to remove any dirt or debris, then dry it completely. Once it’s clean, spray the entire shovel with Krylon plastic paint, ensuring an even coat. Depending on the original color of your toy shovel, you may need to apply a second coat to achieve a vibrant finish.
This project is wonderfully versatile, allowing you to personalize it with any beach treasures you find. While this tutorial uses seashells, feel free to incorporate other coastal trinkets like toy sea creatures, beach glass, or pebbles.
After your shovel is fully dry, it’s time to add the caulking. Begin by spreading the caulking from the bottom of the shovel, working your way up to create a natural, wave-like effect, as demonstrated in Amber’s design. For an authentic touch, you can sprinkle sand onto the wet caulking, giving your wreath a truly sandy texture. Carefully press your shells and other decorations into the caulking, arranging them until you’re satisfied with the look.
Once your design is complete, allow it to set for a full 24 hours to ensure everything is securely in place. For a final flourish, add some ribbons to the handle or tie on a decorative bow.
These beach-themed shovels make fantastic summer gifts, especially for grandparents, who will treasure the seaside memories they hold.


What do you think of this project? Let us know!