
Medusa was then doomed to turn into stone all those who gazed into her eyes.
What you need
Finished size
7in (18cm)
Supplies and materials
Universal Yarn Brand Bamboo Pop DK, 50% cotton, 50% bamboo (292yd/266m per 31⁄2oz/100g): Lemongrass 133, Chocolate 152, Sundae 139, White 101, Clover 109, Lime Green 108, Bubblegum 141
Crochet thread 10: Black and white
Hook size: 2mm
Safety eyes: 1⁄2in (12mm)
Polyester fibre filling
Embroidery needles
Sewing pins
Stitch markers
Scissors
Pipe cleaners
Instructions
ARMS
Make two arms in Lemongrass colour.
Work all the stitches in a round from bottom to top.
Do not stuff.
Wire will be added to the arms later.
Round 1: Make a MC with 6 dc (6 sts).
Round 2: (Dc2inc) 6 times (12 sts).
Rounds 3–6: Dc in each st around (12 sts).
Round 7: Dc 4, (dc2tog) twice, dc 4 (10 sts).
Rounds 8–19: Dc in each st around (10 sts).
Fasten off and hide tails inside the arms.
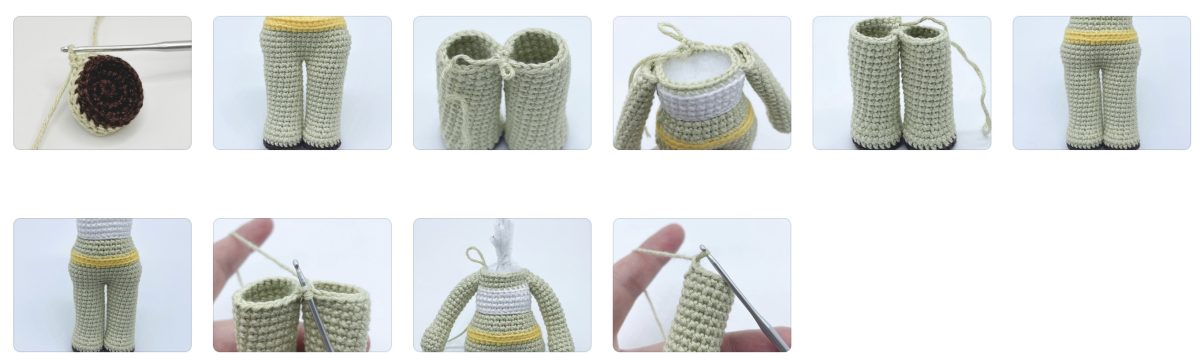
ONE PIECE BODY AND HEAD

Start by making two legs in Chocolate colour yarn.
Work all stitches in a round from bottom to top.
Stuff as you crochet.
Round 1: Make a MC with 9 dc (9 sts).
Round 2: (Dc2inc) 9 times (18 sts).
Round 3: Dc2inc, dc 6, (dc2inc) 4 times, dc 6, dc2inc
(24 sts).
Round 4: FLO sl st in each st around (24 sts).
Fasten off and weave tails inside the rounds.
Attach Lemongrass colour yarn to the BLO of round 3 on the back side.
Round 5: BLO dc in each st around (24 sts).
Round 6: Dc in each st around (24 sts).
Round 7: Dc 8, (dc2tog, dc) twice, dc2tog, dc 8 (21 sts).
Round 8: Dc 7, dc2tog, dc, dc2tog, dc 7, dc2tog (18 sts).
Rounds 9–20: Dc in each st around (18 sts).
Please note: If you are on the first leg, cut the yarn and fasten off. If you are on the second leg, continue to round 21.
Not everyone’s tension is the same. When you connect the legs, if they are not facing perfectly front, adjust your starting dc stitch count by adding or subtracting 1–2 stitches before chaining them together.
The chain in the next round counts as a stitch.
Round 21: Dc 6 (this will move the starting stitch to ensure the legs are facing forward), ch, dc to the first leg (make sure to connect the dc, 3 stitches before where you fasten off), dc 17, dc in the back of the ch, dc 18 around 2nd leg (38 sts).
The ch between the back of the legs will be the new starting stitch. Move the stitch marker to this stitch.
Round 22: Dc in each st around (38 sts).
Please note: If there is a hole visible where the two legs are joined, use an embroidery needle and the leftover yarn from attaching the legs together to sew it closed with a whip stitch.
Round 23: Dc 9, (dc2inc) twice, dc 17, (dc2inc) twice, dc 8 (42 sts).
Rounds 24–26: Dc in each st around (42 sts).
Round 27: Dc 9, (dc2tog) twice, dc 17, (dc2tog) twice, dc 8 (38 sts).
Change colour to Sundae.
Round 28: FLO dc in each st around (38 sts).
Round 29: BLO dc in each st around (38 sts).
Change colour to Lemongrass.
Round 30: BLO dc 9, dc2tog, dc 17, dc2tog, dc 8 (36 sts).
Round 31: (Dc 2, dc2tog, dc 2) 6 times (30 sts).
Rounds 32–34: Dc in each st around (30 sts).
Change colour to White.
Round 35: FLO sl st in each st around (30 sts).
Round 36: BLO dc in each st around (30 sts).
Rounds 37–39: Dc in each st around (30 sts).
Change colour to Lemongrass.
At this point, you will begin to add the arms. Remember that not everyone’s tension is the same. When you add the left and right arms, if they are not parallel with the sides of the legs, add or subtract 1–2 stitches before their placement. Then adjust the starting point of the stitch marker to accommodate the extra stitches.
Round 40: BLO dc 7, dc 5 (place the first arm at the side of the body and stitch the body and arm together with these next 5 stitches. The hook will go through both the arm and the body, leaving the outside 5 stitches of the arm alone.
Make sure the decreases from round 7 on the arms are facing forward), dc 11, dc 5 (place the second arm at the side of the body and stitch the body and arm together with these next 5 stitches, leaving the outside 5 stitches of the arm alone. Make sure the decreases from round 7 on the arms are facing forward), dc 2 (30 sts).
Round 41: Dc 7, dc 5 (stitching into the 5 stitches along the outside of the arm), dc 11, dc 5 (stitching into the 5 stitches along the outside of the arm), dc 2 (30 sts).
Round 42: Dc in each st around (30 sts).
Take two pipe cleaners and twist them together to make one thick pipe cleaner. Take the two ends and twist them together to make a point. Bring the bottom centre of the pipe cleaners up to the twist. This will create two long wires that you will feed down through both of the arms.
Push the wire down in the first arm and then into the second arm. This will leave the ends of the wire coming up out of the neck.
Round 43: (Dc 3, dc2tog) 6 times (24 sts).
Round 44: (Dc, dc2tog, dc) 6 times (18 sts).
Round 45: (Dc 2, dc2tog, dc 2) 3 times (15 sts).
Round 46: Dc in each st around (15 sts).
Do not cut the yarn; continue to round 47 to make the head.
HEAD
Round 47: FLO (dc 2, dc2inc, dc 2) 3 times (18 sts).
Round 48: FLO (dc, dc2inc, dc) 6 times (24 sts).
Round 49: FLO (dc 3, dc2inc) 6 times (30 sts).
Round 50: (Dc 2, dc2inc, dc 2) 6 times (36 sts).
Round 51: (Dc 5, dc2inc) 6 times (42 sts).
Round 52: (Dc 3, dc2inc, dc 3) 6 times (48 sts).
Round 53: (Dc 7, dc2inc) 6 times (54 sts).
Round 54: (Dc 4, dc2inc, dc 4) 6 times (60 sts).
Rounds 55–58: Dc in each st around (60 sts).
Round 59: Dc 33, ch, sk, dc 12, ch, sk, dc 13 (60 sts).
Please note: The chain spaces with the skip in round 59 will be where you place the safety eyes later in the pattern. The chain spaces should line up with the armpits of the doll. If they do not, adjust them left or right by a few stitches to get the correct placement, remembering to have 12 dc between each chain space.
Rounds 60–62: Dc in each st around (60 sts).
Round 63: (Dc 4, dc2tog, dc 4) 6 times (54 sts).
At this time, add the safety eyes in the chain spaces
on round 59.
Round 64: (Dc 7, dc2tog) 6 times (48 sts).
Round 65: Dc in each st around (48 sts).
Round 66: (Dc 3, dc2tog, dc 3) 6 times (42 sts).
Round 67: (Dc 5, dc2tog) 6 times (36 sts).
Round 68: (Dc 2, dc2tog, dc 2) 6 times (30 sts).
Round 69: (Dc 3, dc2tog) 6 times (24 sts).
Round 70: (Dc, dc2tog, dc) 6 times (18 sts).
Round 71: (Dc, dc2tog) 6 times (12 sts).
Round 72: (Dc, dc2tog) 4 times (8 sts).
Fasten off and weave the yarn under each of the FLO, pull tight, and hide the end inside the head.
EARS
Make two ears in Lemongrass colour yarn.
Work all the stitches in a round.
Round 1: Make a MC with 9 dc (9 sts).
Fasten off and do not close the MC; leave it open with long tails to attach to the head.
SKIRT
Work in rounds and then flat rows using White colour yarn.
Turn the doll upside down and attach the yarn with a sl st to the FLO of round 29 but on the right side of the doll.
Round 1: Ch, FLO dc 38, join with a sl st, ch 2 (38 sts).
Round 2: Tr in each st around, tr (in the same st as the ch sts on round 1), ch 2, turn (38 sts).
Row 3: Tr2tog, tr 36, ch 2, turn (37 sts).
Row 4: Tr in each st around, ch 2, turn (37 sts).
Row 5: Tr2tog, tr 35, ch 2, turn (36 sts).
Row 6: Tr in each st around, ch 2, turn (36 sts).
Row 7: Tr2tog, tr 34, ch 2, turn (35 sts).
Row 8: Tr in each st around, ch 2, turn (35 sts).
Row 9: Tr2tog, tr 33, ch 2, turn (34 sts).
Row 10: Tr in each st around, ch 2, turn (34 sts).
Row 11: Tr2tog, tr 32, ch 2, turn (33 sts).
Row 12: Tr in each st around, ch 2, turn (33 sts).
Row 13: Tr2tog, tr 31, ch, turn (32 sts).
Change yarn colour to Sundae.
Turn and work 32 dc along the bottom of the skirt. (Dc, ch 3, turn and sl st in the 3rd ch from hook, dc) in the corner, work 25 dc up the edge of the skirt to the waist and then 25 dc down the other side of the skirt to the starting corner. (Dc, ch 3, turn and sl st in the 3rd ch from hook, dc) in the corner, sl st to the first dc to fasten off (86 sts).
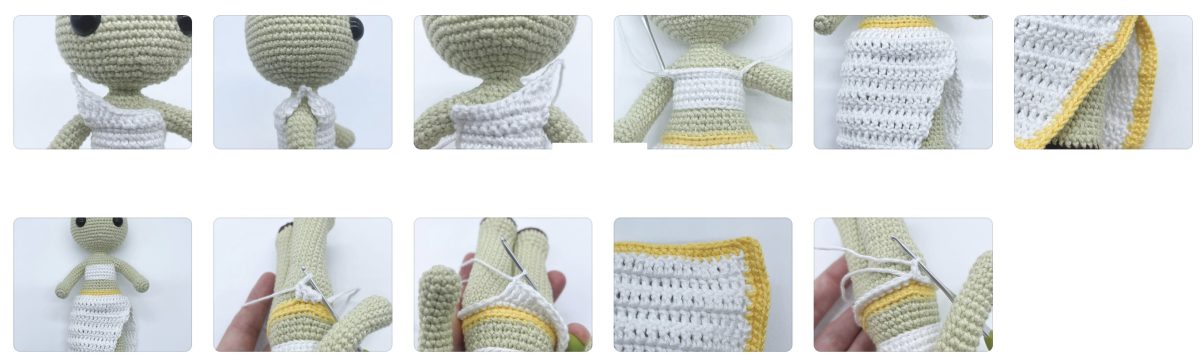
SHIRT
Work in flat rows using White colour yarn.
Attach the yarn with a dc to the FLO of round 39 but on the front right side of the doll. This will be the top round of the shirt.
After each row, ch and turn and work back the other way.
Row 1: FLO dc 12, ch, turn (12 sts).
Row 2: Dc in each st along, ch, turn (12 sts).
Row 3: Dc2tog, dc 6, htr, tr, dtr, dtr2inc, ch 2 (12 sts).
Fasten off and weave the yarn tails inside the shirt.
Flip the doll upside down and repeat rows 1–3 for the back of the shirt, starting on the same side as the front.
Row 1: FLO dc 11, ch, turn (11 sts).
Row 2: Dc in each st along, ch, turn (11 sts).
Row 3: Dc2tog, dc 5, htr, tr, dtr, dtr2inc, ch 2 (11 sts).
Fasten off, tie the two ends together and weave the yarn tails inside the shirt.
SHIRT MEDALLION
Work all stitches in a round using Sundae colour yarn.
Round 1: Make a MC with 8 dc (8 sts).
Fasten off and leave a long tail for sewing.
With an embroidery needle, sew the back of the medallion to the corner of the shirt just above the shoulder. Leaving the highest point of the shirt showing above the medallion, pinch the two sides closed and push the needle through both sides of the shirt to sew it closed. Make sure to add at least 2 whip stitches (see page 21) to ensure the medallion is sewn tightly to the shirt.
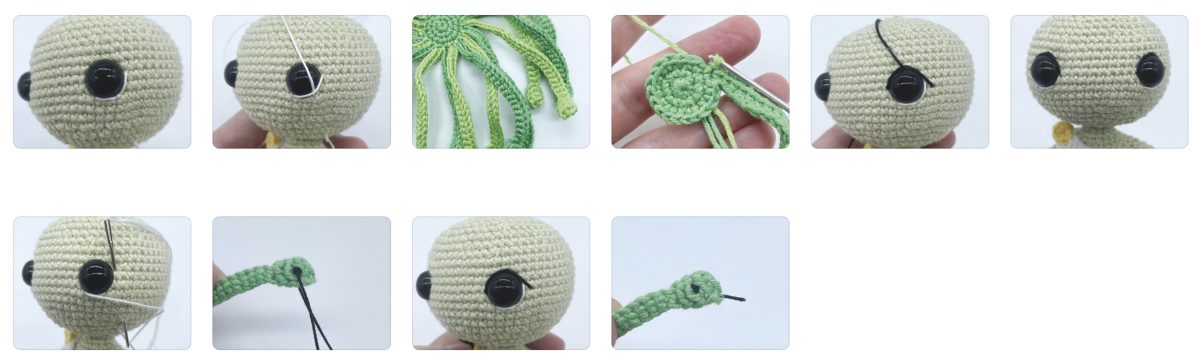
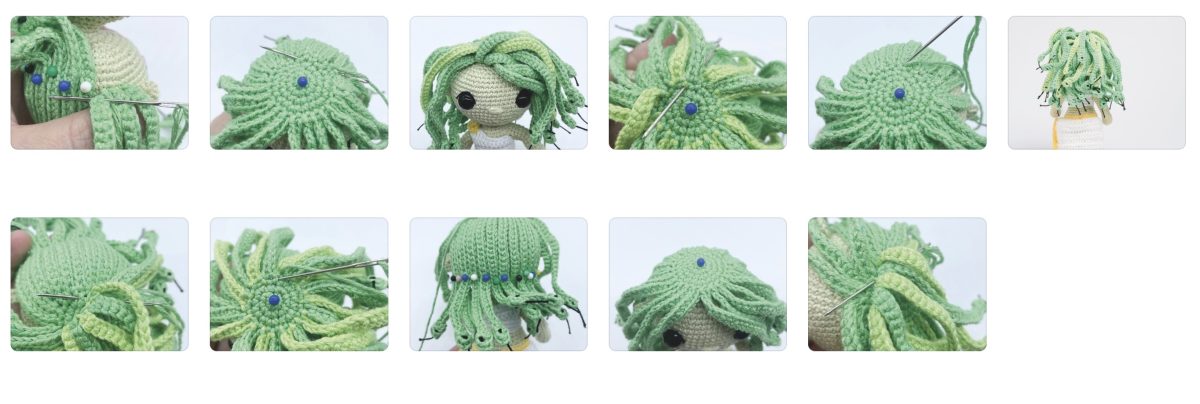
SNAKE HAIR
Work in rounds until instructed to work in chains.
Make the first set of snake hair in Clover colour yarn.
Round 1: Make a MC with 6 dc (6 sts).
Round 2: (Dc2inc) 6 times (12 sts).
Round 3: (Dc, dc2inc) 6 times (18 sts).
Round 4: (Dc, dc2inc, dc) 6 times (24 sts).
Work the next rows in chains to create the hair strands. Then sl st to the next stitch in round 4 before starting the next row.
After turning and working back up the chain, work the dc stitches in the third loop (see page 12). Then the rest of the stitches need to be worked in the third loop.
Rows 1: Ch 30, turn, POP (in the 3rd ch from the hook), dc 27 up the ch, sl st (28 sts) (1 hair strand).
Rows 2–24: Ch 30, turn, POP (in the 3rd ch from the hook), dc 27 up the ch, sl st (28 sts) (23 rows of hair strands).
Fasten off and leave a long tail for sewing.
The second set of snake hair is worked starting in Clover colour yarn and then alternating between Lime Green and Clover for the hair strands.
Round 1: Make a MC with 6 dc (6 sts).
Round 2: (Dc2inc) 6 times (12 sts).
Round 3: (Dc, dc2inc) 6 times (18 sts).
Work the next part in chains to create the hair strands. Then sl st a colour change to the next st in round 3 before starting the next row.
After turning and working back up the chain, work the dc stitches in the third loop. Then the rest of the stitches need to be worked in the third loop.
Rows 1–18: Ch 30, turn, POP (in the 3rd ch from the hook), dc 27 up the ch, sl st (28 sts) (18 rows of hair strands).
Fasten off and leave a long tail for sewing.
To add the snake faces and tongues, use a long piece of black embroidery thread with an embroidery needle and enter the needle underneath the pop stitch. Exit the needle out of the side of the pop stitch, and tie a knot at the bottom of the thread where it exits. Insert the needle half a stitch over from the knot and through to the other side. Tie another knot, exit the needle down through the pop stitch and tie the two ends together.
Thread one of the ends out of the front of the pop stitch to act as the tongue and hide the other yarn tail inside the pop stitch. Trim the tongue to a short length.
Repeat this for the rest of the pop stitches on both of the hair pieces.
ATTACHING PIECES AND ASSEMBLY
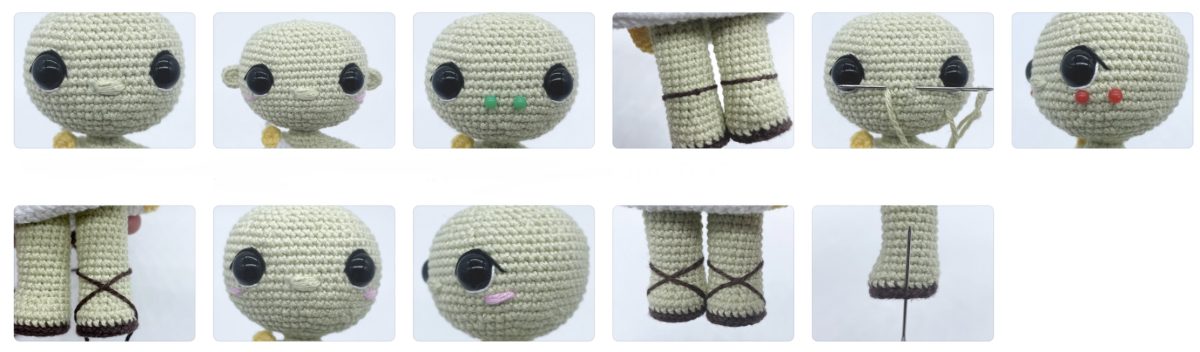
NOSE AND CHEEKS
Using pins, mark the width of the nose in the centre of the face between rounds 57 and 58 and 3 stitches apart. With a small embroidery needle, enter the yarn through the side of the head to the first nose pin. Whip stitch a nose at the two pins 4–5 times.
Once complete, exit the yarn back through the same stitch on the side of the head, knot the two ends, and weave the ends into the head.
Using the Bubblegum colour yarn, whip stitch or embroider a double line beginning on the round below the safety eyes, starting near the end of the safety eye and 3 stitches wide. Enter your thread through the bottom of the head and embroider the cheeks.
Once finished, bring the needle back down through the head to where it entered. Knot the thread ends together and hide them within the head.
EARS
Pin the ears on the side of the head between rounds 56 and 60 with 31 stitches between the bottom of the ears along the front of the head. When pinned evenly, sew on using the leftover ends. Weave the extra tails into the head.
SANDALS
Using an embroidery needle and the Chocolate colour yarn, add the sandal ties around the legs. Enter the needle up through the bottom of the shoe underneath the outside rim. Wrap the yarn around the front of the leg and back down to the sandal on the inside of the leg.
Enter the needle through the bottom of the sandal to the starting yarn tail, tie the two ends together and hide the yarn ends inside the foot.
ATTACHING THE HAIR
Match up the MC of the first larger hair piece and the MC
of the head and add a pin to the top of the hair to keep it in place. Pin approximately 13 of the hair strands to the back of the head, side by side, to cover it. Adjust the hair strands as needed to fill any bare spots.
Sew the hair using an embroidery needle and the long tail left over from making the hair. Starting at the top of the hair, make a few whip stitches around a few of the stitches on the outside rounds, making sure to go through both the hair and the head to keep the hair from moving around.
Next, flip the head upside down and sew the hair strands down, beginning at the pins along the back hair strands and working your way around the back of the head.
Next, match up the MC of the second smaller hair piece and the MC of the first hair piece and add a pin to the top of that hair to keep it in place as well. Then sew the smaller hair piece on using the same steps as the first hair piece. Make sure the embroidery needle goes through both hair pieces when whip stitching along the outside rounds.
Once finished, hide all the yarn tails inside the head. Then part the hair on the left side and flip it over to the right to create a styled hair look.
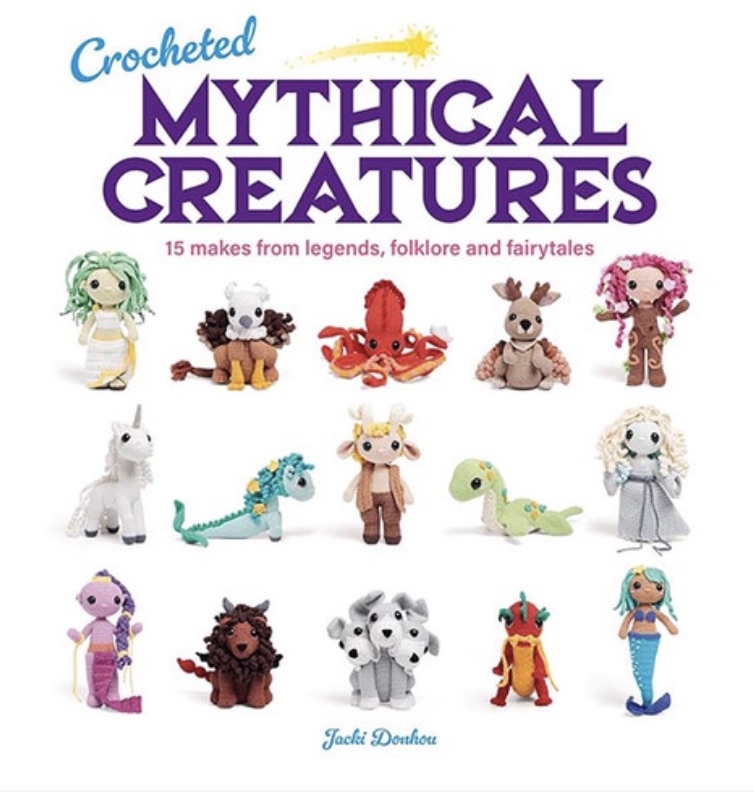
Reprinted with permission from “Crocheted Mythical Creatures by Jacki Donhou, GMC Publications, RRP $26.99, available online and from all good bookshops.”


Awesome doll, thank you for sharing.