
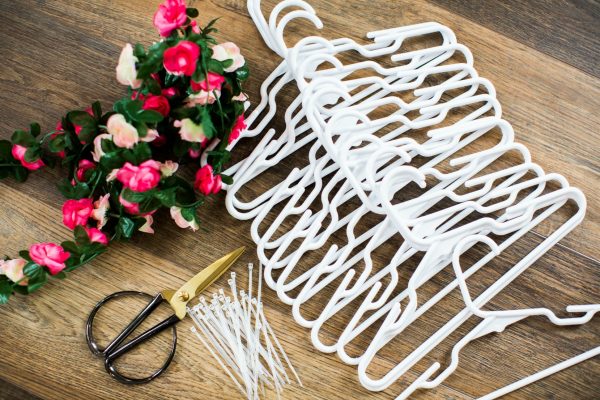
What you need
-You will need a total of 14 coat hangers (I have found that the kid/baby sized coat hangers work best.)
-Zip ties
-Scissors
– Floral Garland
Instructions
Easter is a time of renewal and celebration, and what better way to decorate your home than with a handmade wreath? This DIY Coat Hanger Easter Religious Cross Wreath is a beautiful and unique way to add a touch of faith to your home decor.
This tutorial will show you how to make a cross-shaped wreath using coat hangers, which are a versatile and affordable crafting material. The wreath can be used as a traditional Easter decoration, but can also serve as a meaningful memorial wreath for those who have lost loved ones. The wreath can be customized to your liking and can be made in different colors, this will make it a perfect addition to any home.
The supplies you will need for this craft are minimal and can be easily found at any craft store or online. You will need wire coat hangers, pliers, scissors, and your choice of ribbon or floral decorations to add color and texture to the wreath. The coat hangers are layered to create the shape of the cross and are held together with zipties. The ribbon or floral decorations can be added to the cross using hot glue or floral wire.
This DIY Coat Hanger Easter Religious Cross Wreath not only serves as a beautiful decoration but also has a deeper meaning. It is a great way to remind us of the sacrifice of Jesus Christ and the hope that Easter brings. This wreath can be hung in a church, home, or even used as a centerpiece. It is perfect for anyone who wants to add a personal touch to their Easter decorations.
Making this wreath is a great way to spend time with family and friends, and it is a fun and easy project that can be done by people of all ages. The end result will be a beautiful and meaningful decoration that will be a cherished part of your Easter traditions for years to come. So gather your materials, set aside some time, and get ready to create a beautiful Easter Religious cross that will be a cherished part of your home.
-You will need a total of 14 coat hangers (I have found that the kid/baby sized coat hangers

-Scissors

Step by Step Instructions:
Tips before getting started:
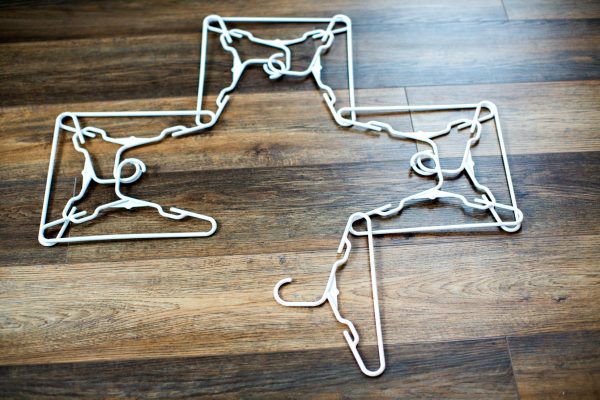
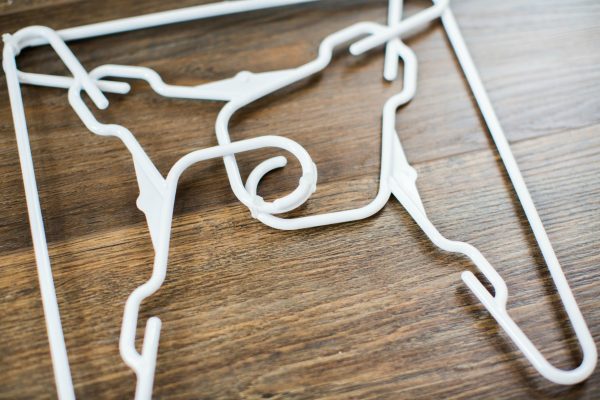
You will place all of your hangers in the cross design before you begin to use the zip ties. Once the cross design is in place you’ll place zip ties, loosely, in directed spots but not tightened all the way. Once all zip ties are in place, loosely, you’ll begin tightening the ties to keep a sturdy, stable and neatly aligned cross.
Step 1:
Place your first hanger starting at the top of the cross with your hanger hook facing towards you.

Step2:
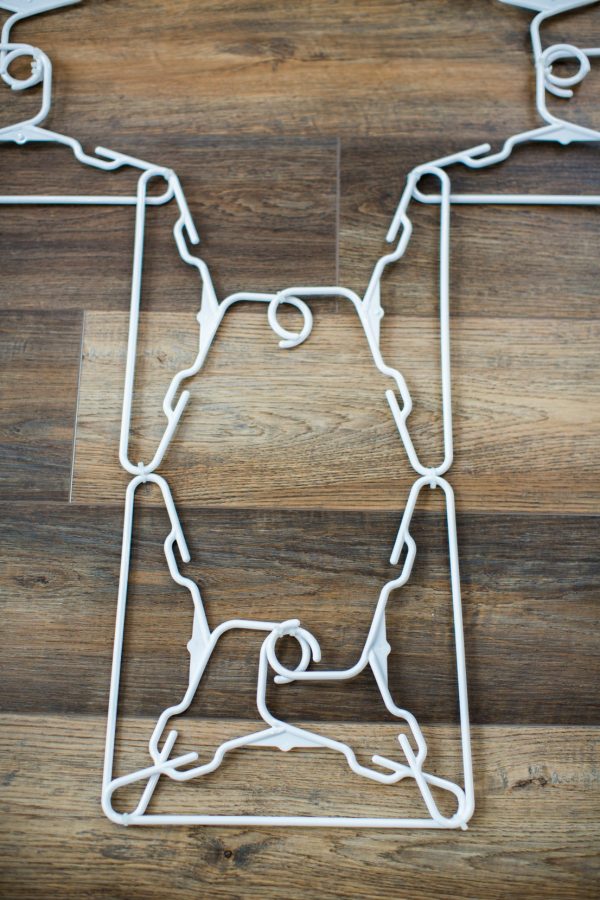
Lay the next hanger on top of the first one with the right top corners sitting on top of each other
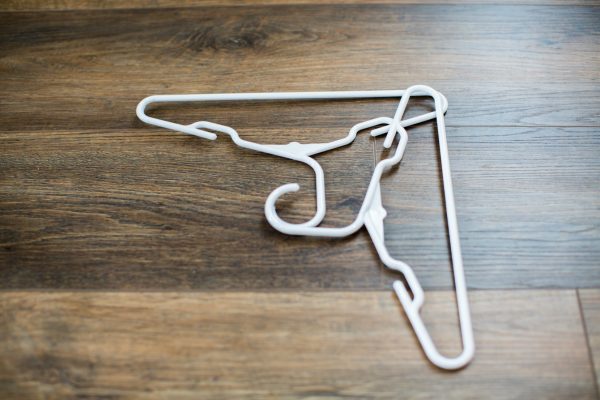
Step 3:
Lay another hanger on top of the first one with the left top corners sitting on top of each other
Step 4:
With another hanger place the corners on top of each other with the top left hanger you just left off of with step #3
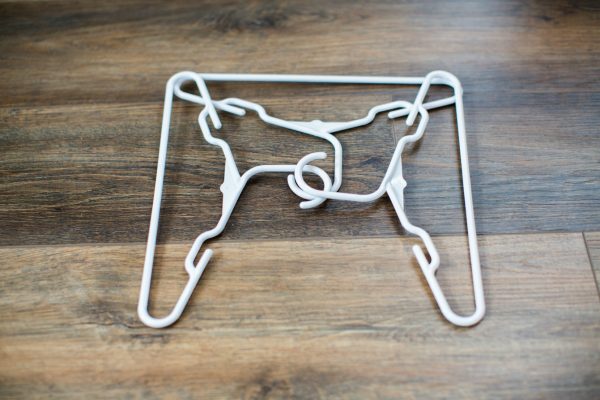
Step 5:
Continue adding another hanger with the side to your left and the hook facing inward with the corners on top of each other
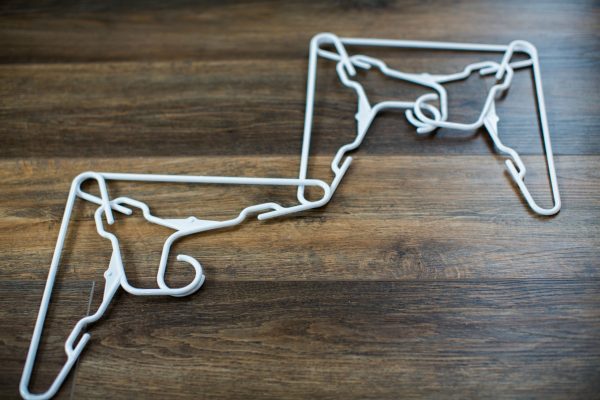
Step 6:
Continue adding another hanger with the side to facing you and the hook facing inward with the corners on top of each other
Step 7:
Continue with steps #4,5,6 on the opposite side to make the right side of your cross.
Step 8:
Now you will begin your rectangle down to finish the cross. Place a hanger on either side of your corners and have the corners on top of one another.

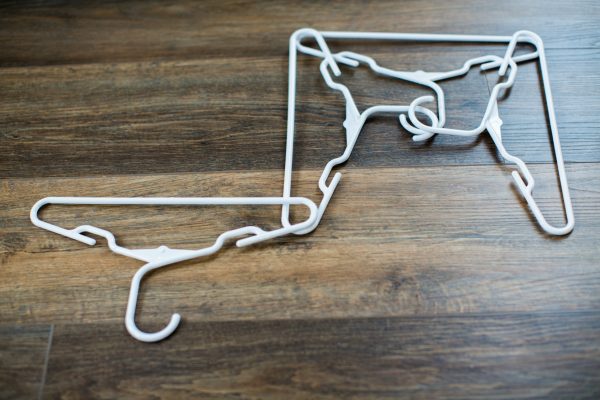
Step 9:
Add another hanger on either side of your rectangle sitting next to step #8 hangers.
Step 10:
The final hanger will be placed on the bottom with the bottom left and right corners sitting on hangers of step #9.
Step 11:
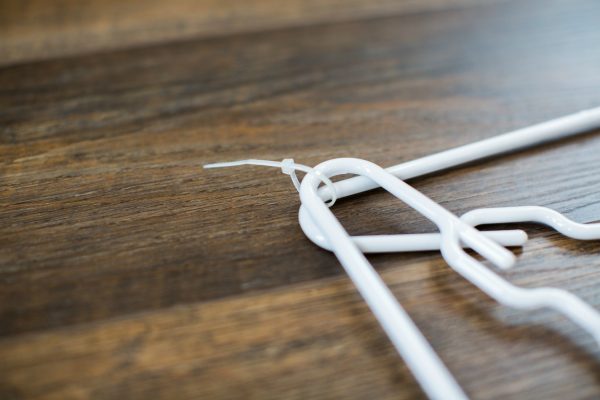
Now that your hanger cross is in place you’ll begin placing the zip ties at each corner (where they sit on top of each other) and on each of the coat hanger hooks which are all facing in towards the cross.
![]()
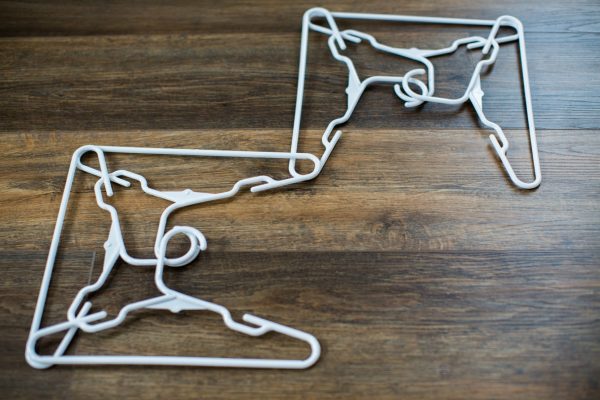
Remember: Be sure NOT to tighten the zip ties all the way, until ALL zip ties have been placed. This will allow you to adjust and reposition your cross if needed.
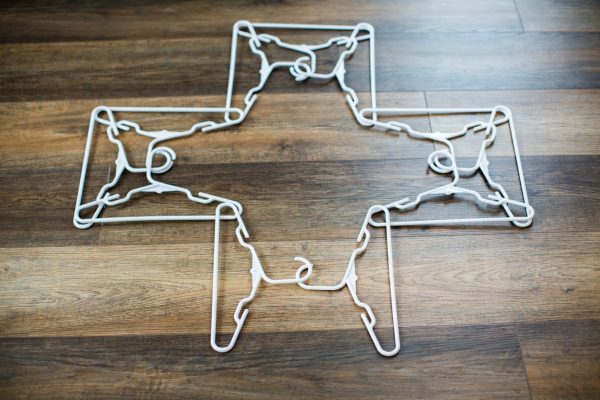
Step 12:
Once all zip ties are loosely in place, begin slowly tightening the zip ties. Adjusting your cross as needed, try to keep the hangers in the same position as you laid out, corners overlapping etc.
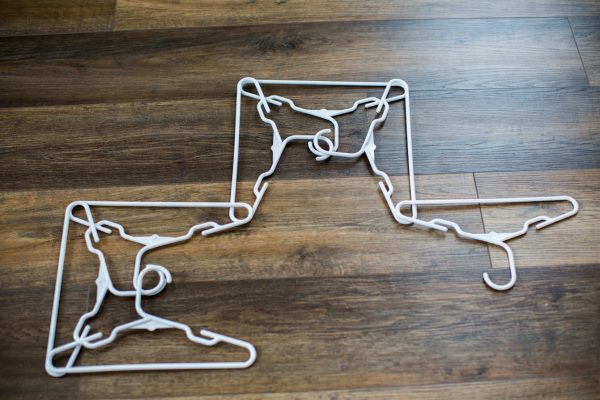
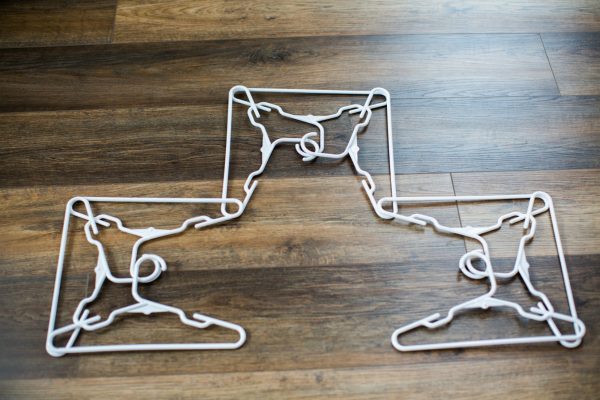
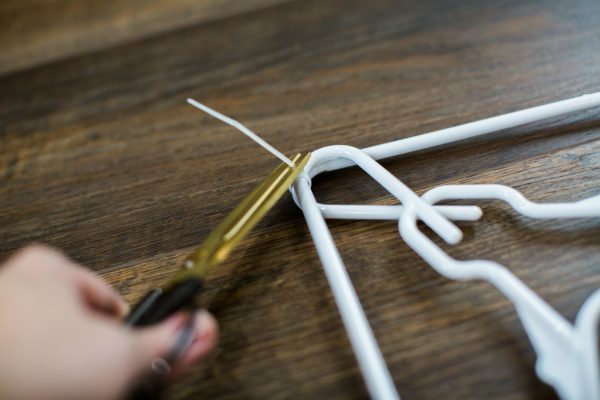
Step 13:
Once all have been tightened it’s time to trim your zip ties!
Step 14:
You can leave your coat hanger cross with or without floral garland. I prefer the garland to give it some vibrant color and life! This is where your creativity can flow! Place the floral all around the cross, on one side or just even on the top half of one side. This is totally your preference!
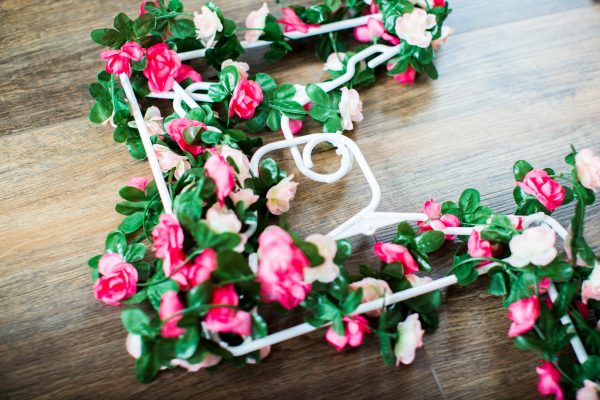
You can either run your garland through the coat hangers and twisting it around, you could hot glue the floral on or even zip tie the floral garland on.


I finished this project yesterday and really love it. It is fairly large so maybe next time I’ll use baby hangers….wish I can send a pic
Such a cute idea. You can wrap it with lights too.
Can’t wait to get hangers, etc ., And start making one of these!
I just made it. I used regular hangers ( plastic). It is HUGE!!! So fun to make. Now just have to decorate it!! Thank you so happy and excited.
Looks like fun to make have to try it for next Easter
I like this. because it’s simple and inexpensive! I want to make this next Easter!
LOVE LOVE IT
Best crafty idea I’ve seen…need to try it
I love this idea!! I really want to try it! Thanks for sharing!
fabulous!