
What you need
¾ yard cotton fabric
12 inches coiled poly boning
Instructions
Cutting Instructions
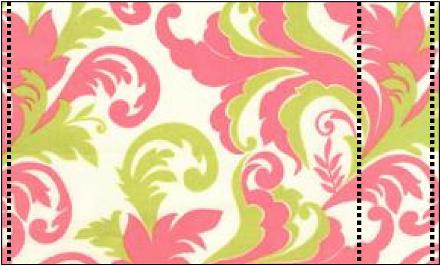
1. Trim each cut edge to make them straight with the grain. An easy way to straighten the edge is to take a snip through the selvage and rip it. Cotton quilting fabrics always tear straight with the grain.
2. Trim off the selvage edges (selvages wash differently and will make your hem wonky if you leave it on.)
3. Cut a 6 inch by ¾ yard width off one selvage side of the fabric. Save this piece for the neck strap.
Sewing Instructions
Making the neck strap:
4. Press the 6 inch strip in half lengthwise (making a 3 inch wide strip.) Open out and press the raw edges to the center. Press in half again. Your strip should now be 4 thicknesses and 1 ½ inches wide.

5. Stitch close to the edge down each side of the strap. Set aside.

Hemming the Body
6. On the bottom 3 sides of the cover, press under ¼ of an inch twice. Top stitch close to the edge.
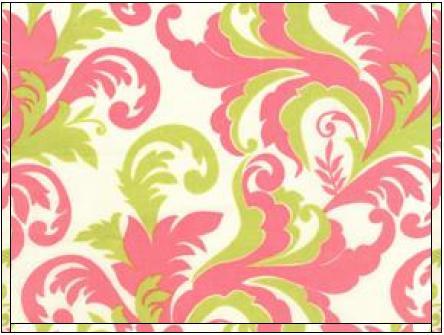
7. On the top side press under ¼ of an inch and then ½ an inch.
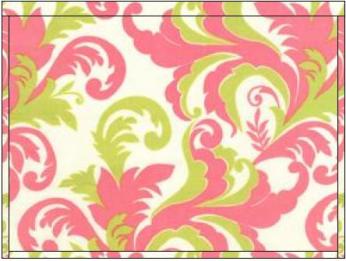
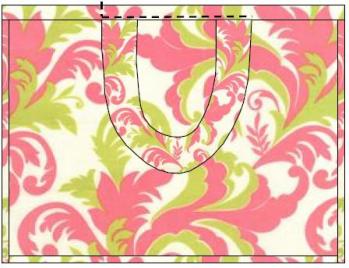
8. Find the center and pin 6 inches on either side of the center.
9. Pin the neck strap piece in place tucking the raw edges under the hem. The outside edge of the strap should be on the pin. Try it on to adjust length of the neck strap. You want it long enough to get it over your head easily, but short enough that you are covered while nursing.
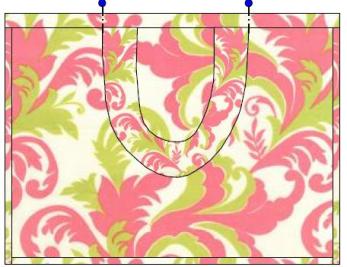
10. Top stitch the 12 inch section close to the edge, double stitching over the neck strap sections. Stitch across one end near the strap as a stop line for the boning.
Adding the Boning
There are many different types of boning available. The boning used for this project is made from polypropylene and sold by the yard covered in white cotton casing. This boning has a natural curve in it from being coiled on the spool that can be ironed straight for building corsets. The curve is perfect for this project so we will leave it as it is. You can slip the plastic boning from the casing it came from or stitch the casing ends shut for this project.
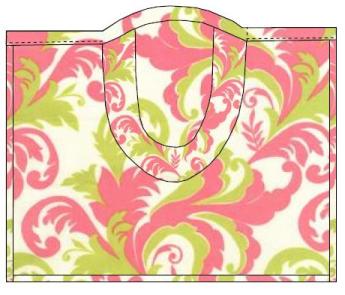
11. Slide the 12 inch piece of boning into the casing just made making sure the natural curve will hold the fabric away from you when you have it on. Stitch on the open side of the boning to hold it in place.
12. Finish hemming both sides of the top of the cover. All done!
VARIATIONS
Add a corner pocket
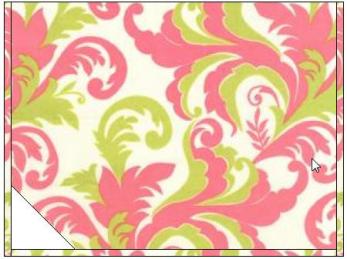
This pocket is great for nursing pads. Cut a 4 inch square of fabric and fold it diagonally to make a square. Tuck it under the corner of your hem in step 6. You can make it out of flannel or terry cloth for an absorbent wipe for milk drips.
Make it reversible
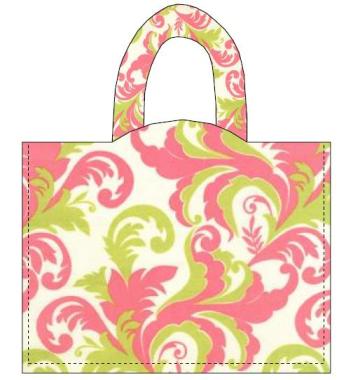
1. Use a second ¾ yard piece of fabric and make as for steps 1-5. Place the two fabrics right sides together with the neck strap sandwiched between and pinned at 6 inches from the center on either side. Leave a gap for turning as shown.
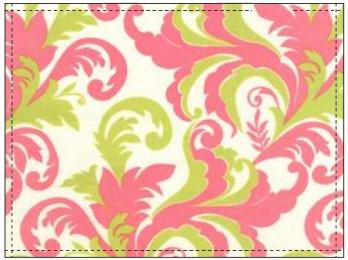
2. Turn right side out and press. Stitch a 3/8 inch casing for the boning.
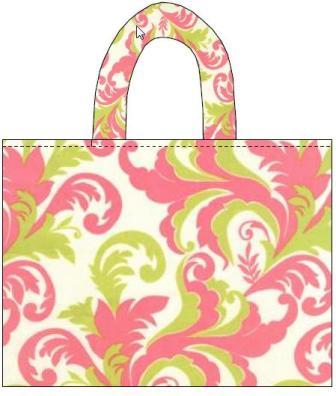
3. Stitch the end of the boning in place and slip stitch the turning opening closed. Top stitch around the bottom 3 sides of the covering. All Done!
Piece the Front
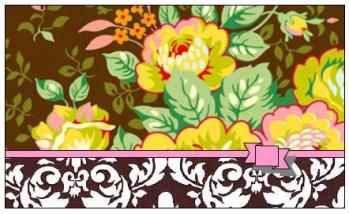
Cut the top piece 20 inches by 36 inches wide and the bottom section 8 inches by 36 inches wide. Sew them right sides together and serge or use a French seam. Stitch a ribbon over the seam if desired.
There are lots of possible variations for the nursing cover. Use your scraps and your imagination!



Quick, easy and affordable. Thanks so much for sharing : ) God Bless
My baby needed to be covered sometimes to focus on eating. This is a great project and I plan on making one for a friend. My question is; is it long enough? I found the older she got the more distracted she was and my cover kept getting smaller.
My baby needed to be covered sometimes to focus on eating. This is a great project and I plan on making one for a friend. My question is; is it long enough? I found the older she got the more distracted she was and my cover kept getting smaller.
My baby needed to be covered sometimes to focus on eating. This is a great project and I plan on making one for a friend. My question is; is it long enough? I found the older she got the more distracted she was and my cover kept getting smaller.
Thanks for sharing this project – whipped this up this afternoon and can’t wait to try it with my baby!
Can anyone tell me where they find the coiled poly boning? I don’t buy the ice cream in the big buckets, so that option is out the window–I like it though! Thanks! This pattern is adorable!
Thank you for posting this!! I think these are too cute and are a great way to be able to breastfeed around other people. I am a little shy when it comes to having my body out in the open so this will really help. Plus they are like $50 in the store and this way I can pick cute fabric that I like and make them!!
Thank you for posting this. I love that you didn’t use rings. I don’t care for hardware.
Regarding the covering up discussion: I don’t care to cover up, but it will make my husband more comfortable. He’s afraid other men get turned on to see a woman breastfeeding. That makes me want to nurse uncovered more, to help the world become less sensitive to the issue. But, so I won’t make rude comments at him when he starts trying to block the car windows, I’m making a cover. Plus, they are so darn cute. I think the adorable fabric only brings more attention to it, personally. So that’s good for breastfeeding awareness too.
Just made a nursing cover using light pink eyelet flower fabric for under $5.00!! Took about an hr, but wanted it perfect. Can’t wait to use it in public. Thank you for having step by step directions
Cant wait to make one of these for my sister, due in March. I had one like this with out the boning in it, so I couldn’t see my son…we both hated it. I’d love to make one for me (if I’m ever blessed with another baby). I’ve never sewed so forgive my ignorance, what is the selvege end?
It is the edge of the fabric were any writing or color swatches is marked most fabrics it is white but some it is the same design as the fabrics pattern look for the little holes that tells you where the pins went that pulled the fabric through the printer you can cut that off about 1/2 to 3/4 of an inch.
Just paid $30 for one of these then turned around and made one for less that $5!
Might be a little easier to follow the pattern if the wrong side of material was a different color! And yes, nursing is perfectly natural, but I don’t show everyone my food when I eat…it’s called manners.
An alternative to the boning is the snip the ends off of a plastic ice cream bucket handle with a pair of kitchen scissors and then round the ends with the same scissors. The handle has the perfect curve and is able to be folded completely in half without being damaged to stuff the cover in a diaper bag. I use these handles in all the covers I make.
Breastfeeding IS completely natural but I’m sure the thoughtful person that posted this link was merely trying to help out those of us who like to keep those special moments just between Mama and Baby, after all just because you can do it doesn’t mean you want an audience
This is an awesome project! After breastfeeding 3 kiddos for at least a year each, I don’t think it’s anything to be ashamed of. I also don’t think their is anything wrong with covering up. Keeps my little one from being distracted by what’s going on around him and let’s face it…not everyone is totally comfortable being exposed to my boobs and I can’t blame them for that! Thanks for an easy, beautiful way to keep me covered.
It’s a great idea which I plan to do as all of my cousins are having babies and would just love these. Thanks !
I am sure the poster of this craft idea was in no way implying that one should be ashamed of breastfeeding. Silly to assume that anyone that uses this is as well.
As I am currently Breastfeeding I agree it is nothing to be ashamed of, but some countries and states have rules and regulations which force women to cover up and this makes feeding in public convenient.
since when is breastfeeding sth to be asheme of??