
What you need
size G/6 (4.25mm) crochet hook
white, blue, and red worsted weight acrylic yarn (you’ll only need a couple yards of each)
black felt or dressmaker’s black iron-on interfacing (optional)
Instructions
8 ply, Double Worsted, DK yarn
Special Stitch:
dc2tog: (yo, insert hook in stitch indicated, yo, draw yarn through st, yo, draw yarn through 2 loops on hook) twice, then yo, draw yarn through 3 loops on hook
Using blue for RIGHT lens: Base ch: Ch 10
Row 1 (RS): Hdc in 3rd ch from hook, hdc in remaining ch to end, turn (8 hdc)
Row 2 (WS): Ch 2, 2 hdc in first hdc, hdc in next 6 hdc, 2 hdc in last hdc, turn (10 hdc)
Row 3: Ch 2, hdc in each hdc, turn (10 hdc)
Row 4: Ch 2, hdc in next 9 hdc, 2 hdc in last hdc, turn (11 hdc)
Row 5: Ch 2, hdc in each hdc (11 hdc) Fasten off.
Using red for LEFT lens: Complete Base ch, and Rows 1-3 as in blue lens above.
Row 4: Ch 2, 2 hdc in first hdc, hdc in remaining 9 hdc, turn (11 hdc)
Row 5: Ch 2, hdc in each hdc (11 hdc) Fasten off. Place red lens, then blue lens WS up in front of you (i.e. fastened-off ends to the right). This is the INSIDE of the mask.
Using white for rims: Attach yarn at upper right corner of blue lens. Sc evenly around the lens, adding an extra sc in each of the four corners. Fasten off. Do the same for the red lens.
Attach yarn at upper right of blue lens (still WS up), hdc across.
At the end of the top row, find the first stitch down on the right side. Complete a dc2tog with this stitch and the corresponding stitch on the upper right corner of the red lens to make the bridge. (Don’t worry, it’s not an exact science. Just get a smooth attachment of one lens to the other.)
Continue to hdc all around the red lens, again making an extra stitch in each corner. Fabric will ‘cup’ slightly towards you.
At the end of the red lens, sl st into the blue lens in the st just under the dc2tog made in the last step.
Continue to hdc all around the rest of the blue lens, making an extra stitch in each corner. Do not fasten off. Turn.
Frame arm:
Row 1: Ch 2, hdc in 8 hdc along side, turn (8 hdc)
Row 2: Ch 2, hdc in 7 hdc, leaving last st unworked, turn (7 hdc)
Row 3: Ch 2, hdc in 7 hdc, turn (7 hdc)
Row 4: Ch 2, hdc in 6 hdc, leaving last st unworked, turn (6 hdc)
Row 5: Ch 2, hdc in 6 hdc, turn (6 hdc)
Row 6: Ch 2, hdc in 5 hdc, leaving last st unworked, turn (5 hdc)
Rows 7-8: Ch 2, hdc in 5 hdc, turn (5 hdc) Do not fasten off. Ch 90, sl st to other end of row, fasten off. Attach yarn to upper right corner of red lens and repeat Frame arm instructions. Weave in all ends.
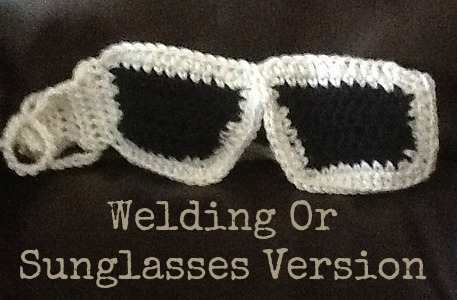
(Optional) To block out more light, you can sew black felt to the inside of the lenses. Or, apply two small pieces of black iron-on interfacing, following manufacturer’s instructions.


It took me about 1 1/2 hours to make this including the felt inside. Glued the felt and it
needed to dry, but dried clear and my grandkids loved it!
Had been planning to make this for a couple weeks now and I finally get fed up and made it right before bed. Turned out great! Good project for beginners who wanna try something other than square items. <3
i did this project and it took me 2 hors to figure it out
This pattern item will make a nice stocking stuffer at Christmas. Thanks, Marilyn
Love it! … Made it for a friend for her birthday … hope she likes it as much as me!
This pattern looks awesome! Cant wait to crochet them, Im making a pair for me and the boyfriend, he’ll love them!
very cool i wish i knew how to do this stuff