
Get more details about this project
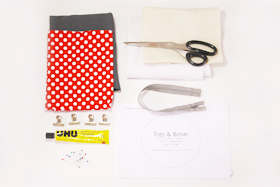
What you need
Felt
Scissors
Heavyweight interfacing
13’ zipper
Fabric pins
Multipurpose adhesive (such as UHU)
Clips
Main fabric
Lining fabric
Instructions
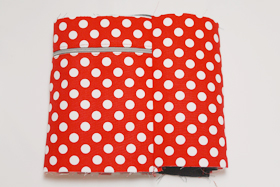
She’s cute, functional, and will carry all your makeup tools for you! Standing at approximately 6 inches tall, she’ll hold your bottled cosmetics standing (no spills!) and will even take in other items like face powder, perfume bottles, and yes even your makeup brushes!
1. When printing the PDF pattern, do not scale to fit page.
2. It’s advisable to choose at least moderately sturdy fabric for the main fabric (as this helps maintain the structure and shape of the purse), keeping in mind that the combination of the fabric and the heavyweight interfacing will be able to feed through your sewing machine.
3. To avoid needles breaking, use at least a size 14 or denim needle on your sewing machine. When sewing through thick layers, always go slow. It’s boring but it’s definitely safer 🙂
4. Some interfacings shrink and may cause your fabric to look wrinkly and bubbly later on. To avoid that, pre-wash your interfacing and steam it before adhering to the fabric.
Your supplies:
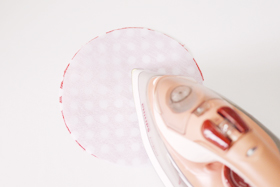
Step 1: Preparing the pieces
Cut fabric and interfacing according to instructions on the pattern.
Iron-on interfacing onto all the main fabric pieces.
Step 2: Constructing the body (Main fabric)
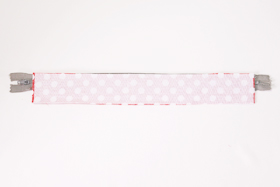

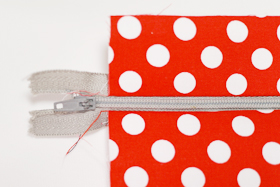
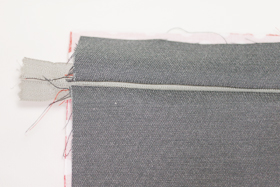
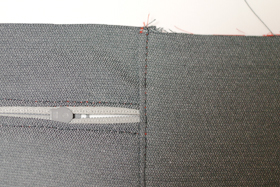
Lay Body B right side down on top of zipper. Do not line it up right to the metal ends of the zipper—leave some excess of the zipper on both ends.
Stitch down as closely as you can to the zipper teeth, from the top to the bottom of the zipper.
Fold upwards.

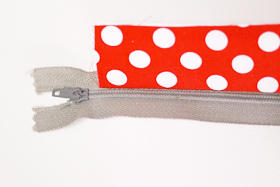
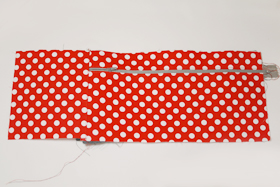
Next, place Body A face down. Line it up against Body B.
Stitch down Body A to the zipper as closely as possible to the zipper teeth.
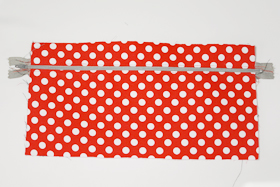
Fold Body A down and this is what you will have.
Step 3: Adding the Lining
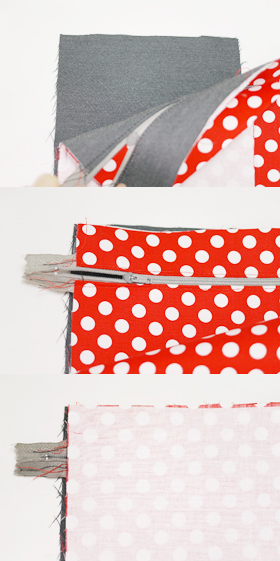
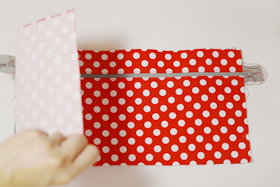
Place the the piece right side down so that Body B is on top, and Body A below the zipper. Fold down Body B to the back so that it’s hidden behind the zipper.
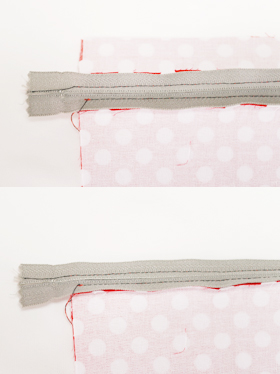
Place Lining Body B right side down on top of the zipper, lining up the edges. Stitch down as close as possible to the zipper teeth.
Fold Lining Body B upwards and this is what you’ll have:

Fold the main fabric of Body A under so it’s hidden behind the zipper. Place Lining Body A right side down onto the zipper. Line up the edges and stitch as closely as possible to the zipper teeth.
Fold Lining Body A down again, and this is what you’ll have: the lining behind the zipper!
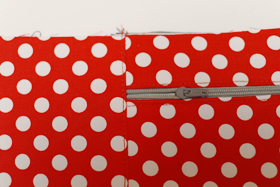
Flip it over so the main fabric is facing you. Top stitch Body B and Body A, again going as closely to the zipper teeth as you can and making sure that the thread catches the lining fabric underneath as well.
We will now refer to this piece as Body AB.
Step 4: Completing the Body
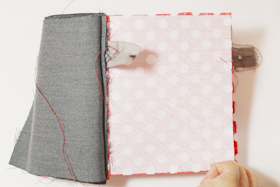
Stack the following pieces in order, lining up the edges:
1. Lining Body C; right side up
2. Body AB; right side up. Open up the zipper slightly so that the zipper head stays at least 1.5 inches in from the left edge.
3. Main Body C; right side down
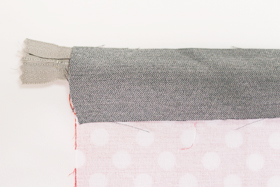
Stitch down on the left edge (3/8 inches Seam Allowance).
Open up both Lining & Main Body C to the left, and top stitch on the fold, catching the lining underneath.
This is what the back should look like.
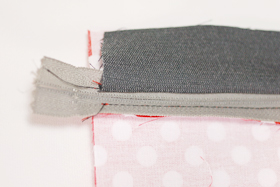
Now, lay down the piece so that the section of Body C is on the left side and the zipper is on the right side.
Take the left end and fold it over to meet the right end.
Stitch down the ends that met (3/8 SA), leaving the Lining Body C unstitched.
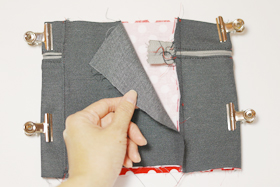
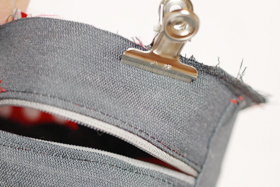
Position the whole piece so that the Lining Body C is in the center like a door. Clip down the sides so they lay flat.
Now we’re going to cheat a bit to finish this up neatly 😉
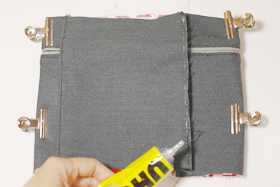
Squeeze out multipurpose adhesive onto the edge of Lining Body C like the picture above.
Using your fingers, carefully flip the edge down and adhere it to the other fabric, taking care to overlap the existing vertical stitches.
Once done, leave to dry.
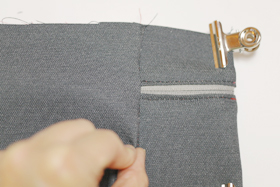
Tip: Be patient! The glue must be dry or you might risk jamming your sewing machine.
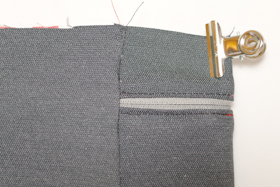
When the glue has dried, turn the whole thing inside out and top stitch at the edge, taking care to catch the lining underneath.
You have completed the Body!
Step 5: Making the bow handle
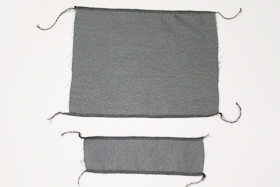
Serge (or zigzag) the top and bottom of Ribbon Center & Ribbon Handle.
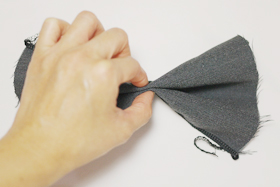
To form the bow, squeeze down the middle of Ribbon Handle. Pin in place.

Wrap Ribbon Center around the middle, taking care to hide the serged edges under. Stitch in place and trim excess.
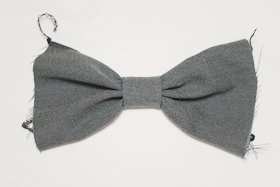
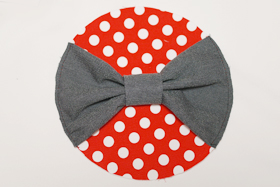
Arrange the pieces until you are happy with the way the bow looks. Remember to hide all serged edges under 😉
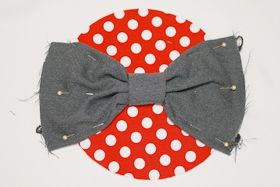
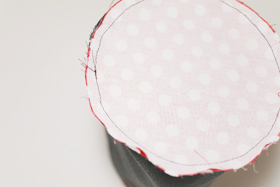
Place the bow on top of one of the pieces of Top & Base A. Arrange and pin in place.
Stay stitch as close to the edge of the circle as possible, and trim excess of the bow away.
Step 6: Attaching the Top & Base
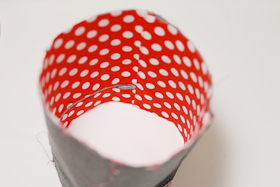
Place the Body tube standing, with the right side facing in, and the zipper being at the bottom (refer to picture above).
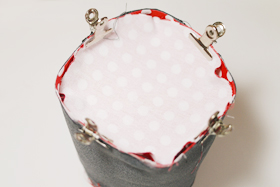
Place the Top & Base A without the bow right side down on top of the tube and clip it down with 4 clips, evenly distributing the position of the clips.
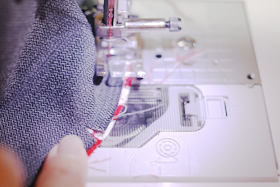
With the Top & Base piece facing down, very carefully stitch the edges (3/8 SA) to join the Top & Base A piece to the Body. To help the pieces conform to the curves smoother, snip notches on the Body piece as you sew along (see picture above for the notch near the finger). The notch shouldn’t exceed 3/8 inches, so be careful and try to keep it short.
Once you’re done, this is what you’ll have.
Unzip the zipper*, and repeat with the other end of the Body tube.
*Important! You MUST unzip the zipper before stitching the other end of the tube, or else the bag will not be able to be turned inside out.

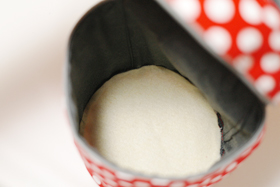
Trim excess, and carefully turn the whole bag inside out through the zipper opening.

Use your fingers to pinch the curved edges to shape it.
Once done, adhere the Top & Base B pieces (felt) on the inside using multipurpose adhesive, tucking in the raw edges to hide them under.
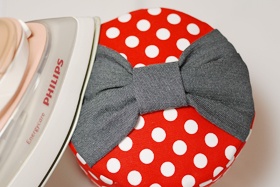
Step 7: Final press!
Stuff the inside of the bag with rolled tshirts or fabric until it’s packed comfortably.
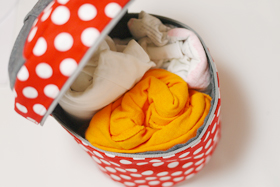
Iron the edges carefully to smooth.
And you’re done!
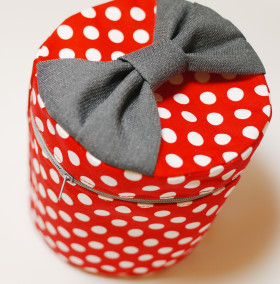
What will you put in your very own makeup bag?


It doesn’t state how much fabric you need to make this. Which kind of sucks
sooooooooo cute!
i made the bag, but it came out too small and it only stands at four inches tall. did i do something wrong?
Lovely little bag.
Thanks for sharing:)