
What you need
Polymer clay “any brand” red & white (or colors of your choice)
Tissue Blade (very sharp – adult supervision required!)
Clay knife, or plastic knife
Toothpick or bamboo skewer
Acrylic roller or dowel (optional)
Work surface – ceramic tile, file folder or wax paper
Oven for baking – it is recommended to use a clay – only oven (toaster oven).
Instructions
Condition a small amount of each color of clay until soft and pliable by rolling and squeezing in your hands. You will need more white. Test to see if it cracks when you bend it – that means it needs more conditioning!
Roll out an even log of white & divide in half. Leave one half whole and cut the remaining half into 4 equal pieces.
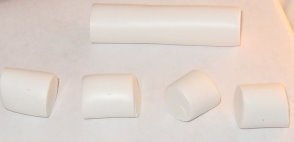
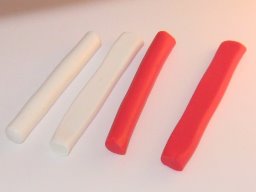
Set the larger piece aside and roll out the 4 smaller pieces into thinner logs about the same thickness & length.
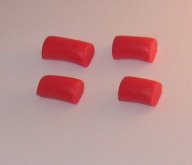
Roll out the red clay into a log of even thickness & divide into 4 pieces. Continue rolling these out to a similar length and thickness as the smaller white pieces.
With your fingers or roller to flatten the small red & white logs slightly.
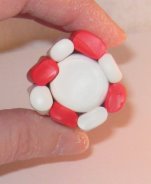
Using your larger, white log as the center, arrange the flattened strips around it. You can gently stretch and roll the pieces if they don’t fit right away.
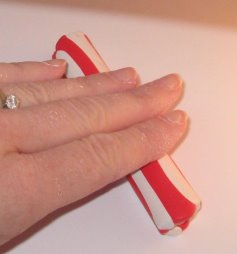
Gently press these together once they are arranged and begin to roll the whole thing into a longer smooth, tube – you just made a polymer clay cane!!!
Once you get it to the desired size, let it rest for about 30 minutes or put it in the refrigerator for a short time. This helps to firm it up and limit distortion when cutting.
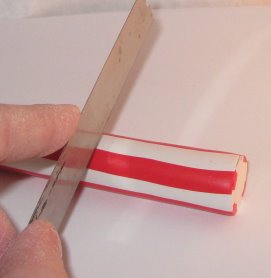
Use your tissue blade to cut the cane into thick slices. Roll as you gently apply pressure to limit squishing your cane. Be careful this is a SHARP tool!!!

Poke holes in the beads using a toothpick or skewer & bake according to manufacturer’s directions.
Glaze if desired. I use varathane – found in most hardware stores. For small projects, use the clay manufacturer’s glaze. The bottles are smaller & more affordable!
CREATE a piece of jewelry with your beads or make a garland for your tree!!!!
***TIP***
***SAVE those pieces you trimmed off and roll them together to make swirly accent beads!
***Red clay can leave some pigment on your hands. To help keep the white clay from turning pink, handle most of the white clay first. You can also use baby wipes to clean your hands and tools (alcohol is a solvent for the clay) or wear latex gloves & switch in between colors.



wonderful idea! i want to make that now haha
This is such a clever idea! I have been attempting to make polymer mints for awhile, but I always mess it up in the cutting. I never thought to refrigerate it for 30 minutes – that really helps! Thank you!!!~