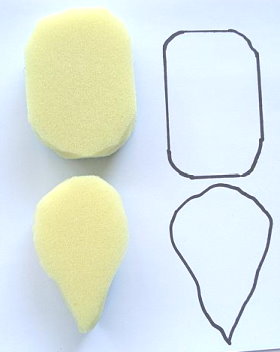
What you need
Brown bag lunch bags
Kitchen sponges
Jute twine
Craft paints: orange, green white
Black permanent marker
Scissors
Paper plate for the paints, one for each color
Instructions
Step 1
Cut the kitchen sponges into a ghost shape and a pumpkin shape: For the pumpkin, simply round out the corners. For the ghost, round out two corners, and cut the other two corners off to form a point.
Step 2
Spread the bags out on a counter, or table, so you can stamp multiples at a time. (If you are making hundreds of bags, spread the bags side by side on the floor.) Pounce a damp sponge into either white or orange, and stamp onto the center of the bag.
Use a corner of the sponge which was cut off, and stroke green below the pumpkin for the grass.

Allow to dry.
When dry, use a flat tip permanent marker to outline the ghost and the pumpkin, and to draw on the facial features. Print “BOO” on the bags!
Make some bags with both the pumpkin and the ghost! Punch holes in the tops of the bags and pass jute twine through. Or staple the bags closed, or bunch the top together and tie a ribbon or jute around to close it up!


Maybe a little bit complicated and expensive for pensioners and their young children
Love the concept Many thanks Alison
really really cute!!!