
It is a lovely scrap yarn crochet project, a fun garden crochet idea, and a quick handmade gift if you need something cheerful and lightweight.
Get more details about this project
What you need
8 ply yarn in 2 to 4 colors
3.5 mm crochet hook
Scissors
Yarn needle
Optional: beads, tassel, pom-pom, or other hanging weight
Notes
Leave a long tail at the beginning and end for hanging.
Do not turn at the end of rows.
Fasten off after each row.
Rejoin yarn at the beginning of the next row.
The spiral forms naturally as the stitch count increases.
Abbreviations
ch = chain
sc = single crochet
dc = double crochet
st = stitch
rep = repeat
Instructions
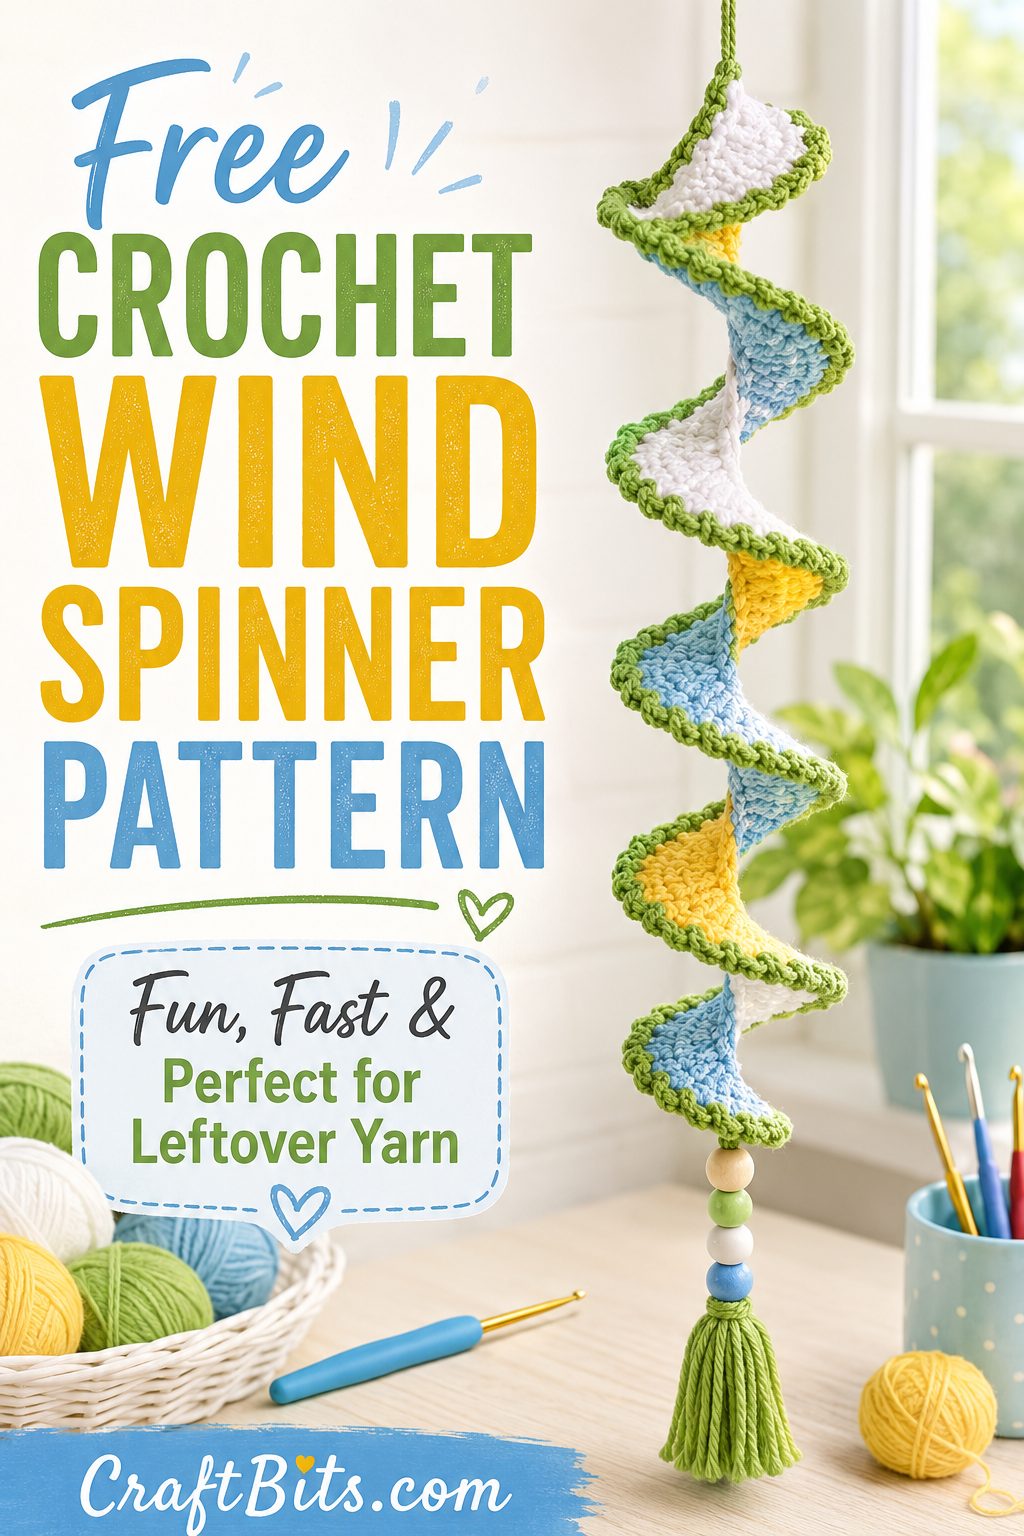
If you have a basket of leftover yarn sitting there giving you that “use me for something cute” look, this is a lovely little project to start with. A crochet wind spinner is quick, cheerful, and one of those satisfying makes that looks far more impressive than the effort involved. You only need a long starting chain, a few simple rows, and a bit of stitch increasing to create that pretty spiraled twist.
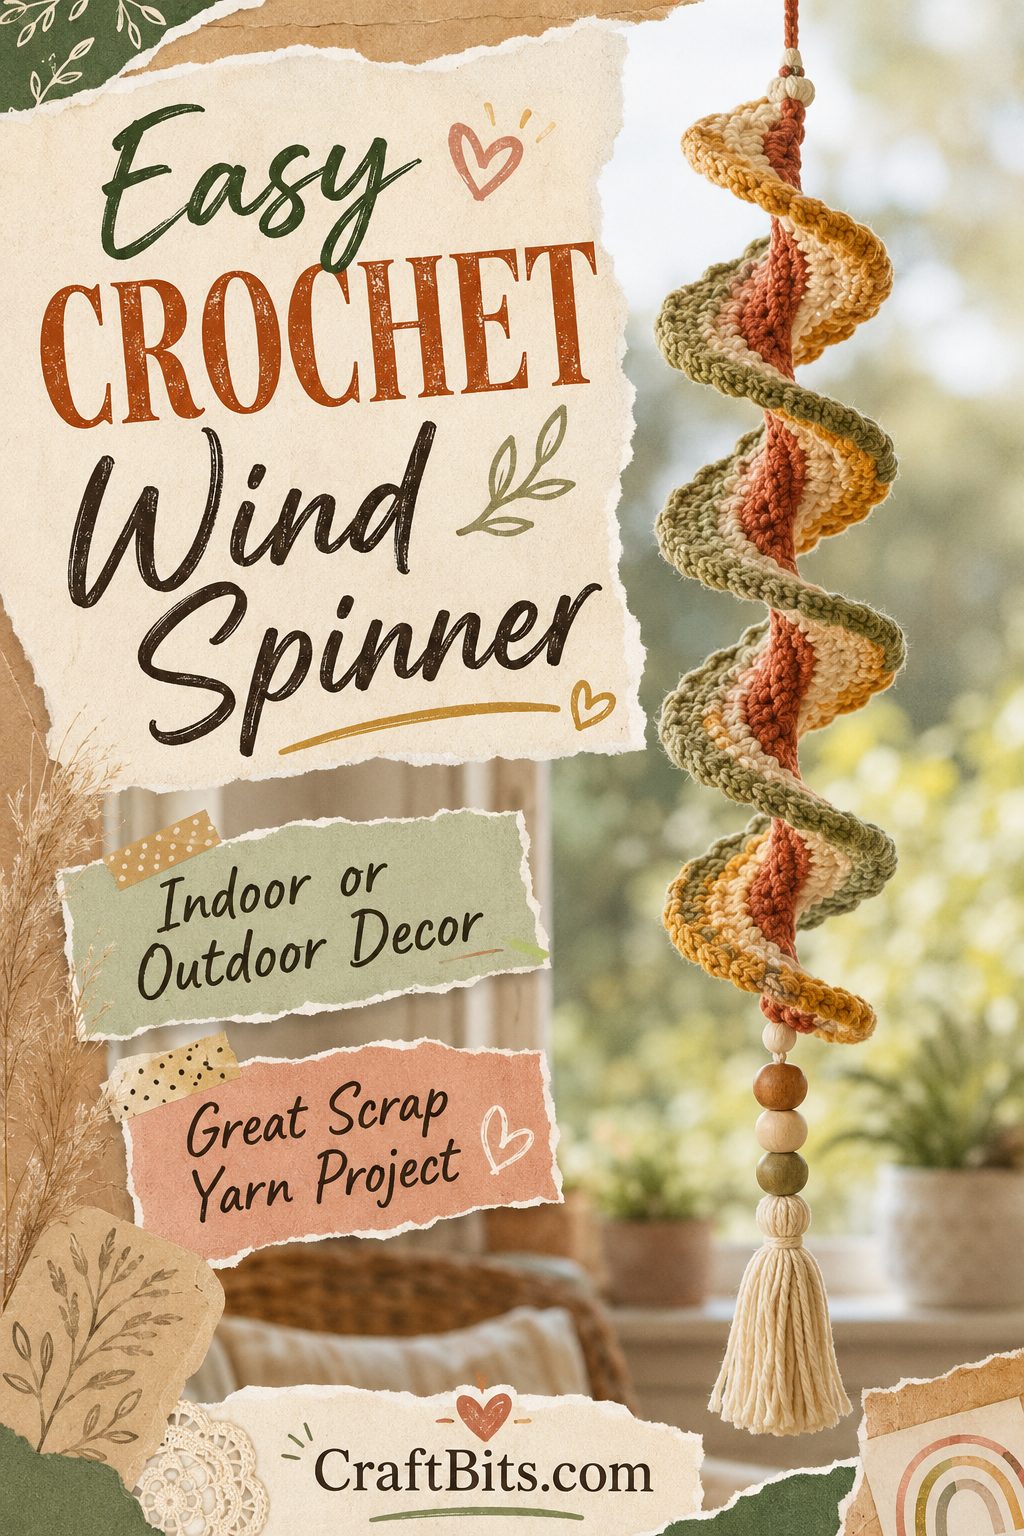
I love projects like this because they are practical in the most charming sort of way. You can hang a crochet wind spinner on the patio, from a tree branch, on a shepherd’s hook in the garden, or even near a sunny window indoors where it can gently spin and sway. It is also a fantastic stash-busting crochet project for using up odds and ends of 8 ply yarn without needing a huge amount of any one color.
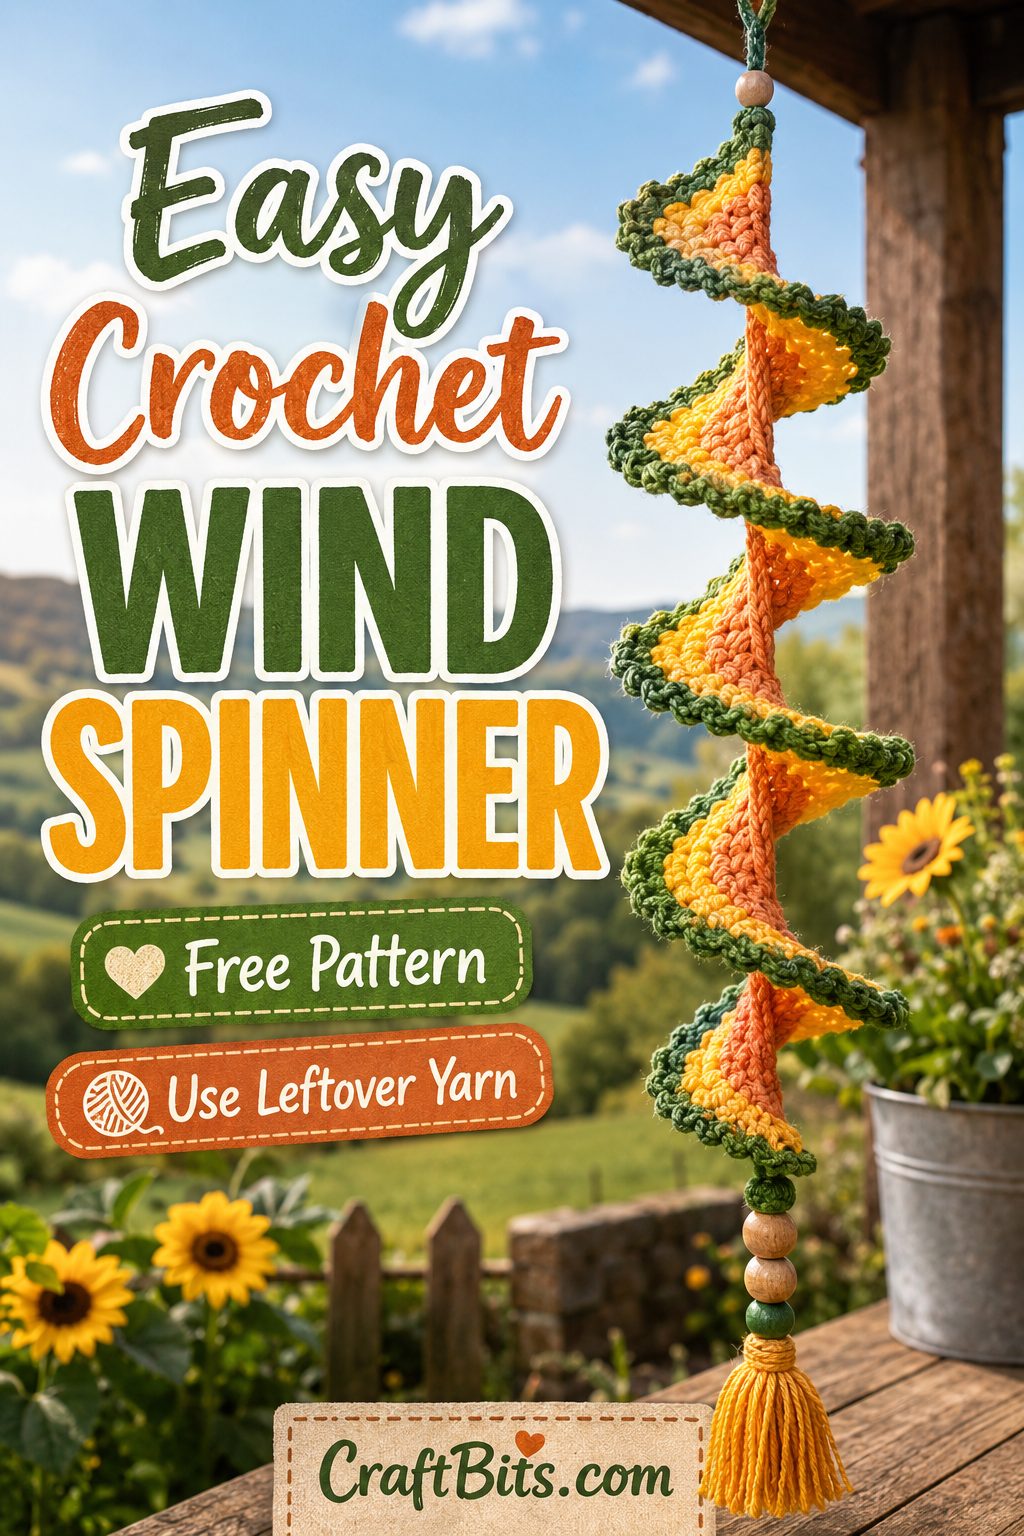
This easy crochet wind spinner pattern is beginner-friendly, works up in an afternoon, and gives you plenty of room to play with color. Use bright rainbow leftovers, beachy shades, sunflower tones, or festive Christmas colors depending on the season. Add beads, a tassel, or a pom-pom to the bottom for a little extra weight and movement, and you have a simple handmade decoration that feels bright and happy without costing much at all.
The magic in this crochet wind spinner pattern is in the increases. You begin with a simple chain, then work one stitch into each chain, then two double crochets into each stitch, then three double crochets into each stitch. That growing stitch count forces the strip to twist and curl into a spiral all on its own.
It is one of those clever little crochet projects that feels almost too easy when you see the result. There is no complicated shaping, no tricky assembly, and no stress if your yarn colors are a bit random. In fact, random often looks even better.
Pattern
Foundation
Ch 75, leaving a long starting tail. Fasten off.
Tip: Tie a small knot in the starting tail so you can easily identify the top end later.
Row 1
Join yarn in the first chain.
Work 1 sc in each chain across.
Fasten off.
Row 2
Join yarn at the beginning of the row.
Work 2 dc into each stitch across.
Fasten off.
Row 3
Join yarn at the beginning again.
Work 3 dc into each stitch across.
Fasten off.
Row 4
Join yarn at the beginning once more.
Work 1 sc in each stitch across.
Fasten off, leaving a long tail.
Finishing Instructions
Use a yarn needle to weave in the loose tails from the middle rows. Leave the first and last long tails in place.
Gently arrange the strip into an even spiral or corkscrew shape. One end will be used for hanging, and the other end can hold a weight.
Add one of the following to the bottom tail:
- tassel
- wooden beads
- pom-pom
- small crocheted motif
- decorative charm
This little weight helps the spinner hang nicely and move beautifully in the breeze.
Color Ideas for Crochet Wind Spinners
This pattern really comes to life with color. If you are using scrap yarn, do not overthink it too much. Sometimes the most unexpected combinations are the prettiest once the spinner is hanging up.
Try:
- white, yellow, green, blue
- rainbow scraps
- sunflower shades
- beachy blues and aqua
- Christmas red, white, and green
Pastels would also be lovely for spring, while strong oranges, reds, and mustard shades would make a beautiful autumn crochet wind spinner.
Handy Tip
If you want a longer spinner, simply begin with a longer chain. If you want a fuller twist, use thicker yarn or experiment with an extra increase row.
That is part of what makes this such a good crochet stash-buster pattern. Once you have made one, you can start playing around with length, texture, and colors to make a whole little collection.
Where to Hang a Crochet Wind Spinner
These look lovely in all sorts of spots around the home and garden. Try hanging one:
- from a patio beam
- on the front porch
- near a sunny kitchen window
- from a tree branch
- in a child’s room
- on a garden hook among flowers
- from a pergola or balcony railing
They also make sweet little gifts tucked into plant baskets, care packages, or handmade housewarming bundles.
Beginner Tips for Success
If you are new to crochet, this is a nice pattern to practice on because the stitches are simple and the shaping is created by the stitch repeats rather than anything fiddly. A few things to keep in mind:
Use a yarn color that makes it easy to see your stitches, especially for the first one you make. Rejoining yarn at the beginning of each row can feel a bit unusual if you are used to turning your work, but after the second row it becomes very straightforward.
Do not worry if the strip starts curling and looking dramatic quite early on. That is exactly what it is meant to do. The more it twists, the better the finished spinner will look.
A Lovely Scrap Yarn Crochet Project
This easy crochet wind spinner pattern is the kind of project that reminds you crochet does not always need to be practical in the serious sense. Sometimes it is enough for something to be cheerful, decorative, and a bit whimsical. It uses up small amounts of yarn, works up quickly, and adds a handmade touch to your outdoor space or window.
And honestly, there is something very satisfying about turning leftover yarn into something that dances in the breeze.


What do you think of this project? Let us know!