
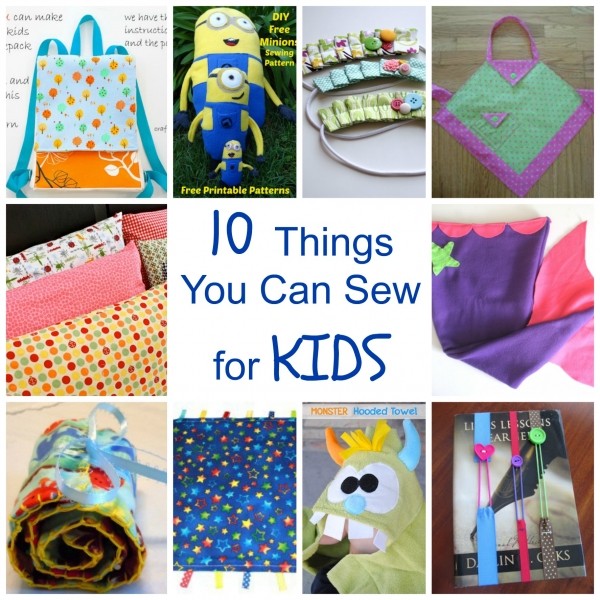
Get more details about this project
What you need
Shoe box, or any other small box with removable lid
Fabric scraps
Wonder Under or other fusible web
Pinking shears
Iron, ironing board
Optional – buttons, raffia, etc.
Fusible web is a fusible interfacing that allows you to bind two fabric
Instructions
To assemble the fabric-covered gift box, essentially you are going to be ironing fabric scraps onto a shoe box.
While assembling my box, I found it was easier to iron the fusible web onto the fabric first, and then cut the fabric into the desired shapes. The web reinforced the fabric and the pinking shears cut through the fabric more cleanly.
Choose a piece of fabric and cut a piece of the fusible web to fit. With a warm iron, iron the web to the wrong side of the fabric, following the directions that came with the fusible web. Don’t remove paper backing yet. Next cut the fabric into desired shapes with the pinking shears. Regular sewing shears would work also, but the pinking shears give the fabric an edge that will not unravel as easily.
When cutting your shapes, cut some rectangular, some square, and some triangular. The number and size of each are up to you, but you will find some fit better than others along the edges and in the corners. Long rectangular pieces lay along the top edges better and reduce the number of pieces required to line the top.
Cut pieces out of several coordinating fabrics. After you cut your pieces out, start ironing them to the box. Peel the paper off of the fusible web, lay the fabric with fusible web side down on the box and press with the iron. You may have to go over it a couple of times to get it to stick really well.
I started with the top of the box and worked my way down. Fold a piece of fabric over the top edge of the box. Mine is folded over about an inch. Iron the edge on the inside of the box first. Fold the piece to the outside of the box and press again. Continue overlapping pieces until the box is covered. Cover the lid of the box in the same way, starting with the bottom edge.
When you’re done look for small spots you missed, adding fabric pieces until the entire surface is covered. You can’t make any mistakes…it’s supposed to look like a patchwork quilt.
Look over the box for spots where the edges of the fabric are coming up and gently run the iron over them. Sometimes it will take a couple of times to get all the edges to lay down. If you later find a stubborn spot that just doesn’t want to stick, just dab a little glue on it and press down until it takes hold.
You can embellish your box with buttons, raffia bows, etc. I used a hot glue gun to glue a corrugated cardboard heart to the top, and then I glued a raffia bow to the heart.
Add some tissue paper to the inside of the box, and it’s ready to add a gift. I placed in mine a small stack of handmade cards tied together with a piece of raffia tied into a bow. The box was a gift to a friend who likes to write pen pal letters.
You can also use these boxes for storage…for photos, letters, or whatever else you’d like to store in a pretty box. These are great for using up fabric scraps you have laying around.
This fabric-covered box is very easy to make and makes a great complement to any gift.
Rachel Paxton is a freelance writer, mom, and owner of four home and family web sites. For scrapbooking, card making, gift-giving ideas, and more family memory-making activities, visit http://www.crafty-moms.com.


how cute thank you