
What you need
To make this heart-beat necklace you’ll need:
1) Craft wire – 16 gauge or 18 gauge
2) Craft pliers
3) Jewelry chain.
Instructions
Welcome to our tutorial on how to make a DIY Heart Beat Necklace! This necklace is the perfect gift to show your loved one how much you care. The unique design of the heart beat, symbolizes the love and connection you share with your loved one. This necklace is easy to make, and the instructions provided will guide you step by step through the process.
This project is perfect for those who love jewelry making and want to create something special and unique for their loved ones. The necklace is simple and elegant, and it can be customized to match your loved one’s style and preferences. The materials required for this project are craft wire, craft pliers, and a jewelry chain. These materials are budget-friendly and can be easily found at your local craft store.
Not only is this project easy to make, but it’s also budget-friendly and it’s perfect for those who want to create something unique and special for their loved ones. The necklace is a great way to express your love and affection for your significant other, family or friends. It is a perfect gift for Valentine’s Day, anniversary, or any special occasion.
In this tutorial, you’ll learn how to create a beautiful heart-beat necklace using craft wire, pliers and a jewelry chain. So, grab your materials, and let’s get started on creating this beautiful and meaningful DIY jewelry.
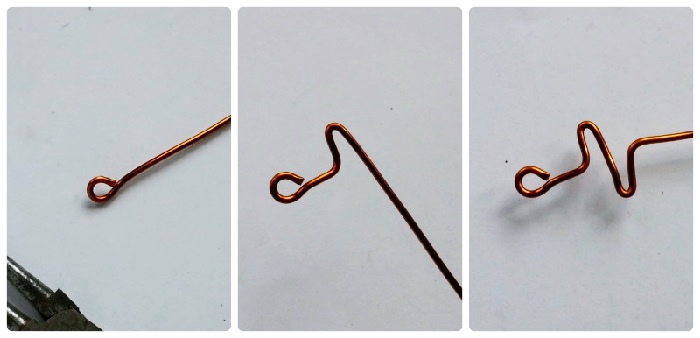
Step-1: Hold the wire from an end. Do not cut it from the bundle. Start by creating a small loop at the end of the wire with the help of the looping pliers. Keep 1 cm straight and then use the flat nose pliers to bend the wire upwards, slightly to 90 degrees. Then again bend the wire downwards. Keep 2 cm straight and the make another bend. Make the last bend by keeping it aligned with the first straight part of the wire.
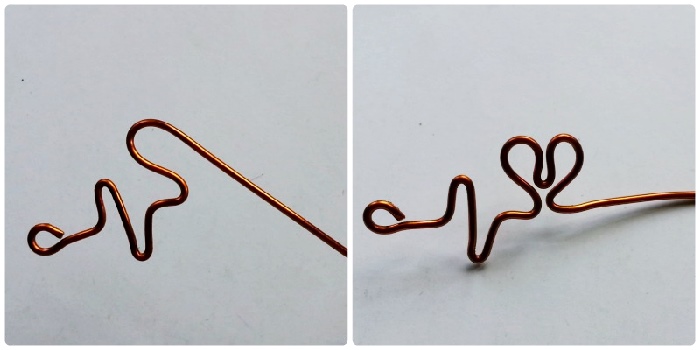
Step-2: Now we’ll make the heart. Use the large part of the looping pliers to create a big loop as you can see in this picture. Use the flat nose pliers to make the center pattern of the heart and then again make the other half of the heart (second big loop). Bend the wire from the bottom part of the heart by keeping it aligned with the previous straight parts.
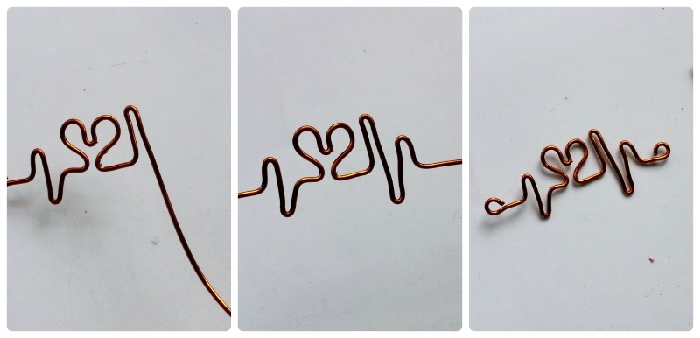
Step-3: Again bend the wire upwards and downwards to create more beats. You can keep the beats random but make sure to create a sound pattern. After reaching the required length of the necklace keep another 1 cm of the wire straight and then cut off wire from the bundle by keeping enough wire to create a small loop.
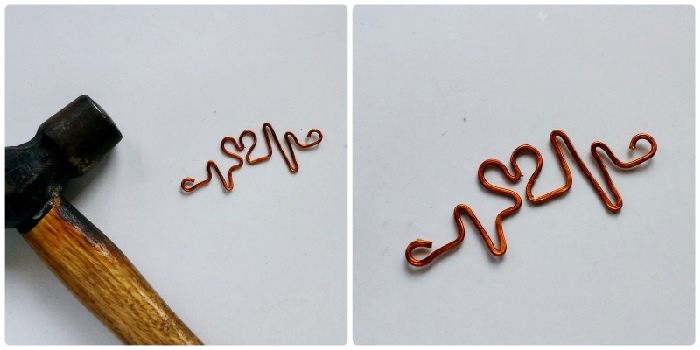
Step-4: This step is optional but it’s better to hammer wire jewelries. Place the heart beat wire pattern on a flat and hard surface. Hammer the pattern carefully and evenly. Hammering the wire will make it sturdy and gives it a nice finished look.
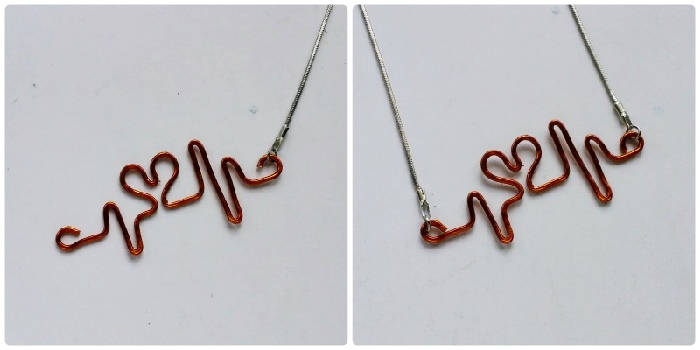
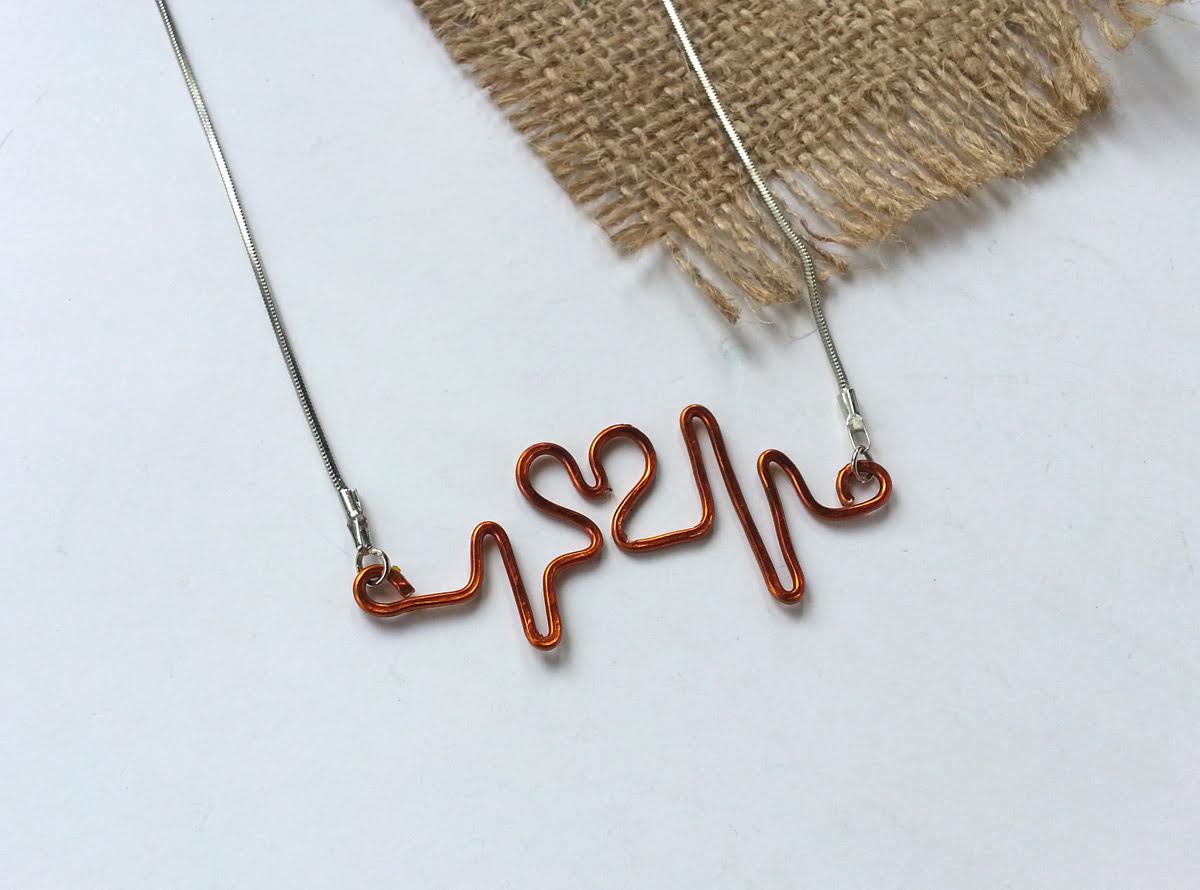
Step-5: This step is super simple. Attach jewelry chain or beaded string or a black string with the loops on both sides of the heart-beat pattern. Hope you enjoy making one!



What do you think of this project? Let us know!