
What you need
8ply wool (worsted weight) in colour of choice for body
4.5 mm crochet hook
small amount of white wool for tail or little white pom pom
small amount of wool for mouth
small 6-8mm safety eyes or small buttons
small amount of polyfill toy stuffing
ribbon, bells, collar or other decorations
Instructions
Note: All pieces use a starter ring made as follows: chain 3, join in a loop with a slip stitch. Chain 2, work 5 SC into loop, join loop with a slip stitch. 6 stitches. Pull on the yarn tail to close up hole in center. Place a stitch marker to indicate the end of the round.
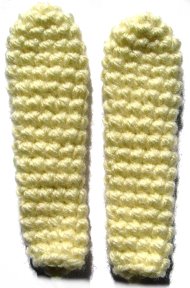
Stitching the Ears (Make two)
Make a starter ring, then chain 1, SC twice in each stitch, join round at end with slip stitch. 12 stitches.
Work in SC for 4 rounds, joining at end each time.
SC10, decrease 1, join round. 11 stitches.
Work in SC for 4 rounds, joining at end each time.
SC9, decrease 1, join round. 10 stitches.
Work in SC for 4 rounds, joining at end each time.
SC8, decrease 1, join round. 9 stitches.
SC7, decrease 1, join round. 8 stitches. Finish off.
Stitching the Head
Make a starter ring, then chain 1, SC twice in each stitch, join round at end with slip stitch. 12 stitches.
*SC, SC twice in same stitch. Repeat from * around, join round at end with slip stitch. 18 stitches.
*2SC, SC twice in same stitch. Repeat from * around, join round at end with slip stitch. 24 stitches.
*5SC, SC twice in same stitch. Repeat from * around, join round at end with slip stitch. 28 stitches.
SC around, join round at end with slip stitch.
*6SC, SC twice in same stitch. Repeat from * around, join round at end with slip stitch. 32 stitches.
*6SC, decrease 1 stitch. Repeat from * around, join round at end with slip stitch. 28 stitches.
SC 2 rounds, joining each round at end with slip stitch.
*5SC, decrease 1 stitch. Repeat from * around, join round at end with slip stitch. 24 stitches.
Do not fasten off.
Put in safety eyes a couple of rounds up and about 1.5 inches/3.5 cm apart.
Stitch a little cross for the mouth.
Start stuffing the head, then work *2SC, decrease 1 stitch. Repeat from * around, join round at end with slip stitch. 12 stitches.
Fasten off, leaving a short tail. Finish stuffing head.
Put tail back inside hole to hide.
Stitching the Arms (Make two)
Make a starter ring, then work *2SC, work 2 SC into one stitch. Repeat from * around, join round at end with slip stitch. 8 stitches.
SC 5 rounds, joining each round at end with slip stitch.
Fasten off, leaving a short tail.
Leave unstuffed or put a pea sized amount of stuffing in paw tips.
Stitching the Legs (Make two)
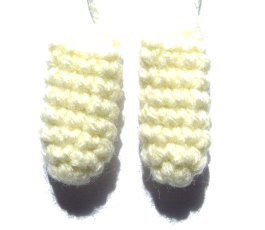
Make a starter ring, then *SC, work 2 SC into one stitch. Repeat from * around, join round at end with slip stitch. 9 stitches.
SC 5 rounds for short legs, joining each round at end with slip stitch. Fasten off and leave a long tail to sew to the body.
For longer legs, SC 10 rounds total, joining each round at end with slip stitch.
7SC, decrease 1 stitch. 8 stitches.
SC 5 rounds, joining each round at end with slip stitch. Fasten off and leave a long tail to sew to the body.
Stitching the Body
Make a starter ring, then work 2 SC in each stitch, join round at end with slip stitch. 12 stitches.
Work 2 SC in each stitch, join round at end with slip stitch. 24 stitches.
SC 4 rounds, joining each round at end with slip stitch.
*4SC, decrease 1 stitch. Repeat from * around, join round at end with slip stitch. 20 stitches.
Divide the top edge into quarters and mark the sides of the body.
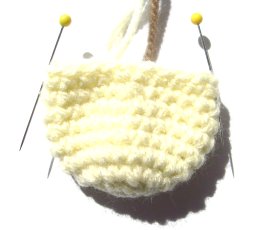
Pin the arms in place.
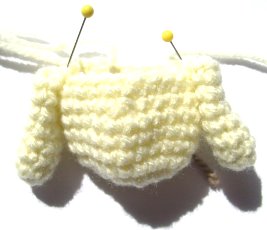
Now continue crocheting. Make sure you go through all the layers of the arm and body. *2SC, decrease 1 stitch. Repeat from * around, join round at end with slip stitch. 15 stitches.
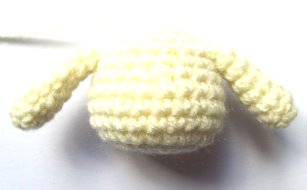
Fasten off, leaving a long tail 10 inches/25cm to sew the body to the head.
When you finish stuffing the body, make sure the bottom is a little flat so you can sew the legs in place. Alternatively you can just crochet the body and sew the arms to the outside of the body later using a ladder stitch.
FINISHING
Pin the ears in place and ladder stitch to head.
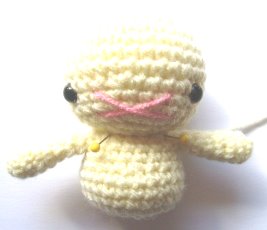
Pin the body to the head making sure the arms are at the sides.
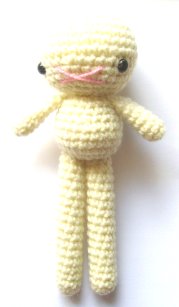
Pin the legs to the bottom of the body and sew in place.
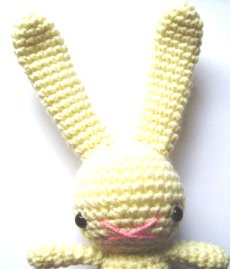
You can use a small white pom pom for a tail or make a tail from a small amount of white yarn: use a starter ring, then SC 2 rounds. End with a long tail and sew to the body. Don’t stuff.



I agree WORST instructions I have ever seen. Looks like instructions in shorthand- gimma a break
I don’t understand how to read this pattern =(
omg so cute and just in time fir easter thanks for posting it up you are gr8!
I LVE the bunny but do you have simpler instuctions? I’m just a beginner…..
KAWAII! =]
Hi there,
I’ve pretty much made my bunny, but I think I’m missing something.
Am I supposed to be joining the rounds or is it continuous rounds?
Still a novice here, but I Love the bunny.
Thanks for your help.
Christine
I was thinking of making bunnies for the family – this one is SOOO cute!! Thanks for the tutorial…
What a fabulous bunny! So cute! Thanks for the instructions.
Deanne
I made one yesterday and another today. It took me a couple hours. Maybe I’m just slow. My first one turned out shorter & fatter than the picture, so I added rows to the second one. I used Baby Bee Pitter Patter Eyelash Yarn. The bunnies are so soft and smooth, I can’t stop cuddling them! Thank you for sharing this pattern!
Soooo cute!! im gonna try it somtime 😀
CUTE LIL BUNNY!
I am going to try this. After I finish my afghan. I just have to sew it alotgether. Well, since I have to keep it 255 characters or less, gtg.
Looks hard. Cute though.
This is ok… but the mouth is to wide for me. so, i just did it smaller. otherwise, it is adorable!!!
Soo Soo Cute
this is sooo cute!!!
This would be to difficult for me!
But it looks waaay cute!
Really cute made one..
it looks very cute. 🙂
thats cute. Would be great in a child easter basket.
EXCELLENT!!!!!!!!!!
This pattern is adorable and thanks for posting it but where are the legs! : )
Im not sure how to make the starter ringer. Please explain
nose and mouth look scarry & to long of legs. pattern is good how to is good the legs and nose/mouth can be modified to taste..
adorable & fun to make…