
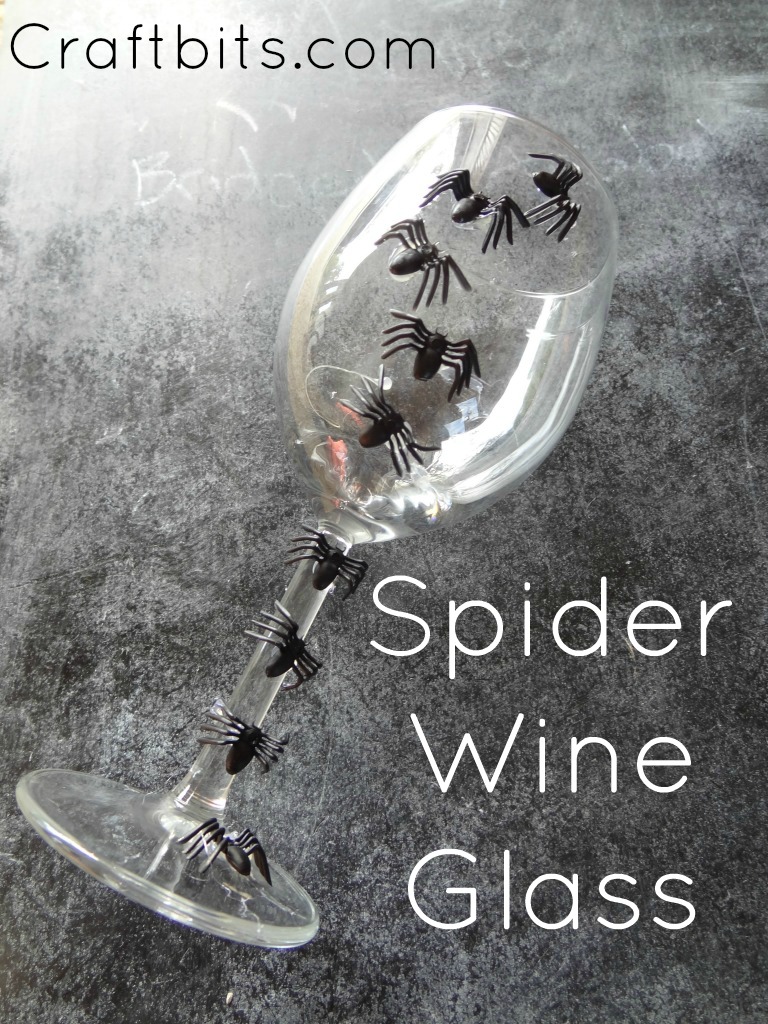
Arrange the spiders so they appear to crawl from the base, travel up the stem and continue across the outside of the bowl. Keep all spiders and adhesive safely below the drinking rim so the finished glass can still be used for serving wine or another cold drink.
Get more details about this project
What you need
Clear stemmed wine glass
Miniature black plastic spiders
Clear silicone adhesive or transparent glue suitable for glass
Rubbing alcohol
Lint-free cloth
Tweezers, optional
Removable marker, optional
Painter’s tape, optional
Protected work surface
Instructions
A trail of creepy black spiders can transform a plain wine glass into fun Halloween drinkware in very little time. It is a simple project, but it makes a big impact when several decorated glasses are arranged around a Halloween dinner or party table.
The key to this project is choosing the right adhesive. Look for a transparent glue that specifically states it will bond plastic embellishments to glass. The adhesive must also be allowed to cure completely before the glass is handled, washed or used.
Arrange the spiders so they appear to crawl from the base of the glass, wind their way up the stem and spread across the outside of the bowl. Keep the upper section and drinking rim completely free from spiders and adhesive.
Instructions
Step 1: Clean the wine glass
Wash and dry the wine glass thoroughly.
Wipe the outside of the glass with rubbing alcohol and a lint-free cloth. This will remove fingerprints, grease and residue that could prevent the adhesive from bonding correctly.
Allow the glass to dry completely before continuing.
Step 2: Check the spiders
Inspect the miniature plastic spiders and remove any loose plastic or rough pieces.
If the spiders have very curved bodies or legs, check that each one has a suitable contact point for attaching it to the glass.
Do not use spiders with sharp points in areas where the glass will be held.
Step 3: Plan the spider trail
Lay the wine glass carefully on a folded towel so it cannot roll.
Position the spiders around the base, along the stem and over the lower and middle portions of the bowl.
Arrange them at slightly different angles so they appear to be crawling naturally across the glass.
Keep the spiders and adhesive well below the drinking rim. Leave at least the upper 2–3 cm of the glass completely undecorated.
You can make small removable marks or use tiny pieces of painter’s tape to remember where each spider will be placed.
Step 4: Attach the first spider
Follow the directions supplied with your chosen glass adhesive.
Apply a very small amount of glue to the underside of the first spider. Avoid using too much, as excess adhesive may spread beyond the spider and become visible.
Press the spider gently against the glass and hold it in place for the amount of time recommended by the adhesive manufacturer.
Step 5: Continue along the glass
Attach the remaining spiders one at a time, following your planned trail.
Begin at the base and work upward so you are less likely to disturb spiders that have already been positioned.
Tweezers can make it easier to hold the small spiders and place them precisely.
Check the glass from several angles as you work to make sure the arrangement looks balanced.
Step 6: Allow the adhesive to cure
Place the glass upright in a safe location where it will not be touched or knocked over.
Allow the adhesive to cure completely according to its instructions. Some silicone and glass adhesives may require 24–72 hours to reach full strength.
Do not fill, wash or use the glass until the adhesive has fully cured.
Step 7: Check the finished glass
Once the adhesive has cured, gently check that every spider is firmly attached.
Remove any temporary marks or painter’s tape. Carefully clean the undecorated upper section and rim before using the glass.
The finished spider wine glass can now be filled with wine or another cold party drink.
Step 8: Wash and store the glass
Hand-wash the decorated glass gently with warm water and mild dishwashing liquid.
Avoid soaking it or placing it in the dishwasher, as prolonged heat and water exposure may weaken the adhesive or loosen the spiders.
Take care when washing around the raised embellishments. Dry the glass with a soft cloth and store it where the spiders will not be crushed or caught against other glassware.



What do you think of this project? Let us know!