What you need
1 sheet of stiffened felt
1/2 yard of shiny or metallic fabric
1 sheet of white felt for horns
1/4 inch elastic
hot glue
sewing machine
Instructions
- Using the pattern, cut:
- Two of the large horn from white felt
- Four of the small horn from white felt
- Two of the head piece from metallic fabric
- Two of the crown from metallic fabric
- One of the crown from stiffened felt
- Cut a 3-4 inch piece of elastic to go around your dog’s chin.

3. Placing the stiffened felt on the bottom, stack the two fabric crown pieces, right sides together on top of the felt.
4. Stitch around the top curved edge of the crown pieces, going through all three layers. Leave the smaller bottom curve open.
5. Flip right side out- the stiff felt should be on the inside.
6.Pin the crown closed and stitch lines going up along the pieces to add some texture (like dinosaur ridges).

7. Now take your to head pieces and your elastic.
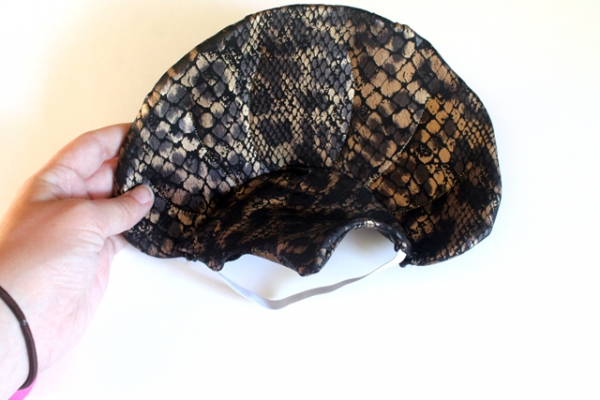
8. Using the photo below as a guide, place your elastic on the top of one of your head pieces. Place the second head piece on top, right side down and pin the elastic in place.
9. Stitch the 2 pieces together, going over the 2 elastic ends. You want to stitch around the bottom half of the head piece, leaving the top open.
10. Flip right side out.
11. Next you’ll need to sew your head piece and your crown piece together. Lay them out as pictured below and then flip the top crown piece down so that the two right sides are touching and pin the edges.
12. Stitch around the edge. It is a little tricky to pin and sew this edge- you have to make sure you have the curve pinned good.
13. Match up your felt horn pieces and stitch the side seams. I liked the look of the open seams so I did not flip them right side out, however you can if you prefer.

14. Use hot glue to adhere the horns to the top of the dinosaur head.


What do you think of this project? Let us know!