What you need
Metal watering can
Spray paint
Ribbon
Scrapbook embellishments (you can buy baby die cuts, templates or make your own embellishments)
Stamps
Clothpins or some sort of clip
Wooden dowels (no larger than 1/4″ diameter)
Masking tape or floral tape
Floral foam
Adhesive
Scissors
Instructions
The items in the bouquet are scrapbook embellishments which can be used throughout the baby’s scrapbook. Each embellishment includes a journal block for the guest to write their tips and a tag to mat a picture of the person giving the advice. The shower hostess should take pictures of each guest so that they can be featured next to their “words of wisdom.”
One option is to take pictures of each person next to the guest of honor. Another ideas is to take a picture of the guest with the expectant mother as she opens their gift. This bouquet is a unique memorable present that will last a lifetime.
First you will need to paint the watering can. Metal watering cans can be purchased at garden centers, hardware stores or some craft stores. (I got mine at Wal-Mart). When spraying the can make sure you hold the spray paint bottle at least 8-10 inches away from the watering can so that you don?t get drips and/or runs. You will probably use the entire can of spray paint and you definitely will need multiple coats of paint.
Once the paint is completely dry then you can place the floral foam into the watering can. Cover the bottom of the watering can so that you can insert the stems where ever you need to. Depending on how deep your watering can is you might want to stack the floral foam and use two layers.
Now it is time to decorate the watering can with ribbons. Tie your ribbons on the handle of the can, the water spout and around the outside of the watering can any way you want. The ribbon used around the entire can will stay in place better if you use adhesive on the back of the ribbon. Adhesive backed ribbon can be purchased at craft supply stores or you can manually add adhesive to the back of your ribbon. (I used my Tombo tape runner to apply adhesive to the back of the ribbon, but you can use glue dots or other adhesives). You can use as much or as little ribbon as you desire.
Set the can aside and take out the wooden dowels. Now attach the clothespin (on one side leaving the other loose so that you can squeeze the clip) to the top of the wooden dowel so that the ‘clip’ end of the clothespin is sticking up. Do this by wrapping your masking tape or floral tape securely around one end of the clothespin and the top of the wooden dowel. Attach the clothespins to as many dowels as you will be using.
Next clip your embellishments to the clothespins and arrange the wooden dowels in the watering can like a bouquet of flowers. Some embellishments will be at different levels to make the bouquet arrangement flow.
Then, stick tissue paper along of the bottom of the bouquet to give it a “finished” look. Arrange the tissue paper so that various ends of the paper are sticking out for a decorative appearance.
Baby Die Cut Embellishment Ideas
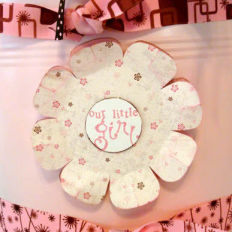
You can use any kind of baby related object for your page embellishments. The baby bouquet pictured uses baby bottle, baby rattle, baby carriage, tear bear and flowers.
The baby bottle was a simply creating using two basic shapes, circles and rectangles. A medium sized circle is cut in half to make the bottom of the bottle nipple then a small circle is glued on the back of the half circle with only half of that circle visible. Then, a 3″ x 4″ rectangle is the base of the baby bottle. The corners were rounded and the bottle was decorated with patterned scrapbook paper. The edges of the baby bottle nipple were inked with a brown ink pad to add some texture and dimension.
The baby rattle was also a cinch. It consists of two circles and a paper strip. One medium sized circle for the top of the rattles and a small circle for the bottom end. The circles are connected by a ?” paper strip. Patterned paper was used to decorate the rattle die cut.
The other embellishments were created with templates. The patterns were traced and cut out of cardstock, then decorated with scrapbook supplies. The tear bear was torn out of handmade mulberry paper.
Each die cut is mounted onto a background piece and a tag was created to coordinate with the embellishment. The tags are 2 1/2″ x 3″ rounded rectangles with a ribbon tied on the top. A journal block was cut and attached to each die cut so that advice could be written on the die cut embellishment. The tags are tucked behind the embellishments, ready for pictures to be added.

Baby Shower Closeup


Cutest thing ever!
Cute! I love this idea and you could change the theme for wedding shower, bridal shower, anything you wanted! I love it!