
What you need
1 20″ square napkin
2 13″x 19″ Reversible Placemats
2 yards of grosgrain ribbon, cut into four equal lengths.
Thread
Instructions
If you want to use a fabric piece, simply allow an extra ½ seam allowance on all raw edges and turn edges under prior to piecing needle roll together.
When selecting placemats, look for fabric that has some stiffness but isn’t much thicker than denim. If you want to use a heavy tapestry, use a placemat made of a lighter weight fabric on the inside.
Not all placemats are sewn accurately. Look for mats that have the straightest edges and match closely in size.
Go slowly when sewing several thicknesses together to avoid breaking the needle.
Press placemat and napkin, pulling corners of napkin diagonally to square up if necessary.
Cut napkin in half, creating two 10” x 20” rectangles
Turn under ¾” along the one 10” edge of each napkin (or amount necessary to make napkin the same width as your placemat. Stitch in place.
Turn under ½” along the raw 20” edge of one napkin rectangle. This will become the cover flap of your needle roll.
Turn under 4 ½” along the raw 20” edge of the other napkin rectangle. This will become your needle pocket piece.
Place needle pocket piece on bottom half of inside placemat (wrong side of pocket facing right side of placemat), aligning hemmed edges of napkin with lower and side edges of placemat. See diagram one (or photo one).
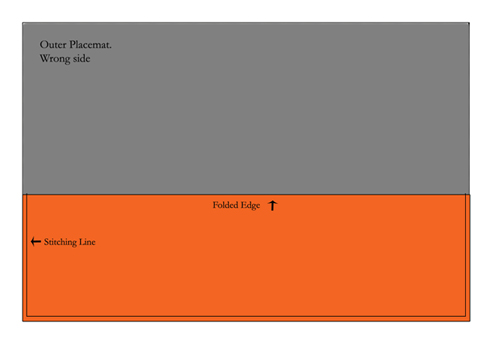
Diagram One
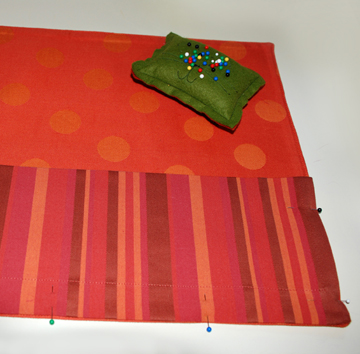
Photo One
Stitch ¼” along the side and bottom of napkin and placemat to secure in place.
To create pockets, mark vertical lines along needle pocket 1” and 5/8” apart. Use one 1” pocket for thicker needles and 5/8” pockets to hold smaller needles. Vary sizes based on your needs. For circular needles, leave a space of 2-3” between last few pockets on right side. See diagram two.
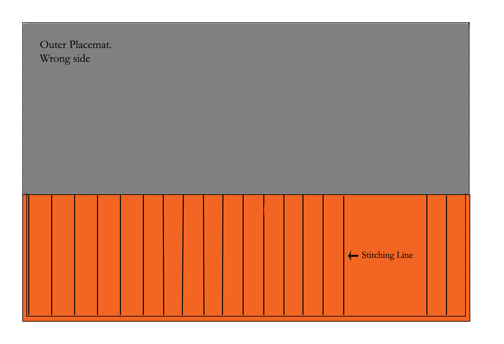
Diagram Two
Stitch vertical pocket lines, securing beginning and end of stitching rows by reversing for a few stitches
Pin one edge of grosgrain ribbon pairs about three inches down from the top edge (on the wrong side of placemat), perpendicular to the left edge. Tack in place. You will secure the ribbon in step 12. See diagram three (or photo two).
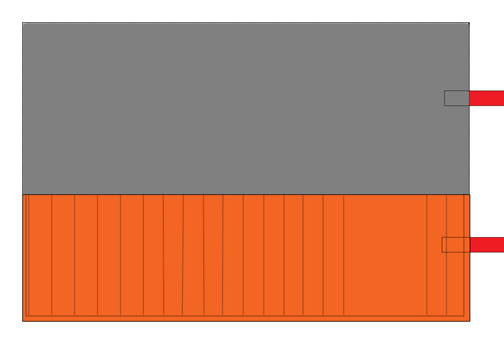
Diagram Three

Photo 2
Pin one edge of grosgrain ribbon pairs about three inches up from the bottom edge of placemat (on the wrong side of placemat), perpendicular to the left edge. Tack in place. See diagram three.
Pin placemats, wrong sides together, matching edges and corners. Stitch ¼” from the edge.
Pin folded edge of top napkin flap to the top of inside placemat. Stitch ¼” from top edge. See diagram four (or photo three).
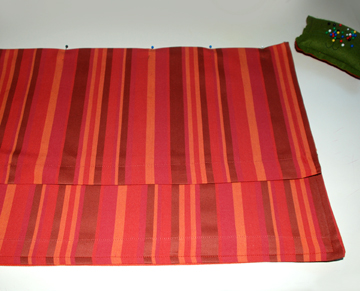
Photo Three
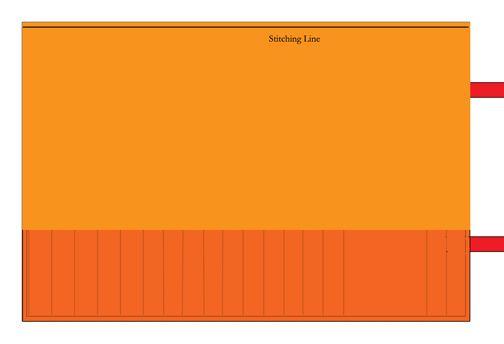
Diagram Four
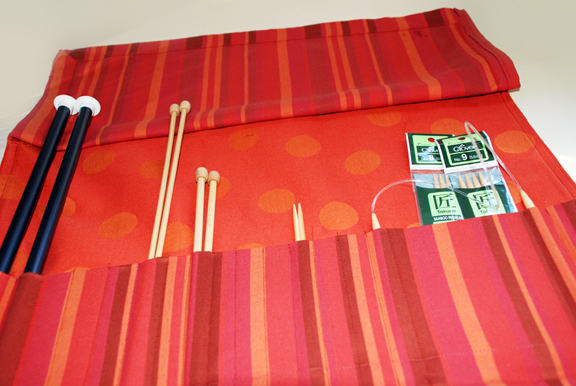
Fill holder, roll starting with the short edge opposite ribbon ties. Wrap ties in opposite directions and tie in a bow. Now your needles are stored nice and tidy!



I wonder.. could this project be done using heat bonding tape and an iron? Because I had no sewing machine, and would love to make this for a friend.
Also, using a napkin from the thrift store would be super, indeed! Recycle, Recycle!
You could use bonding tape, but for the needle pockets you would have to find a really thin tape.