
What you need
Cardstock and photos, glue and scissors.
Instructions
I used the matchbook as the template and for measurements. I added an interactive photo insert strip that not only pulls out for additional photos (head shots) but also opens up to show more photos!
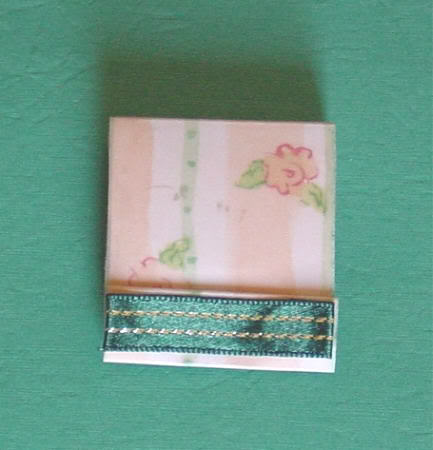
I used pattern paper on the front embellished with just a tad bit of ribbon. The photo insert is inside here, open it and it pulls out…..
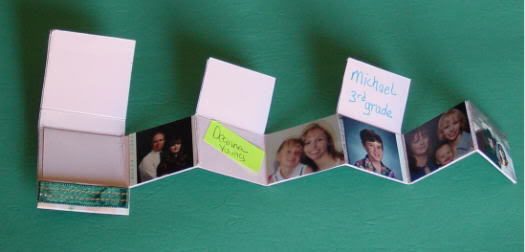
Photo Inserts
See how this inserted piece pulls out to reveal head shot size photos? This is the baby’s family. The mother and father head shots current age, but are on a tab that opens up to show them at a younger age.
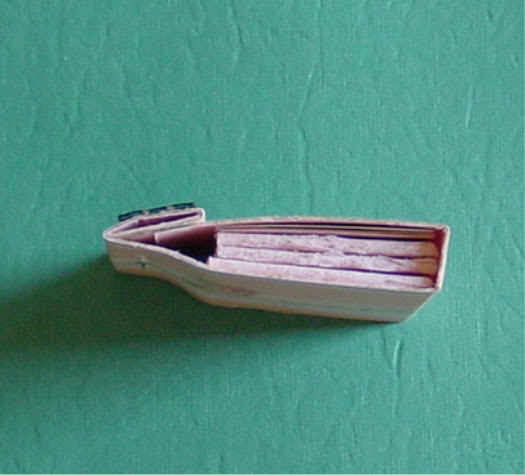
Closed Matchbook
This is a closed view of the matchbook scrapbook. See how it all fits inside there? Totally cute!!!
These aren’t hard, just kind of time consuming, but they are certainly worth it. This is my first one and it turned out pretty good, and I didn’t have any instructions – just saw a completed one once and figured it out. It is that easy. And the errors I made on this one, won’t be on the next ones! Totally fixable!
This is one was made with a regular size matchbook as the template, but I have done the same thing, only enlarged the template – adding about 2 inches all around. Worked out great!
Scrapbook Layout Ideas -Beautiful, quick, easy & inexpensively! http://scrapbook-layout-ideas.blogspot.com



cool idea, but directions could definately be clearer – more step by step.
This is sweet. I love the idea of making it a magnet. Can be adapted to any style of taste of the recipient. thanks!
I made one of that for my mother-in-law with pictures of all her 7 grandchildren. For me was easy, but, for the beginners, is difficult. Please use measures (inches) when you explain the tutorial for the next time.