
What you need
– 3 sheets of colored paper
– quilling strips ( you can cut your own as well )
– glue
– scissors
– quilling board
– quilling tool or a toothpick
-patience
Instructions
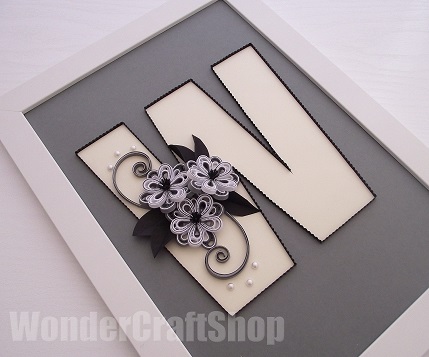
Hi there! My name’s Edyta Moson and I am very excited to share my knowledge about quilling with you today. We are going to make a beautiful quilled W monogram, which can be a very unique gift to your special one! So let’s get started!
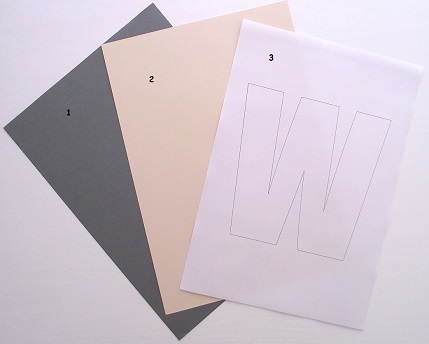
First, for the letter you need 3 pieces of paper. Print out W letter (nr 3) and cut it out. Then glue it onto nr 2 and cut it out again. Finally, glue it onto a grey background (nr 1). Your base is ready!
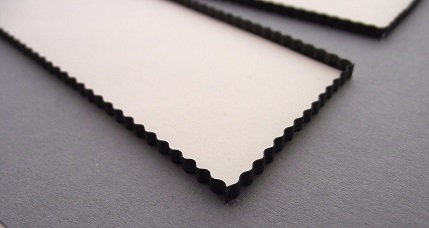
I like to add some depth to my monograms therefore I use a corrugated paper strip and glue it around the edges of the letter. You may also use a plain strip or leave it as it is.
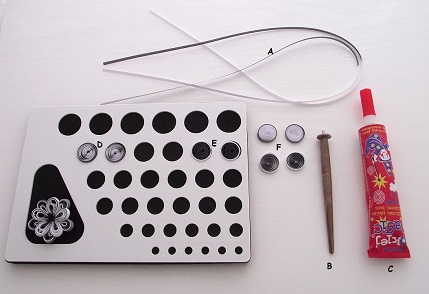
Now for a flower you need 10 strips – 2-coloured strips. In this case I glued white and grey strips (A). Now using your quilling tool (B) make 5 coils that start with the white strip (D) and 5 coils that start with the grey strip (E). The diameter of the coil is 20mm. Glue your coils (C) and let them dry (F).
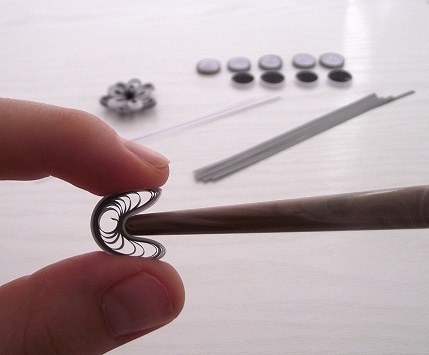
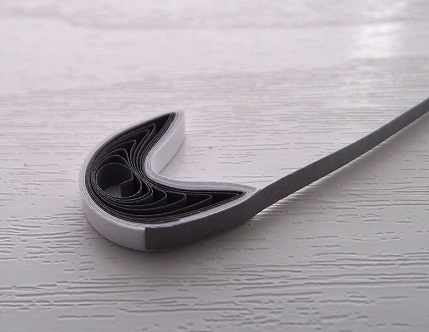
Prepare 5 grey and 5 white strips – half of the length of your strip (you may see mine in the background). Take your coil between your thumb and the index finger. Now here’s the tricky part. With your other hand equipped in a pen, pencil or just the tip of your quilling tool push the coil inward to make a moon shape. Don’t go too far! Pinch both ends of the moon.
This is how your moon-shaped coil should look like. Now take the half strip and glue it on the side of the moon. Be consistent – if the coil started with the grey strip then use the grey strip for the outside border (as shown in the photo). Take the moon coil and join both ends together and wind the grey strip around the coil. Secure it with the glue and let it dry. Your first petal is ready! Make the remaining 9 petals in the same way.
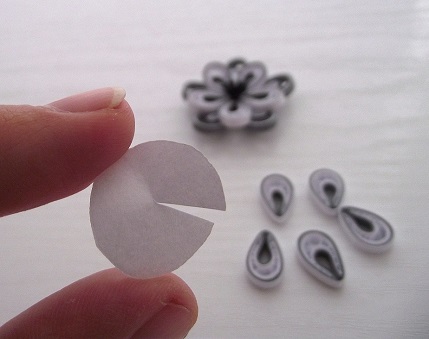
Now we’re going to assemble all the petals into a flower. You need a base for the petals so cut out a paper circle (app 2cm in diameter) and make a cut as shown in the picture. Now glue it so that it forms a small cone.
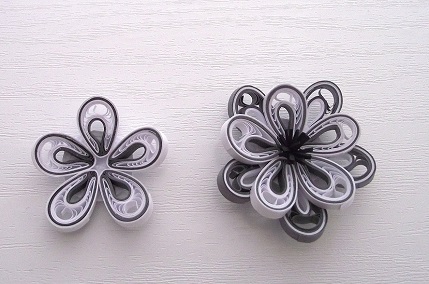
Glue the white petals on top of the cone leaving a small gap in the centre. Glue the grey petals on the bottom of the cone.
For the centre piece you need a piece of a black strip. Mine measures 1cm x 3cm and make small cuts along the edge. Then roll it on your quilling tool and insert into the centre of the flower. Your flower is ready! I made three flowers for this project.
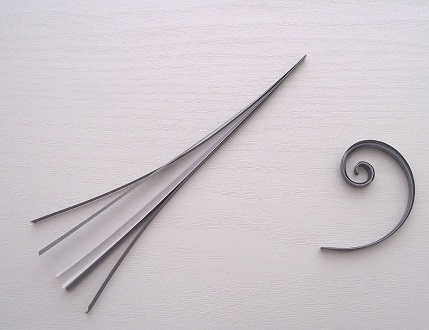
Now as for the swirls. Glue 6 half strips – just the tips. 2 grey strips + 2 white strips + 2 grey strips. Then roll them on a toothpick, glue the other end and cut the excess of paper. Now all is required is to assemble all elements on your monogram, add a couple of paper leaves and you’re done!
Hope you enjoyed this short tutorial.
You may view other letters and numbers in my Etsy Shop!
Should you have any queries please do not hesitate to contact me via e-mail : wondercraftshop@gmail.com.





Loved this and tried it , my first attempt at this beautiful craft. x