
Get more details about this project
What you need
- 4 wooden coaster rounds (MDF, plywood, or thick chipboard)
- Brown acrylic paint or brown spray paint
- White paint pen (or fine-tip white paintbrush and acrylic paint)
- Black, green/blue paint or markers (for the eyes)
- Pink paint or pastel (for the cheeks)
- Small paintbrushes for detail work
- Hot glue gun and glue sticks
- Cardboard strip (cut slightly narrower than your coasters) or strong ribbon for the base
- 4 lengths of gingham ribbon (around 15cm/6 inches each)
- 4 large craft buttons
- Twine or ribbon (for hanging loop)
- Optional tassel for the bottom
Instructions
While I adore the real, edible kind (and yes, I’ve been known to “taste-test” more than my share of icing while decorating), there’s a charm to gingerbread-inspired décor that lasts all season long without a single crumb. This hanging gingerbread face wall decoration brings that whimsical, fresh-from-the-oven spirit into your home — no baking required!
What I love about this project is that it’s simple enough for beginners, yet charming enough to be the star of your holiday wall display. You can whip it up in an afternoon using inexpensive materials, many of which you probably already have in your craft stash. The hand-painted faces give it a truly personalised touch, and the gingham bows add that old-fashioned farmhouse Christmas vibe.
This piece works beautifully as a kitchen decoration, hallway accent, or even as part of a larger Christmas wall arrangement. Plus, it makes for a delightful handmade gift for friends, neighbours, or anyone who shares your love of gingerbread cuteness.
So, put on a little Christmas music, brew yourself something warm, and let’s bring these gingerbread faces to life.
Instructions
1. Prepare Your Coasters
Start by giving each coaster a smooth surface to work on. If they’re glossy or finished, lightly sand them so your paint adheres well.
- If you’re spray painting, take them outside or to a well-ventilated area, and give them 2–3 light coats of brown, letting each coat dry in between.
- If you’re hand painting, use a wide flat brush and apply 2–3 even coats of brown acrylic paint, allowing drying time between layers.
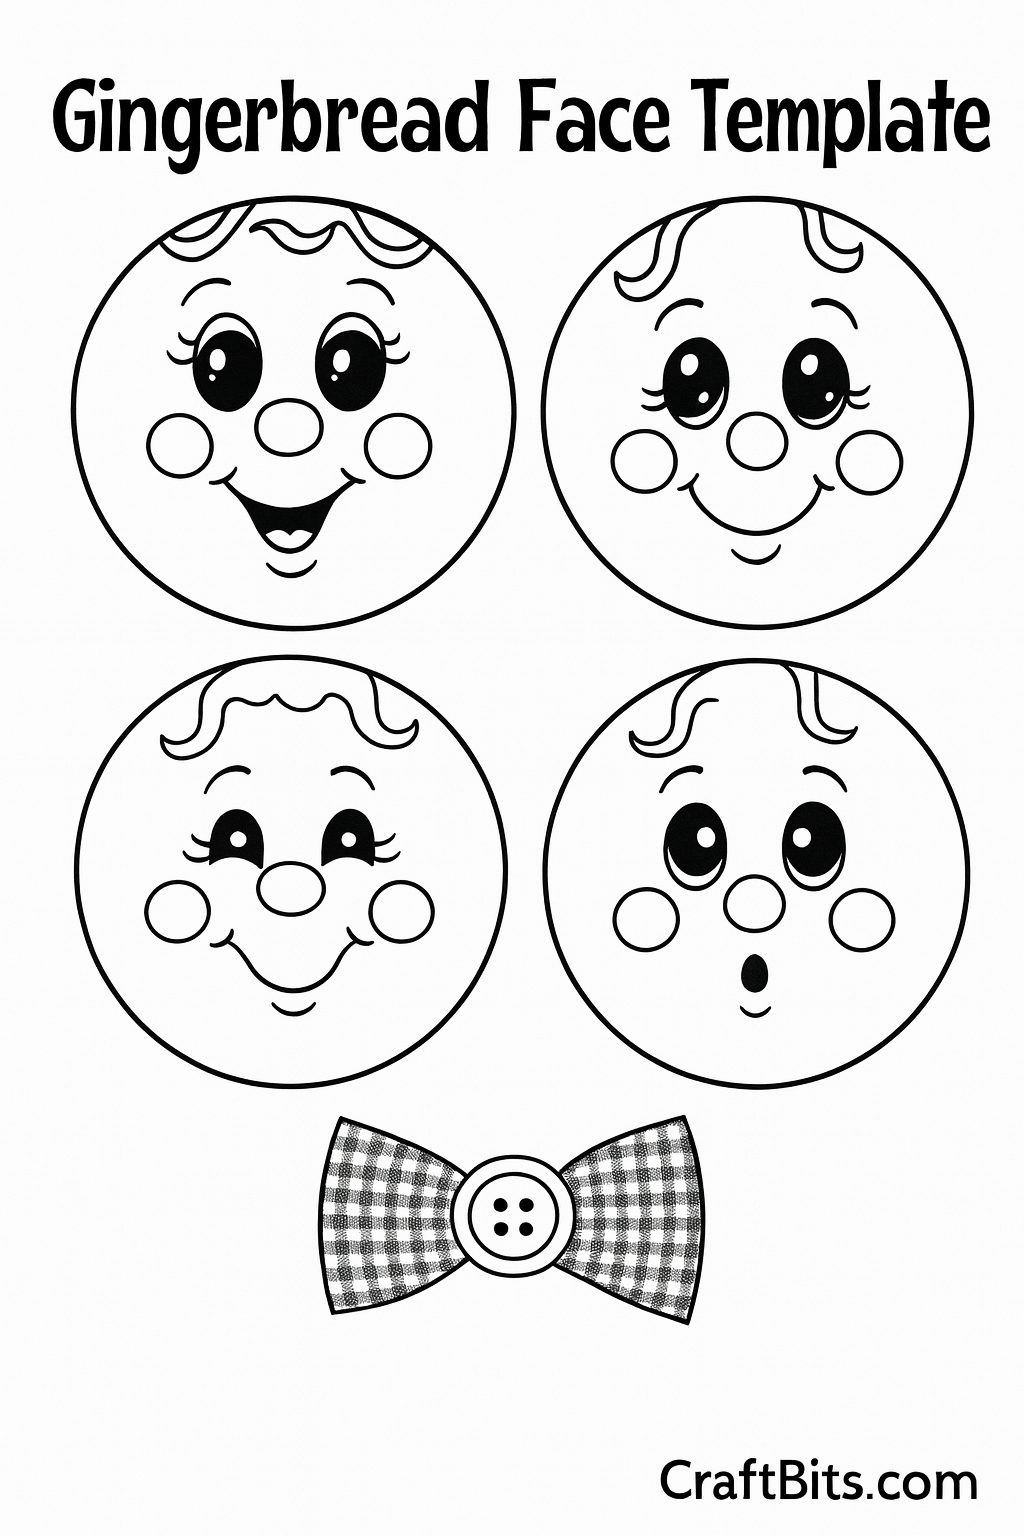
2. Paint the Gingerbread Faces
This is where your little characters come to life.
- Using a white paint pen, draw your “icing” details — think swirls on the hairline, scalloped outlines around the edges, and a cute mouth.
- Paint the eyes in black, adding a coloured iris if you’d like. A tiny white dot in each eye will make them sparkle.
- Add two rosy cheeks with pink paint or blush powder dabbed on with a cotton bud.
- Keep the faces varied — one could have a big smile, another a surprised expression. This gives your wall hanging more personality.
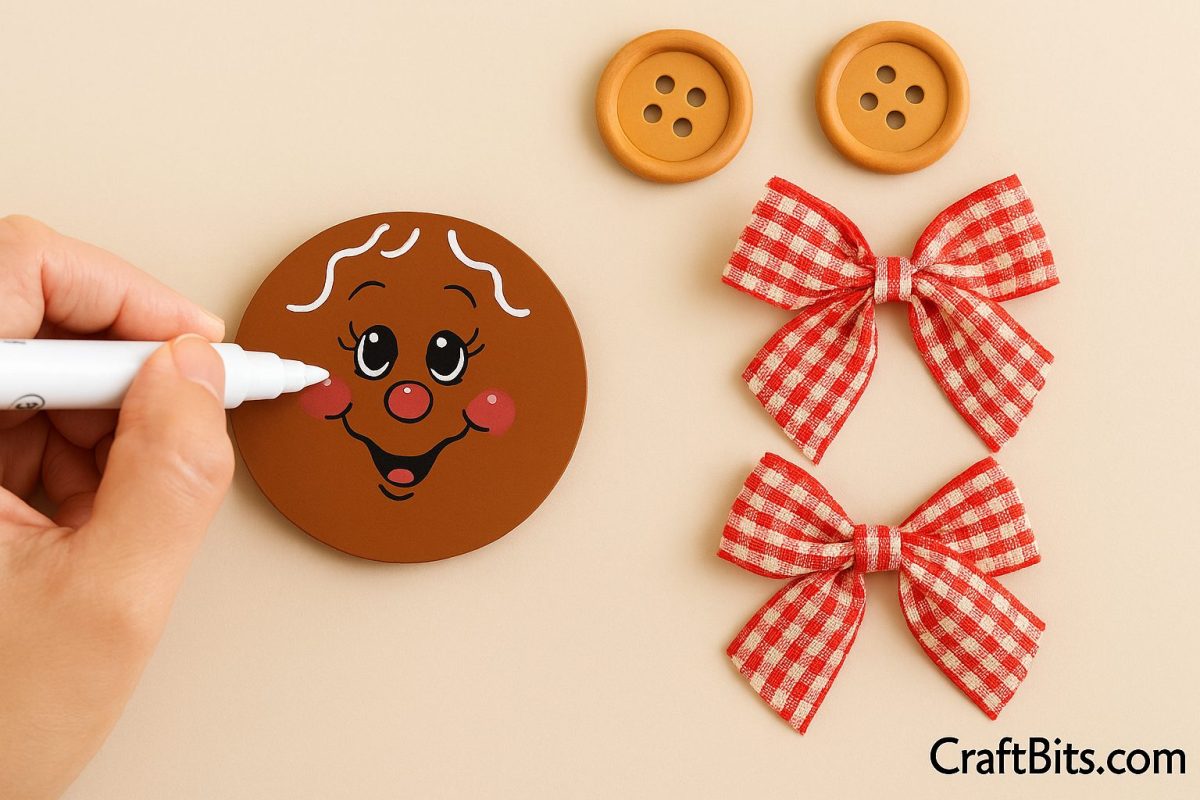
3. Create the Bows
Cut your gingham ribbon into four equal lengths.
- Tie each into a bow, trimming the tails neatly.
- Use a hot glue gun to secure a large craft button in the centre of each bow.
- Press the button in firmly until the glue sets.
4. Assemble the Base
Cut a strip of sturdy cardboard that will be just narrow enough to hide behind the coasters but long enough to space them apart. You’ll want about 2–3cm (1 inch) gap between each coaster for the bows.
- Alternatively, you can use a strong ribbon as the base, but cardboard keeps the arrangement flatter and sturdier.
- Starting at the top, glue your first bow + button to the cardboard strip.
- Directly below, glue your first coaster so the bow sits just above its “head.”
- Repeat the process — bow, coaster, bow, coaster — until all four faces are attached.
5. Add Hanging Loop and Tassel
- At the top of the cardboard strip, glue a loop of twine or ribbon for hanging.
- At the bottom, glue a tassel for an extra touch of rustic charm. You could also add a bell for a jingly surprise.
6. Finishing Touches
- Double-check for any stray glue strings and trim them away.
- Touch up any paint that might have smudged during assembly.
- Give your gingerbread faces a quick “blush” if you want them extra rosy.
Display Ideas
Hang your gingerbread wall decoration:
- On a pantry or kitchen door to greet holiday bakers
- In your entryway for a cheerful welcome
- As part of a larger Christmas wall display with wreaths and signs
- On the wall above a dessert table at your holiday gathering


What do you think of this project? Let us know!