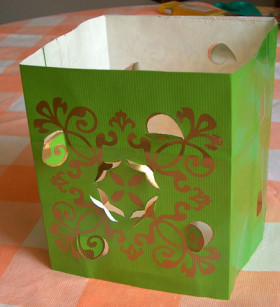
What you need
Several sheets of handmade paper (pastel colors and white are especially nice)
Roll of double-sided scotch tape
Several sheets of tracing paper
Craft knife with a sharp blade
Cutting mat
Ruler
Kitchen knife
Pencil
Instructions
1. Start by planning the size of your paper lantern. You might already have a wax or electric candle that you would like to use inside the lantern. Use the candle as a guide when cutting the paper to make sure that your lantern cover will fit properly. Cut the paper large enough to fit around the candle or lantern, with a little extra bit of overlap so that you can form and secure the cylinder shape. When measuring, be sure to make the paper lantern big enough so that it will not end up too close to the burning candle flame.
2. Sketch a design that will look nice when cut out. Patterns that remove small amounts of cut paper work best, so that you have enough paper left to make the lantern sturdy and secure. Designs that only involve cutting slits in the paper also work well, especially if you bend the cut portion of the paper slightly outward so that the candle light can shine through. Once you’ve decided on a pattern, you can use the tracing paper to transfer the design to your piece of handmade paper. Trace the design on the back side of the paper so that you won’t see pencil marks on the outside of the lantern when you are finished.
3. Protect the table surface with a cutting mat, then lay the paper on the mat. Using a sharp craft knife cut out all the openwork in the design. The cut areas will be the spots where the candlelight will show through.
4. When you are done cutting out your design, gently roll the paper into a cylinder. Use your candle as a guide as to how big of a circle diameter you will need to create. Use double-sided scotch tape to invisibly connect the two edges of the paper to form the cylinder.
5. You can leave your lantern in a circular shape, or crease it to form other shapes. For example, you could make a square lantern by creasing it four times or a triangular lantern by making three equally spaced creases.
6. Place your handmade paper lantern around the candle, light it and enjoy. Of course, always make sure to keep the candle flame safely away from the paper, and never leave a candle burning unattended.
Jessica Ackerman of WallDecorandHomeAccents.com, is an interior designer who illustrates how simple it can be to use wine wall art and wall art trees.

Paper Lantern Green


I’ve been wondering how to make these!! Great project and fantastic instructions!!