
What you need
2 Fabric panels -prewashed
Yarn for quilt tying
Pins
Needle thread
Sewing machine
Quilt batting
Instructions
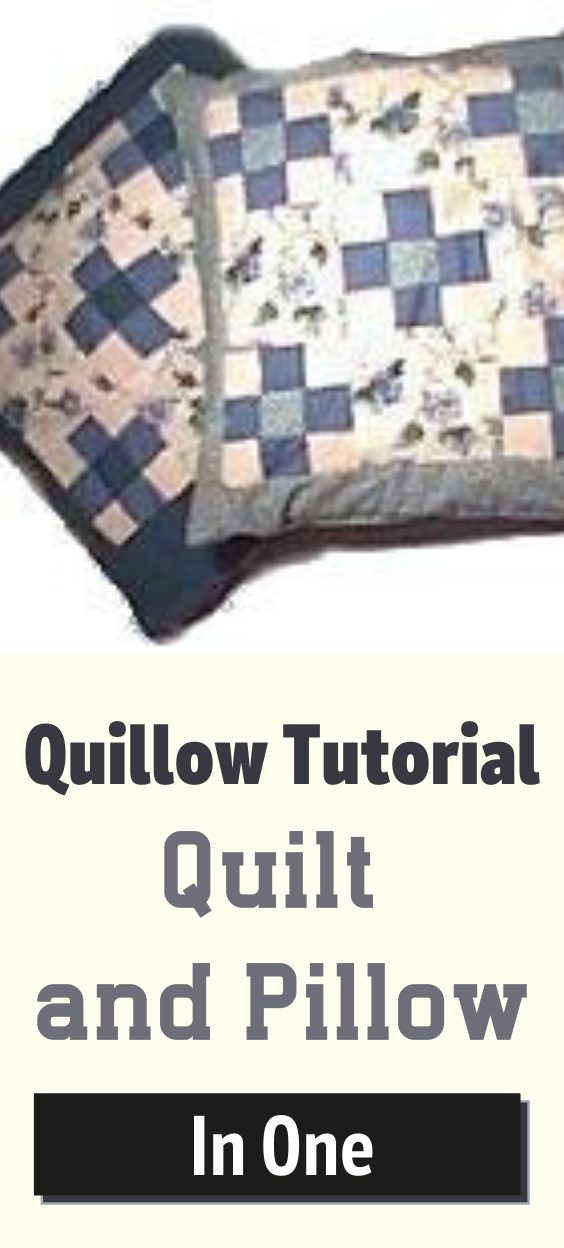
Quillows can be made any size but I made mine to have a finished size of 45 x 65″ which is long enough to cover a full size adult but not designed for use as a bed comforter. They do however make a nice throw pillow to be used as a bed accessory.
Start by making the Quillows pocket. You will need 2 pieces of approximately 18×18″ fabric squares. These pieces of fabric will be getting a lot of wear and use and will need to be extra sturdy.
You can purchase commercial pillow panels that are preprinted on material in a variety of styles. You can find panels with sports teams insignia, tractor and race car panels, outdoor fishing or hunting motifs, southwest pillow panels and dainty flowered panels. Fabric stores have a wide variety of options available for decorating your quillows.
I chose to use a basic star quilting pattern and piece a quilt block to use on the top of my quillows.
If you are not using a very strong material, reinforce it with heavy duty fusible webbing sandwiched between your two pocket panels. After choosing your pillow top panel, layout the 2 pillow panels right sides together. Sew them together leaving a few inches open at one end to turn the pillow inside out. Before turning the pillow panel, use a pencil point to bring your corners to a nice point and clip off the corners at an angle. Turn the pillow right sides out and using a hand needle and thread, blind stitch the turning hole closed. Press the pillow for a crisp look.
Position the finished pillow front on the top middle of one of the quilt fabric panels. Match up the panel on the unfinished outside edge of the quilt panel. Machine stitch the pillow panel to your quilt panel leaving the side of the pillow that faces the vertical quilt open to form a pocket. Be sure to double stitch the top ending seams of your pocket for durability.
Next, laying out both top and bottom quilt fabrics with the “right” sides of the fabric together, the pocket facing in. Separate your quilt batting in two as the general commercial batting tends to be to thick and makes it difficult to fold your bulky quilt into the finished pillow pocket. You will find it quite easy to pull the batting apart once you start separating a corner and working it apart.
Lay the batting on top of the two pieces of fabric and pin all three pieces together along the edge of the fabric. Turn the pinned pieces over with the fabric side up and trim the batting to fit the fabric panels.
Next, Machine sew all the way around your pre-pinned quilt leaving a 12 inch hole to turn your quilt inside out. After turning your quilt using a hand needle and thread, blind stitch the turning hole closed as you did with the pocket.
My quillow was made for my rough and tumble children so I decided to machine stitch a 1/4 inch stitch around the outside edge of the fabric to make the quilt edge stronger but this is not necessary.
The last step is to hand tie your quilt with coordinating yarn and wide eyed quilting needle. If your fabric has a pattern you may want to tie off the yarn along the design. Yarn ties should be made about every foot of the quilt to keep the batting in place.
FOLDING A QUILLOW
After you have folded your quillow into a pocket a few times it will be easy to do. To start, lay out the quilt with the pocket side down and fold the outer vertical edges of the quilt towards each other overlapping first one side, than the other edge. Flip your quilt over so the edges are folded in and the pillow pocket is at the top of your quilt. Start at the bottom of the quilt and fold it into approximately 2 foot sections until you get to the pocket and slide the quilt into it’s self made pillow.
This Project was contributed by Rachel Webb


I have made several of these, but do you know of anyone who has made these for children or babies? They make great pillows for the car because they can be made into a blanket for kids when going places at night or in the early morning.
What size of material do I buy?
What type of material?
This doesnt give enough info on what I need????
Teresa
A DIAGRAM OR PATTERN WOULD HELP, i AM A VISUAL PERSON AND NEED TO SEE PATERN, OTHERWISE GREAT IDEA
it was hard to understand these instructions for the quillow maybe pictures would have been a bitter visual?? thanks
I’ve done this project before and I love it, but there should still be diagrams
It woed look good in the house. I think that my kids woed like it.
I have made several of these with a group of teachers from school. Making them was much easier for me than remembering how to fold them. Fleece is the best fabric to use.
needs pictures/diagrams
I also need to see a picture.
I have seen these quillows before and I needed a pattern so I could make one for this sick man I know
please put on a diagramm
needs pictures or diagrams. Im a visual quilter
i need instuctions on pillow pannels
Without a picture, it is so hard to visualize. Quilters usually are “visual” people!
Perfect
I find this very interesting. I myself just started quilting. I have only made one so far. I agree it would make things alot easier with a pattern.
it would be good to have a diagram to go with the instructions
i thought i hve made every pillow possable but i need to try this i will go look to find a diagram
I received one of these as a gift many years ago…I want to teach my little girls to make them. THANKS!
I did one like this for my boyfriend, except I used fleece, it was very forgiving and very easy to use.
ahhhh that didnt help me at all.
have always wanted to try this Thanks for sharing
I have made these before. They make great gifts. My grand kids used theirs until they fell apart!! Instructions were easy to understand!
I would really like to try this could you send me a diagram as to how it all will fit together.
Diagrams…diagrams…diagrams…most projects are extremely deliquent in this area. I just pass over most everything.everything
Could you send me pics or a diagram?
I would love to make these, but find I too, need a diagram. Please help.
mmmmm this caft is good but i dont understand
Hello, I have made these before and done such weird stuff as make a drawstring for the top (so kids can carry pj’s) and a braided handle for teen’s so can carry for stadium seat but cover up for later;
Hello I love the picture you have of the quillows pillow I have to ask you will you send me a diagram of how it is put together, I really would apprecitate it
A diagram would be wonderful and I really like this. I am going to try it.