
What you need
Supplies:
1. Wooden crate
2. Wood pallets
3. Wood varnish (optional)
4. Sand paper
5. Nails and hammer
Instructions
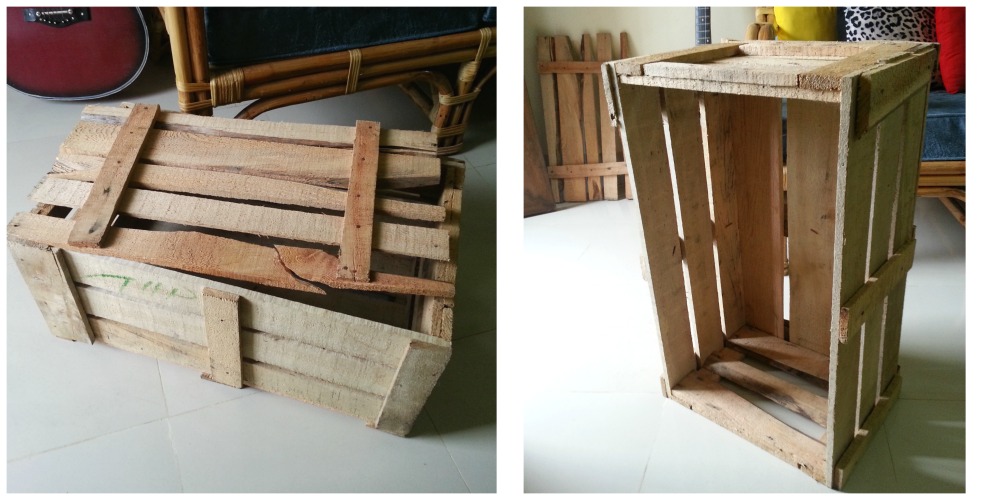
I’ve collected this crate from a fruits shop. These wooden crates are quite sturdy and have a lid, which can be used for another craft projects. Take off the lid and keep it away for now. Rotate the crate and make it stand on one of its sides.
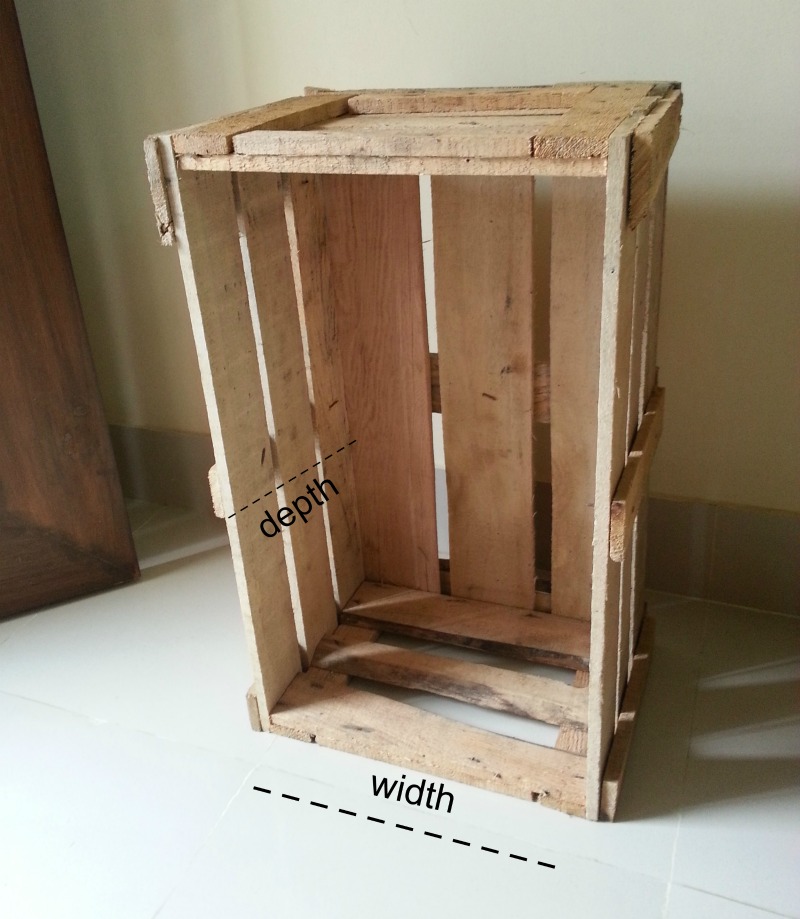
Measure the crates’ width and depth. Measurement for my crate was width- 13 inches and depth- 9 inches.
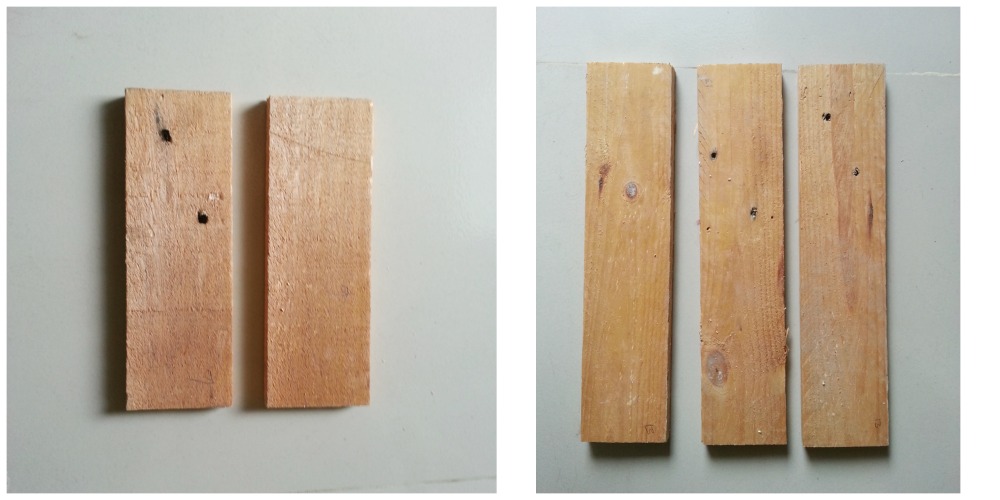
Cut 2 pallets for the depth measurement and 3 pallets for the width measurement.
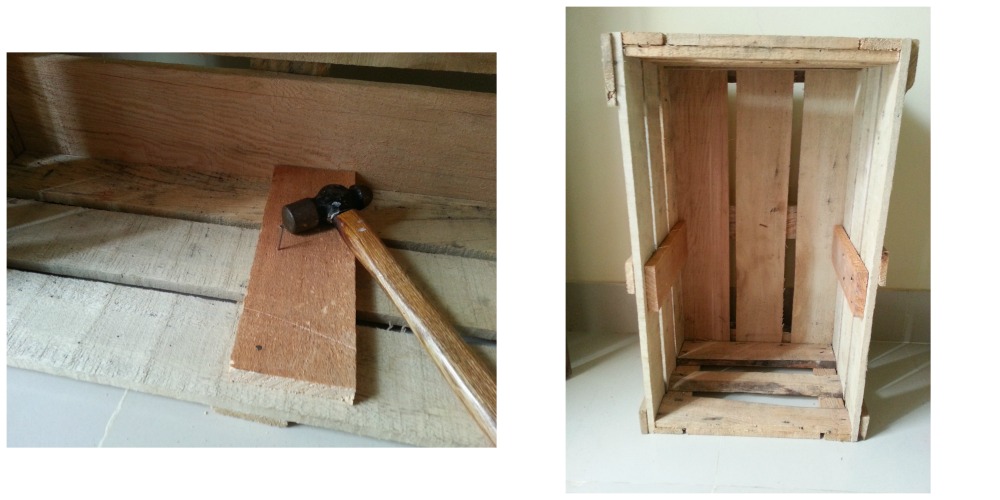
Mark the points for the shelf and attach the 9 inches pallets on both sides of the crates length. Make sure that the 9 inches pieces are parallel. Use nails to attach the pallets.
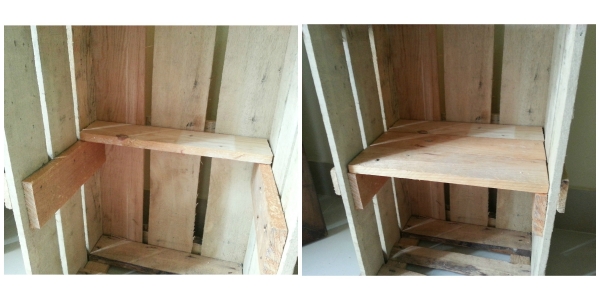
Now place the 13 inches pallets to create the shelf. The 9 inches pallets on both sides will hold the shelf pallets. You can attach them using nails or glue or keep them free as you wish. They’ll stay fixed anyways.
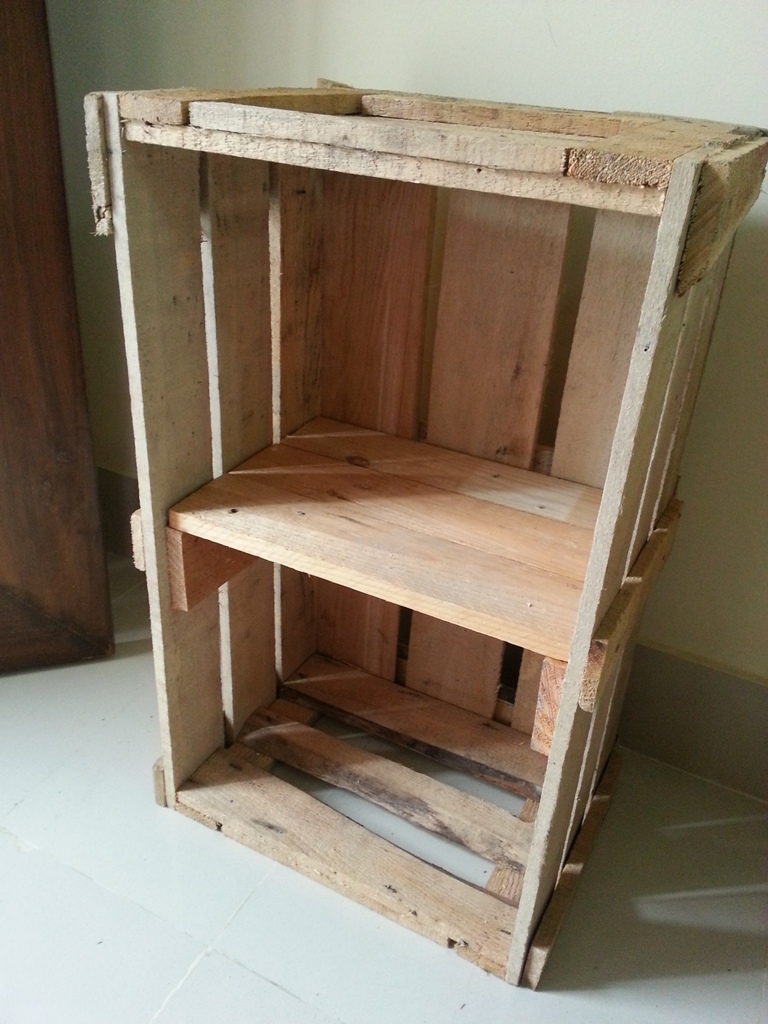
And done! Keep beside your bed or a sofa. You can use it for many purposes. Enjoy!


interesting and practical