
We had lots of fun trying this out and making it with kids last Christmas, but this is a fun activity for the whole year around.
What you need
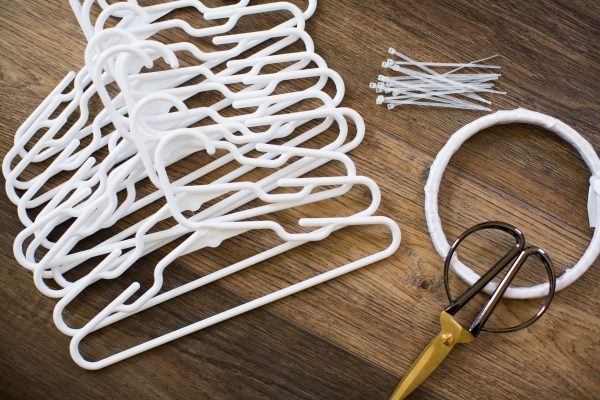
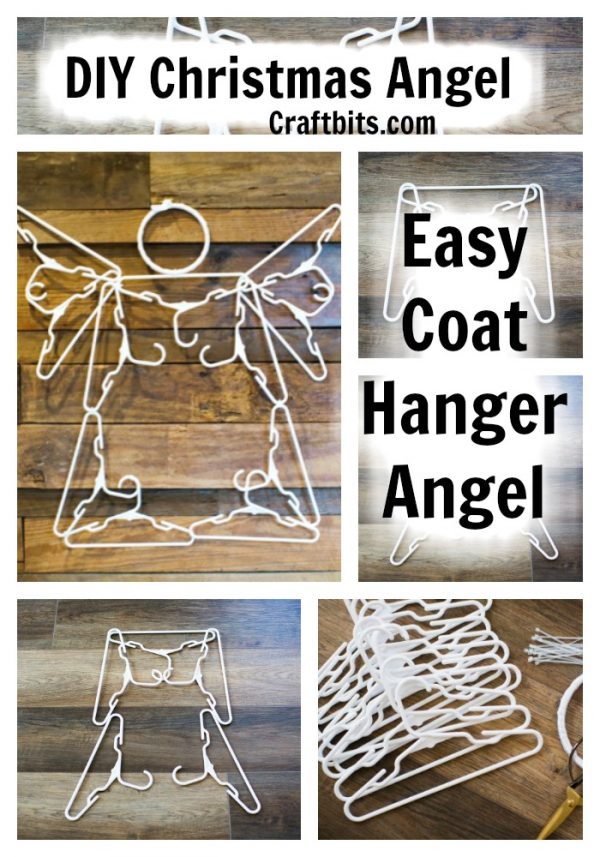
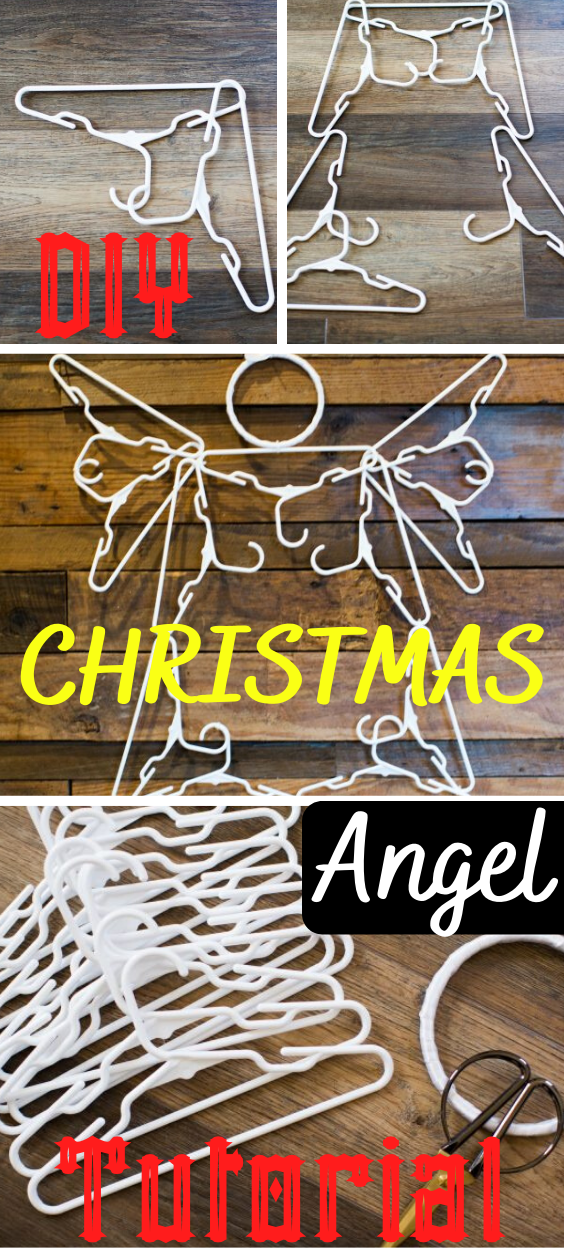
You will need a total of 11 coat hangers (I have found that the kid/baby sized coat hangers work best.)
-Zip ties
-Scissors
-Circle Ring for Angel head – I used a cross-stitch hoop and wrapped with white ribbon (feel free to use your creativity!)
Optional: spray paint to paint your angel gold, silver or any color that resonates with you.
Instructions
Tips before getting started:
You will place all of your Baby coat hangers

Circle Ring

Optional: spray paint to paint your angel gold, silver or any color that resonates with you.
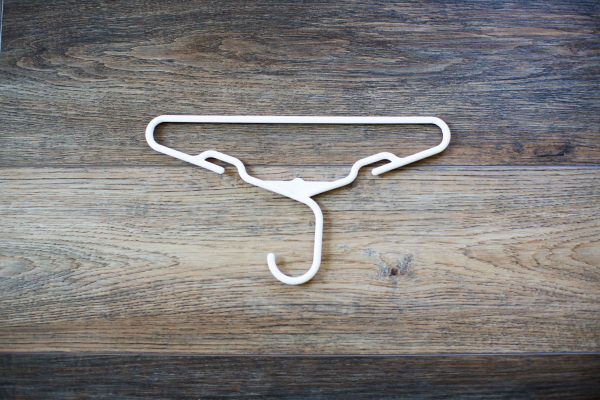
Step 1:
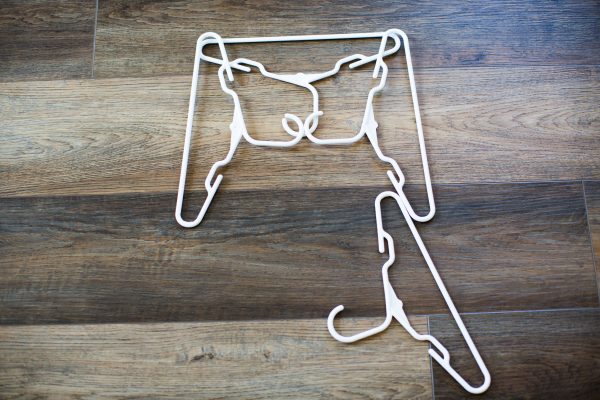
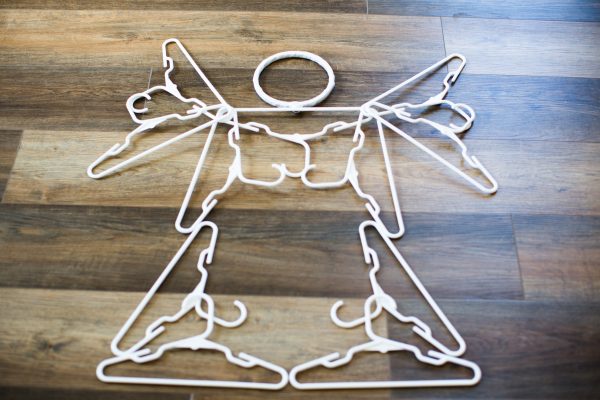
Place one hanger with bottom facing up, as shown in photo.
Step 2:
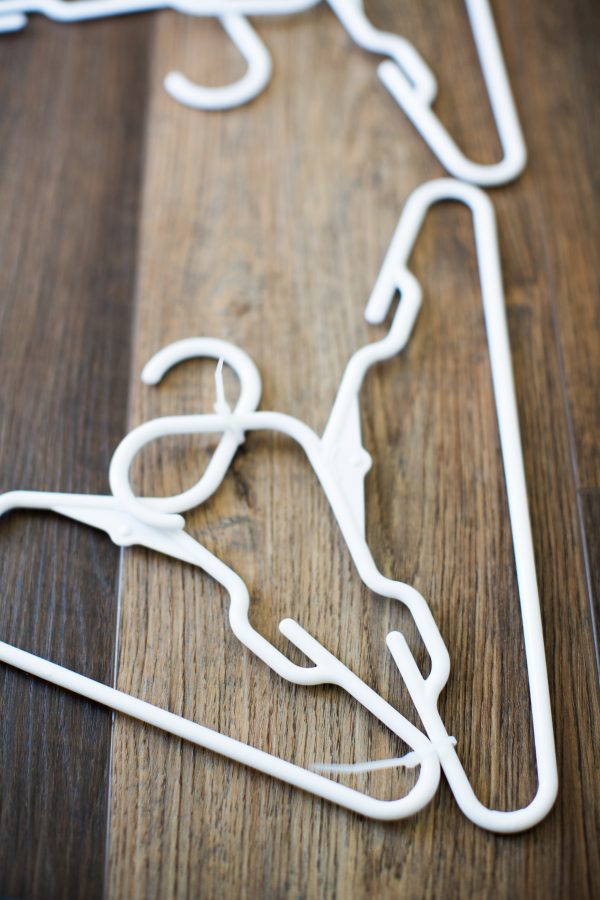
On the top of the right corner of hanger #1 place hanger #2 with hanger hooks sitting on top of each other.
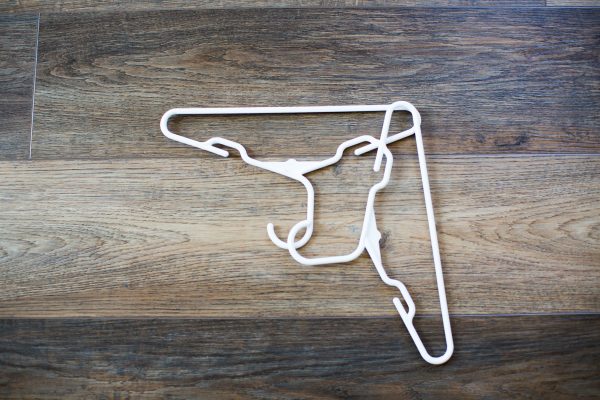
Step 3:
On top left of hanger #1 place hanger #3 facing in where hooks are all touching.
Step 4:
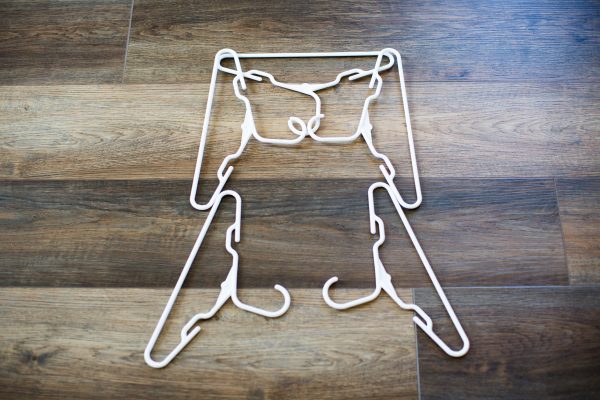
Coat hanger #4 goes on right side of angel touching the inner side of the above coat hanger.
Step 5:
Coat hanger #5 goes on the left side of the angel touching the inner side of the above coat hanger. Coat hanger #4 and 5 hooks will not touch each other.
Step 6:
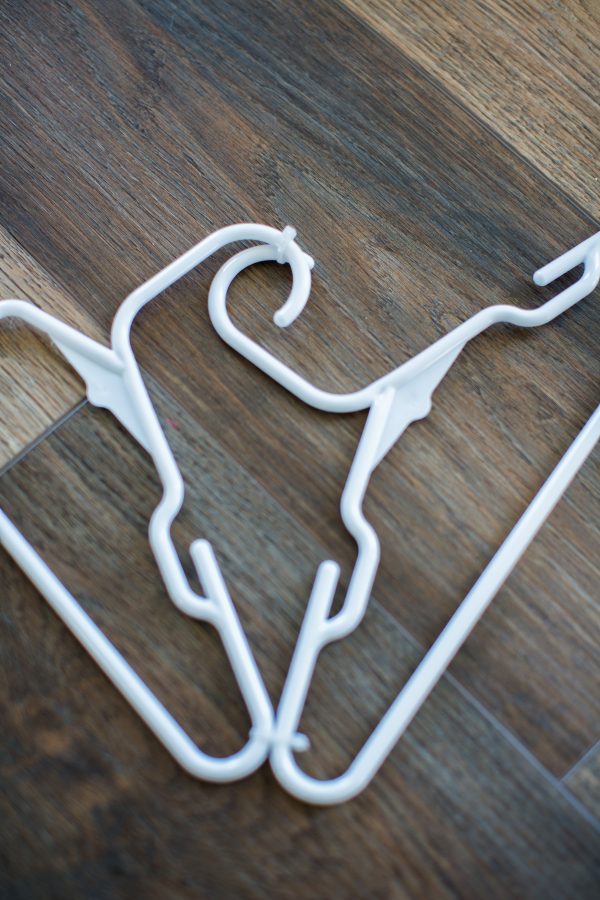
Take coat hanger #6 and place the long edge towards you with hook facing inward to the angel.
Step 7:
Coat hanger #7 completes the bottom right corner of your angel.
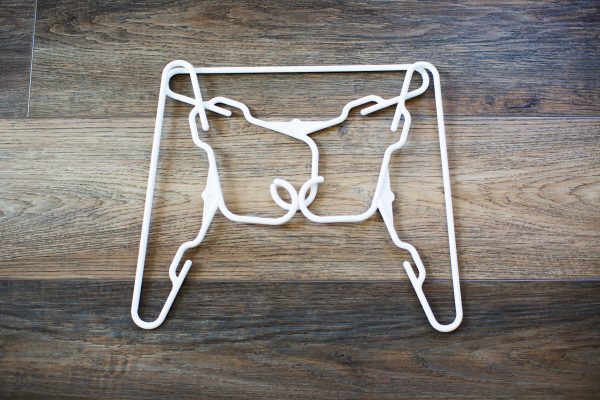
Step 8:
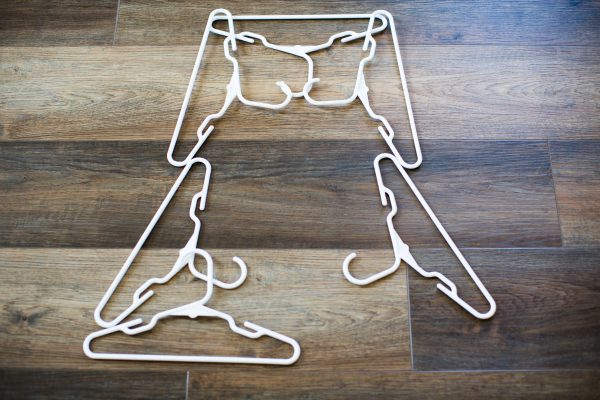
Take coat hanger #8 to begin the top right wing of the angel.
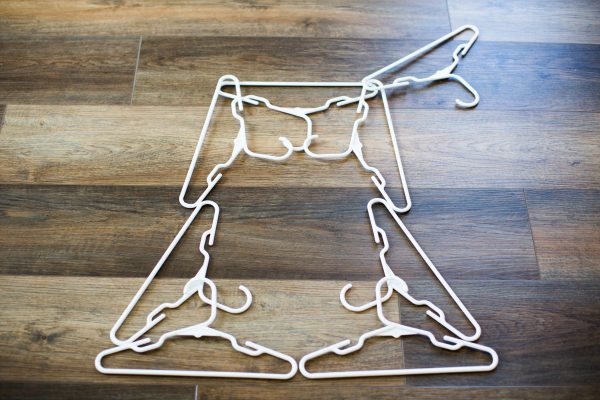
Step 9:
Coat hanger #9 should sit on top of the corners of the top right of the angel, finishing off the right wing.
Step 10:
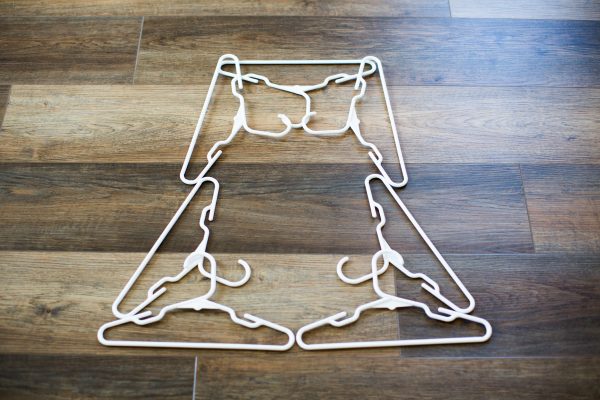
Coat hanger #10 and #11 complete the left wing, following the mirrored look of the right wing in step 8 and 9.
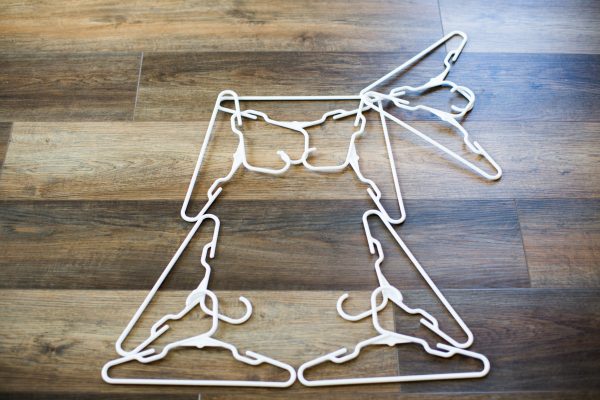
Step 11:
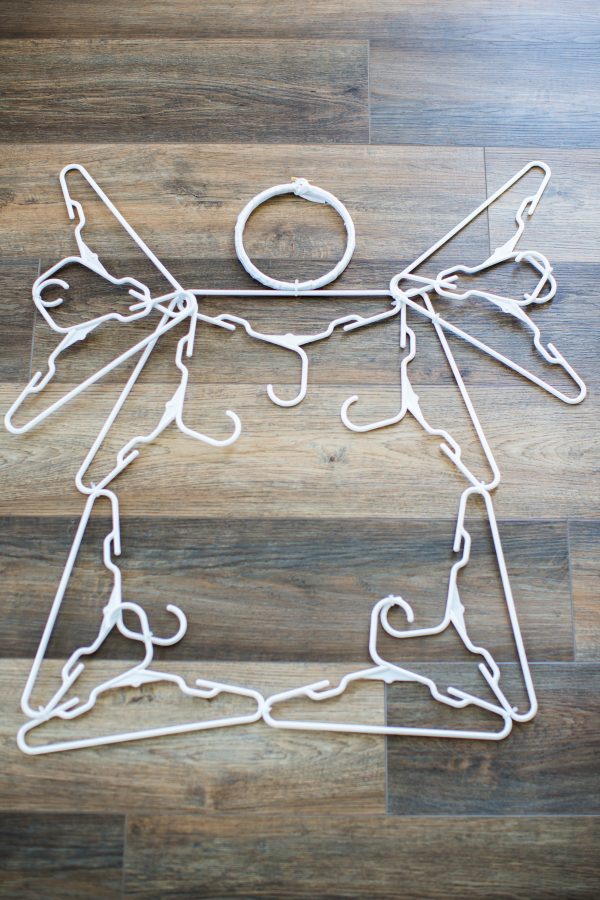
Place your angel head in the middle of hanger #1 and in step #1
Step 12:
Now that your angel coat hanger craft is in place you’ll begin placing the zip ties at each corner (where they sit on top of each other) and on spots where two coat hangers meet.
Remember: Be sure NOT to tighten the zip ties all the way, until ALL zip ties have been placed. This will allow you to adjust and reposition your angel if needed.
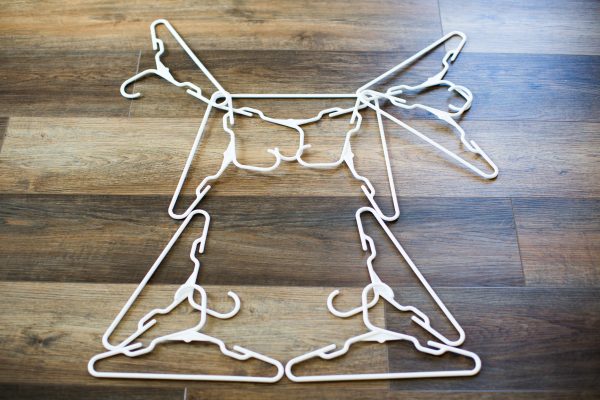
Step 13:
Once all zip ties are loosely in place, begin slowly tightening the zip ties. Adjusting your angel as needed, try to keep the hangers in the same position as you laid out, corners overlapping etc.
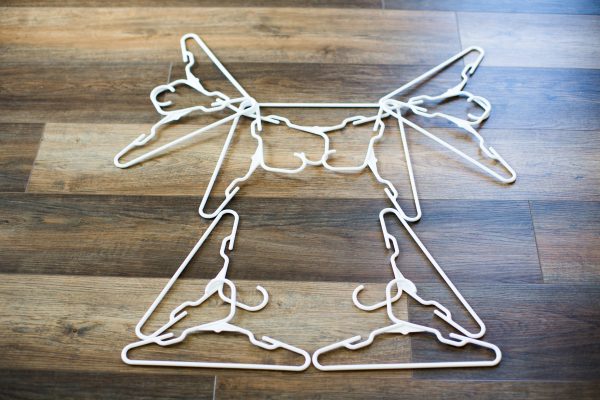
Step 14:
Once all have been tightened it’s time to trim your zip ties!
Your angel is ready to hang or even paint if you prefer it a color! This is where your creative juices can flow.
When I hung it on my wooden wall I put a nail to hang from each wing and the angel head as well. This gave it great stability!
 .
.


What do you think of this project? Let us know!