
What you need
Materials Needed:
1) Aida fabric or burlap fabric
2) Embroidery floss
3) Tapestry needle
4) Scissors
5) Materials for framing
Instructions
Welcome to our tutorial on how to make a Valentine’s Day Hearts XO Cross Stitch! Cross stitch is a timeless craft that has been enjoyed for centuries, and it’s a great way to turn a simple pattern into a stunning piece of art. This Valentine’s Day themed cross stitch project is perfect for those who want to add a personal touch to their home decor or to give as a gift to a loved one.
This project is perfect for those who love to cross stitch and want to create something special for Valentine’s Day. The Valentine’s Day Hearts XO Cross Stitch can be customized to match your home decor, and you can add any embellishments or decorations you like. The materials required for this project are inexpensive and can be easily found at your local craft store or online. The pattern is provided but you can make your own!
Not only is this project easy to make, but it’s also budget-friendly and it’s perfect for those who want to create something unique and special for their home. The Valentine’s Day Hearts XO Cross Stitch is a great way to add a touch of love and charm to your home decor, and it’s also perfect for giving as a gift to a loved one.
In this tutorial, you’ll learn how to create an adorable and charming Valentine’s Day Hearts XO Cross Stitch using a simple pattern. You can use the supplied pattern or make your own. So, gather your materials and let’s get started on creating this budget-friendly and unique Valentine’s Day home decor or gift.
![]()
Template: This is the template we’ll be using for this cross stitch project. You can make your own template or make changes to this one as you want.
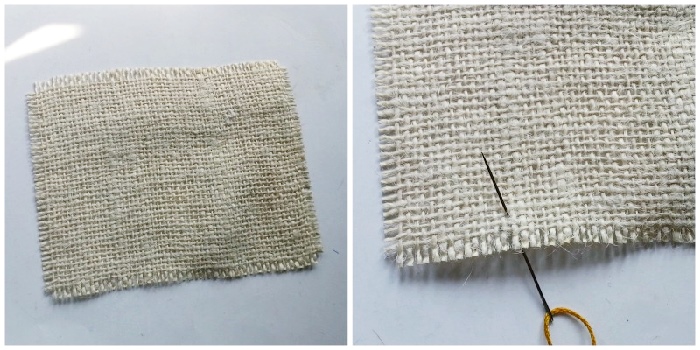
Step-1: Prepare your fabric for cross stitching. Measure the counts on the template and then cut the fabric by keeping 2-3 extra counts on all sides. Prepare needle and thread. Again measure the counts on the template and select the staring point. It’s a good choice to start from the point of the arrow (bottom part of the arrow from the template). Draw the needle from the back side of the fabric through the selected point. I did 2 counts for each stitch.
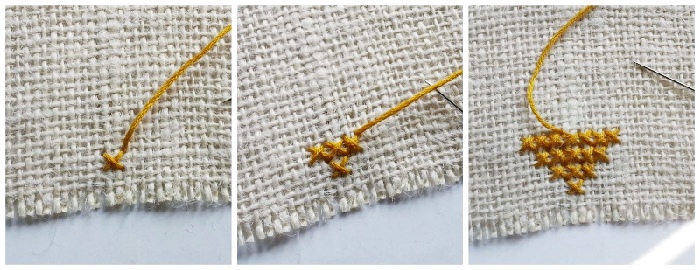
Step-2: Do the first cross stitch, this would be the edge of the arrow’s point. Do another roe of 3 cross stitches next to the first cross stitch. Then again do 5 cross stitches and finally 7 cross stitches in adjacent rows to complete the arrow’s point.
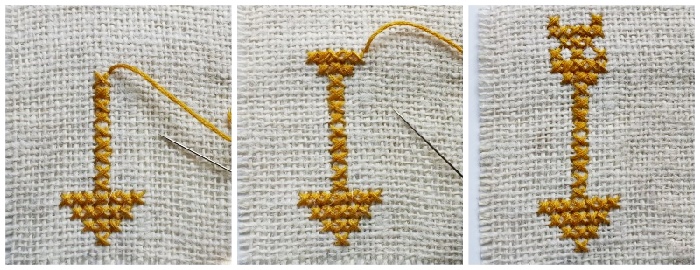
Step-3: Now simply cross stitch the straight part of the arrow. After reaching the fletching part follow the template and complete the arrow. You can cross stitch 2-3 parts for the fletching, I did 2.

Step-4: Measure the counts on the template to check the gap between the arrow and the heart. Prepare your needle and thread (use red or hot pink embroidery floss for the heart). Draw the needle through the fabric from the back side. Do the bottom center cross stitch of the heart first. Cross stitch any one outer side of the heart first. Simply follow the template for counting the stitches.

Step-5: Do the other half of the outer side of the heart. Now cross stitch your way inside the heart. This is the easiest part. Simply cross stitch to fill the heart pattern. Cut off extra thread when you’re done.
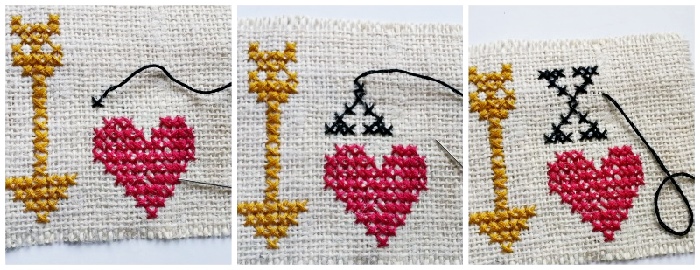
Step-6: Cross stitching the letters is the easiest step. You can cross stitch any one letter as you want but it’s better to start from the x. Cross stitch the bottom half of the x first and then do the top.
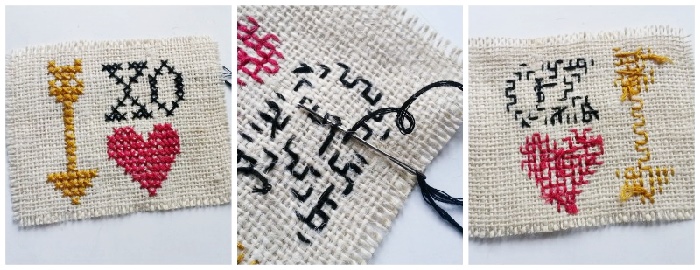
Step-7: Now cross stitch the o. Make sure to count the stitches on the template while cross stitching. Draw the needle to the back side of the fabric. Draw the needle along with the thread through 2-3 stitches. Pull the thread all the way through and then cut off extra thread. Done!
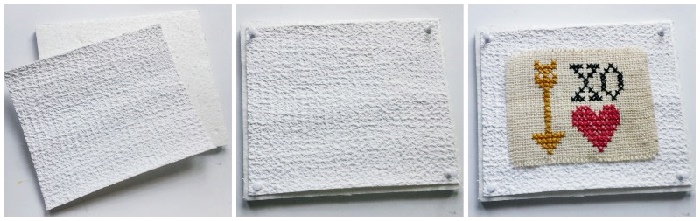
Step-8: You can frame the cross stitched piece as you want but I thought that this was a cute idea. You’ll need a piece of styrofoam, embossed paper, thumb pins and craft glue. Cut the styrofoam and embossed paper slightly bigger than the cross stitched pattern. Attach the embossed paper on the styrofoam piece with the thumb pins on four corners, this will be the base. Finally glue the cross stitched fabric on the center of the base piece. You can add a stand on the back of this piece or attach a hanging mechanism. Enjoy!


What do you think of this project? Let us know!