
What you need
Blank card
Corrugated board
Card
Speciality paper
Small star punch
Large star punch
Silver Sticky sheet
Sticky sheet
(double sided sticky paper)
Glitter
Fancy scissors
Straight edged scissors
Instructions
Step 1: The first step in making this beautiful card is to cut a strip of sticky sheet with the fancy scissors.
The strip needs to fit across the bottom width of the finished card. Cut it slightly larger because we will trim it later. You only need to cut one edge with fancy scissors because the other edges will be trimmed later.
Step 2: Peel the backing off the Sticky Sheet.
Step 3: Stick the length of sticky sheet onto the edge of the card so that there is a slight overlap all around, making sure that the fancy edge is facing the centre of the card. Turn the card over to see the overlap. Trim around the sides of the card with straight edged scissors.
Step 4: Trim across the bottom of the card with fancy scissors, cutting through both the card itself and the sticky sheet edging.
Step 5: Fold the card over to visually check the width of the sticky sheet strip and then cut the edge of the front side of the card with the fancy scissors so that when the card is closed you can see the Sticky Sheet strip clearly.
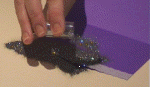
Step 6: Place a piece of folded paper (a manila folder is perfect for this), under the card and pour a generous amount of glitter over the sticky sheet. Shake off the excess glitter and flick the card to release the remaining glitter.
Close up the folded piece of paper with the glitter in it and pour the collected glitter back into the vile.
Step 7: Using the fancy scissors cut all around a strip of corrugated board to fit across the top of the card – the finished size is not critical, and it also doesn’t matter if your cut is straight or not. Cut two thin strips of sticky sheet (about 5mm wide) (with any scissors, they are going to be hidden). Peel off the backing sheet and stick them to the back of the corrugated section. Peel off the second backing and then stick the corrugate onto the card as shown.
Step 8: With the fancy scissors cut three rough square shapes to fit across the corrugate. You can position these in line with the bottom edge of the corrugate or at an angle if you wish.
Cut small squares of sticky sheet and adhere the speciality paper squares using the sticky squares.
Step 9: Insert the corner of the silver sticky sheet into the slot in the small punch. Place the punch down on a firm surface, e.g. a table top and using your thumb press the button down on the punch.
Helpful hints:
If you find that your punches are sticking, punch out some waxed paper with them, this should ease them up.
If you are having a problem with punching because you do not have enough strength please check out our punch mate which makes punching easier. Great for children too.
Step 10: Punch three silver stars, remove the backing and stick them onto the centre of the speciality squares as shown here.
Step 11: Insert the purple card into the large star punch at the corner and move to the centre of the card. Push the punch all the way into the card.
When punching with a large punch it is best to place the heel of your hand on the punch button and then place your other hand over the top. Then using your weight you can push down to create the punchout.
Now punch the other two star holes.
Helpful hint:
Keep the punched out star to use for other cards. If you stick it onto a card using magic mount it will give a raised effect.
Step 12: Again using the large star punch, punch out three silver sticky sheet stars.
Remove the backing and, with the card closed, position the corner of one star through the star hole and stick down a tiny bit. Then open the card and stick down the whole of the star. By doing this you can locate the position of the star so that it lines up with the hole and shows through when the card is closed.
You now have a beautiful finished card. Wasn’t that simple?


Easy yet beautiful.