
What you need
2.25†x 16†scrap of any thin, flowing material such as silk or organdy
Needle and thread
Sewing machine (optional)
Scissors
Adjustable ring base with large glue pad
E-6000 glue or similar
Iron
Safety pin to turn tube
Instructions
Cut a 2 1/4” x 16” strip of a thin, flowing fabric such as silk.
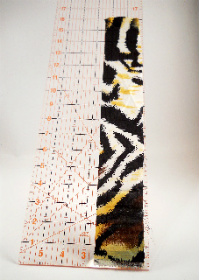
Make a tube by folding the fabric in half lengthwise with right sides together.

Sew down the long side, staying ¼” from raw edges.
Trim threads close to the fabric.
This is what you should have so far:
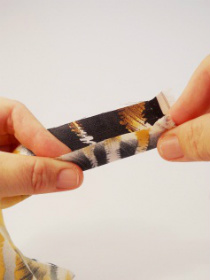
Use a large safety pin to turn the tube inside out:
Push the point of the pin through the fabric from INSIDE the tube
and fasten the pin. Be sure to only catch ONE layer.
Push the bottom end of the pin through the tube.
Scrunch the fabric until the end of the pin is visible.
Hold the pin firmly in one hand while pinching and pulling
the fabric away from the pin with the other.
Keep pulling until the tube is turned inside out. Remove the safety pin.
Cut off 4” from the end with the raw edge (the one that you didn’t turn under).
Tie a knot in the middle of the short tube to make the center and temporary “stem” of your flower.
At this point, so that it will be easy to see what to do during the construction of the rosette, the photos will show a flower being made with different-colored fabrics.
The center (made from the short piece) is red.
The longer yellow piece will become the ruffle that forms the rose.
I’m using black thread so you can see it easily, but you should use matching thread.
Thread a needle with doubled matching thread, and sew around the “stem” several times to define the knot. Put aside.
*Set the longest straight stitch on your machine.
Press the long tube. The seam should be along one edge.
Stitch at 1/4″ from the sewn edge. Leave long tails of thread for pulling.
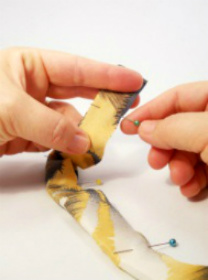
Insert a pin on one end of the tube.
Wrap the long tails of thread on that end around the pin several times so they’re secure.
Pull one of the long threads from the end without the pin.
Slide the fabric along the thread as you’re pulling to gather it up toward the pin end.
You can use your fingers to move the ruffled fabric toward the pin at the other end.
Pull the thread very gently (so it doesn’t break!) and keep sliding until the entire length of fabric is ruffled. It will twist, but that’s okay.
Beginning at the end you turned under, wrap the gathered strip around the knot one time. Stitch in place. Be careful not to put stitches down on the “stem,” since you will cut it off shortly.
Continue winding and stitching the gathered fabric around the flower, adjusting gathers as needed, until you get close to the unfinished edge.
With the point of your scissors, tuck the raw edges of the fabric into the tube to make a neat fold.
Stitch closed the edge you just made,
then continue to stitch the flower to the stem.
Tie off and knot your thread, being sure to hide the knot.
Trim the stem as closely to the flower as possible,
being careful not to cut any part of the flower itself.
Apply your glue (I used E-6000) to the raw edges of fabric where you just cut the stem off.
Attach the rosette to the ring base.
Press the base onto the rosette to work the glue down into the fabric.
Make sure the base is on straight.
Place your flower ring upside down somewhere it can stay undisturbed overnight.
The glue is cured after 24 hours and your ring is ready to wear!
Alternate center idea: Instead of a knot, fold the 4” section over and sew the rosette on around it. Glue a gem or sew a button in the center.


What do you think of this project? Let us know!