
What you need
-Paper Mache Box 6”x4”x2 1/2”
-Orange Alcohol Marker (or Orange Acrylic Paint)
-Light Grey Marker
-Silver Glitter Gel Pen
-Black Memento Brand Ink Pad
-Silver Tinsel Strand
-Coordinating Pattern Scrapbook Papers (suggested colors are orange, green, black, grey)
-Halloween Stamp Sets (from Lawn Fawn)
-1 1/2″ Circle Punch
-Double Sided Tape and Foam Tape
-Glue Stick
-Scissors
Instructions
-Remove the lid from the paper mache’ box, it will not be used in this project. Using the orange alcohol marker color the box on all sides inside and out except for the inside back. Or paint the box using orange acrylic paint and let it dry.
–Note: This project uses several different coordinating pattern papers, choose paper that work well together and have a small pattern, 6″x6″ scrapbook papers work well for this.
-Choose a pattern paper for inside the box and trim to 6″x4″ (or whatever size your box is). Using the glue stick adhere this paper to the inside back of the box.
–Note: This project uses a technique called paper piecing, using the black ink pad stamp the image onto the pattern paper and cut it out carefully, following right along the outside lines of the stamped image. This technique adds color, pattern and texture to your stamped designs. This project used several stamp sets from Lawn Fawn but you can use whatever will fit in your box.
-Using the black ink pad stamp out 3 pumpkins onto orange pattern paper and cut them out, stamp only the stems of the pumpkins onto green pattern paper and cut them out, using the glue stick adhere the stems onto the pumpkins
-From grey pattern paper stamp and cut out both bats and the cat. Glue the cat behind one of the pumpkins.
-From orange pattern paper stamp and cut out the spider and punch out a 1 1/2″ circle. Glue the flying bat to the punched circle moon.
-On light grey paper stamp and cut out the spider web. Using the orange marker go over the “Happy Halloween” words and using the glitter gel pen go over the threads of the spider web. Glue the spider to the bottom of the web.
-Using the light grey marker add shading to all the stamped images.
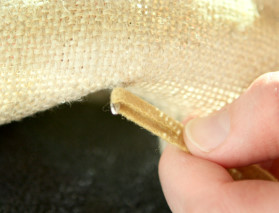
-Glue the hanging bat to the outside edge of the box.
-Using foam tape adhere the moon and two pumpkins to the back inside of the box.
-Fold two thin strips of scrap paper in half to form an “L” shape. On one strip glue one folded half behind the spider web and the other to the inside top of the box, so the web hangs down. For the other strip glue half to the back of the pumpkin with cat and the other half of the strip to the inside bottom of the box so the pumpkin will stand up.
-Run double sided tape along the outside rim of the box to adhere the tinsel strand.


Love this! Easy to substitute various elements if you don’t have exactly what is shown.
I’d use the lid, though, I think. It could make a base for the shadow box to sit on, or a background to hang behind? Or a base for a different collage? IDK, maybe someone else has a thought, but paper mâché isnt expensive.