
What you need
Worsted weight yarn
1 pair straight US 8 needles
1 24″ long US 8 circular needle
Instructions
This is about 5″ in diameter, 7.5″ tall and about 20″ in circumference (when full!). It will easily hold a grocery bag full of dog leavings and it has a shoulder strap for hands-free carrying. But wait – there’s more! It also has a secret weapon!
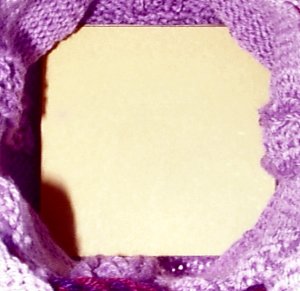
That’s not just a piece of cardboard you see here, that’s our patented smell-well component. Alright – it’s two pieces of cardboard with a dryer sheet sandwiched between them. It gives the bag a little more shape and it helps it smell nicer 🙂

Terms
C4B – Place next 2 stitches on cable needle and hold at the back of your work. Knit the next two stitches. Knit the two stitches from the cable needle.
M1 – Insert left needle, from front to back, under the running stitch between the needles. Knit into the back of this stitch.
With the straight needles, Cast on 20 stitches.
Knit 40 rows.
Switch to the circular needle and pick up 20 stitches along the side, 20 stitches along the cast-on row and 20 stitches on the other side. 80 stitches on needle.
Mark the beginning of the round and knit one round.
1. K8, *P1, M1, K2, M1, P1, K16; repeat from *, end K8
2. K8, *P1, K4, P1, K16; repeat from *, end K8
3. K8, *P1, K4, P1, K16; repeat from *, end K8
4. K8, *P1, C4B, P1, K16; repeat from *, end K8
Rounds 5, 6 and 7: K8, *P1, K4, P1, K16; repeat from *, end K8
Round 8: Repeat round 4.
Repeat rounds 5-8 until you have done 8 cable twists.
Repeat rounds 5-7.
Next round: P9, *C4B, P18; repeat from *, end P9
Next round: P9, *K4, P18; repeat from *, end P9
Next round: P1, *[yo, P2tog] 3 times, P2, K4, P2, [yo, P2tog] 3 times, P2; repeat from *, end P1
Next round: P9, *K4, P18; repeat from *, end P9
Next round: P9, *C4B, P18; repeat from *, end P9
Repeat rounds 5-7
Bind off loosely.
Make a tie in whatever style and of whatever material you like. Thread it through the eyelets starting with the first eyelet after a cable by inserting the tie from the front. Doing it this way will keep the cables from being covered up.
Measure the bottom of the bag. Mine came to about 4.5″ x 4.5″. Cut two squares of cardboard just a hair bigger than that. Snip a dryer sheet so that it fits nicely between the two pieces without sticking out anywhere. Place it between the cardboard pieces and fit this into the bottom of your bag.
This project was contributed by Robyyn Kenyon
(C) Copyright, Robbyn Kenyon, 2004 Not for commercial use. For more patterns and thrice weekly nonsense, visit the Yarnpath


or both … 😀
nice project, will make it this weekend thanks a lot!
Anna
after putting on 80 stitches it doesn’t come out I have 4 stitches left over after the first round what am I doing wrong can someone help me out please
I really like this pattern. It’s written correctly with no mistakes and the directions are very clear. Thanks!!! I like the idea of using it as a poop bag, there’s nothing I hate more than carrying around the bag until I find a trash can, especially since I usually walk the neighborhood and feel bad using other peoples’ cans. I personally used the pattern as a jewelry bag for bracelets. I finished the cardboard by covering it with matching cloth and stuffing some cotton in before hot gluing the cloth down to make it a little padded and fancy looking. It was a hit!
I agree! It’s too cute for a poop bag. It would make a nice handbag.
I lined the bag and used it for a carry purse for my young cousin. It knits up easily and does not have to be used for a doggie bag necessarily.
Who wants to carrie dog poop in a cute bag!?!?!?
this bag is TOOOOO cute to be a dog poo bag or a lunch bag!im making this for me as an actual purse!!love it love josie
I think its cuter as a lunch bag! 🙂
So you can carry poo in it…or lunch.