
What you need
PDF pattern* (see below)
Main fabric
Lining fabric
Foam or Batting
9″ zipper
2 x D-Rings
Chain in preferred length
Jump rings (optional)
Instructions
Just pick your favourite colour of fabric (we chose a thin PU leather from the upholstery section), color of findings (silver, gold, antique bronze, copper), and size of the chain (thick, thin, or layered).
One-of-a-kind yet simple enough to whip up in an afternoon!
* Note:Print the Quilted Chain Bag Pattern without any page scaling.
Step 1
Cut main fabric, lining fabric, and foam/batting according to pattern instructions.
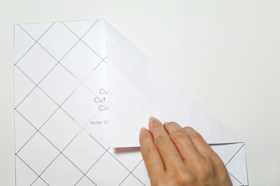
Fold and score along the quilting lines on the pattern, as this will be your guide to getting a perfect quilting result with the right proportions.
Lay the pattern paper on top of your main fabric.
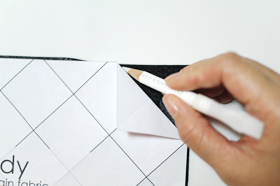
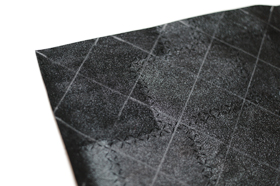
Use a chalk pencil to lightly draw the lines onto the right side of your main fabric, folding the pattern as you go along and using the edge as a ruler for your pencil.
Repeat on the other piece of the main fabric.
Step 2
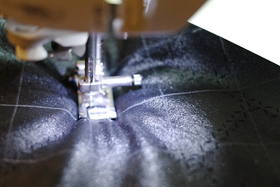
Place the main fabric on top of a piece of the foam/batting.
Hold in place and top stitch right through the foam/batting. Start from the center and work your way out to the edges, smoothing the fabric as you go along.
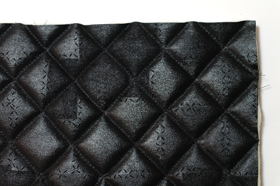
Repeat for the other main fabric piece as well, so that you will have 2 quilted body pieces. Trim excess if needed.
Step 3
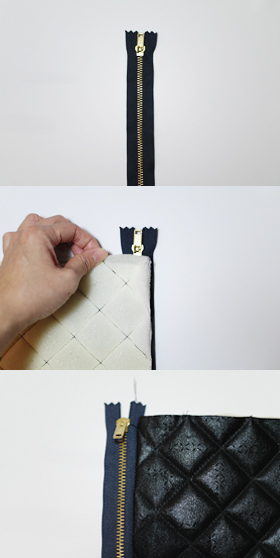
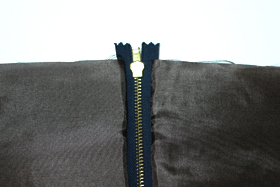
Place the zipper right side up, and bring the quilted main piece (wrong side up) to meet the right zipper.
Stitch the quilted main piece down onto the zipper, as close to the edge as possible. When you fold it out, both pieces will be attached without any stitches showing.
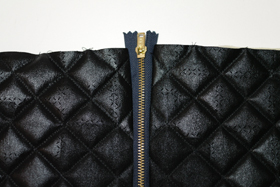
Repeat for the other side as well.
Step 4
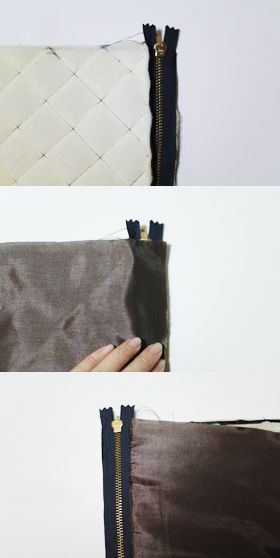
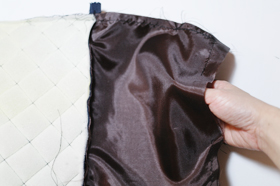
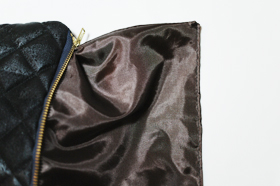
Fold the quilted main pieces so that the right sides meet, and the wrong side of the zipper is facing up. Place the lining fabric piece and line it up against the zipper’s edge vertically. Stitch as close to the edge as possible.
Again, when you fold it out, the lining would be attached to the zipper without any stitches showing.
Repeat on the other side of the zipper for the remaining lining piece.
Step 5
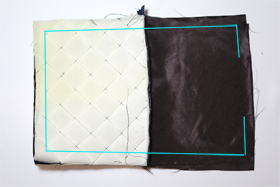
Fold the pieces so that the quilted pieces’ right sides are facing each other, and the lining pieces’ right sides are facing each other too. Sew around the edges (as marked by the lines above), leaving an opening of about 5” on the lining.
Make sure that the zipper head is at least halfway open so that it will be easier for you to turn the bag inside out later.
Put your hand through the 5” opening in the lining, and carefully turn the whole bag inside out.
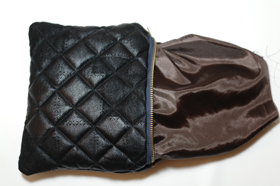
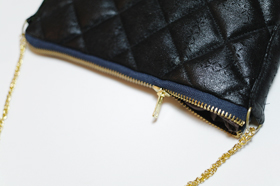
To complete the bag, fold on the 5” opening you left earlier and topstitch [see next image].
Step 6
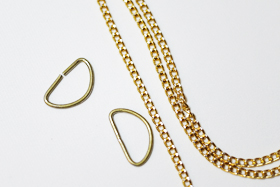
Cut chain to desired length, and attach to D-rings.
If your chain’s holes are big enough, they may be able to slide directly through the D-ring opening. You can also use jump rings.
We strung our D-rings through the chain and closed the chain’s ends with a small jump ring.
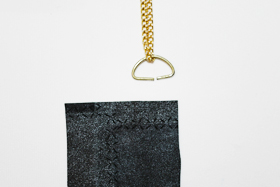
Cut a piece of main fabric that is approximately twice the width of your D-ring, and 4” in height.
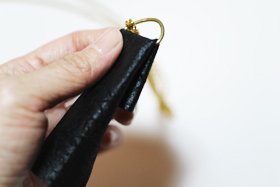
Fold the fabric so that it overlaps and fit it through the D-ring, letting it sit on the straight bar. Stitch as close as possible to the straight bar.
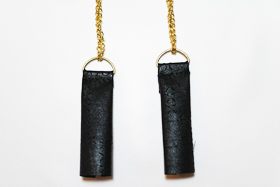
Repeat for the other D-ring.
Step 7
Place the D-ring pieces to both side seams of the bag and top stitch carefully to attach them to the bag [see next image].
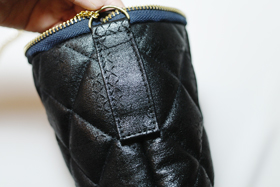
If you’re unable to top stitch with your machine, you can do it by hand and with a little help from some strong adhesive.
And you’re done! Enjoy your brand new accessory!


This is fantastic! My readers at FaveQuilts would love it.
you made this very easy to understand:)
good photos and directions